
Everything you need to know about our product install, setup steps, configuration and usage of various features
Global MIDI Channel
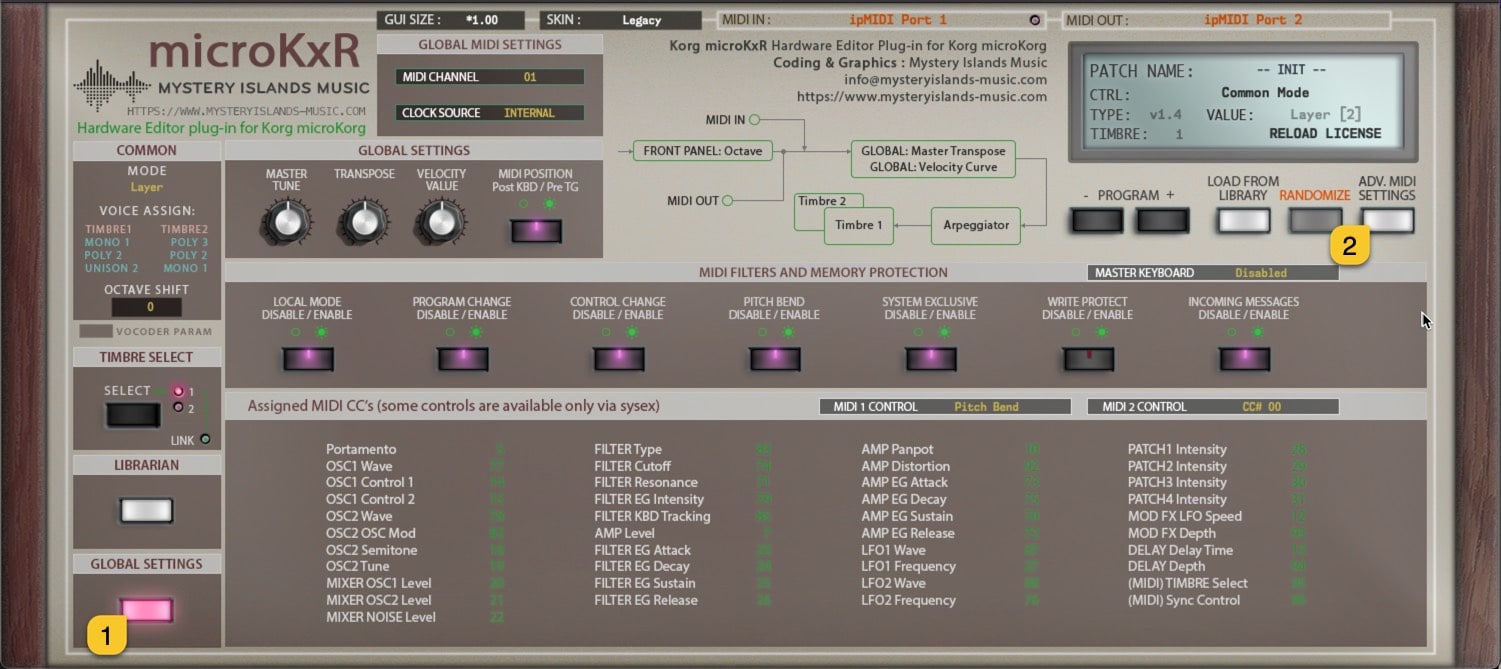
Before we kick off with MIDI setup, click GLOBAL SETTINGS [1] and then check the Global MIDI Channel [2] value so that it matches your hardware unit.
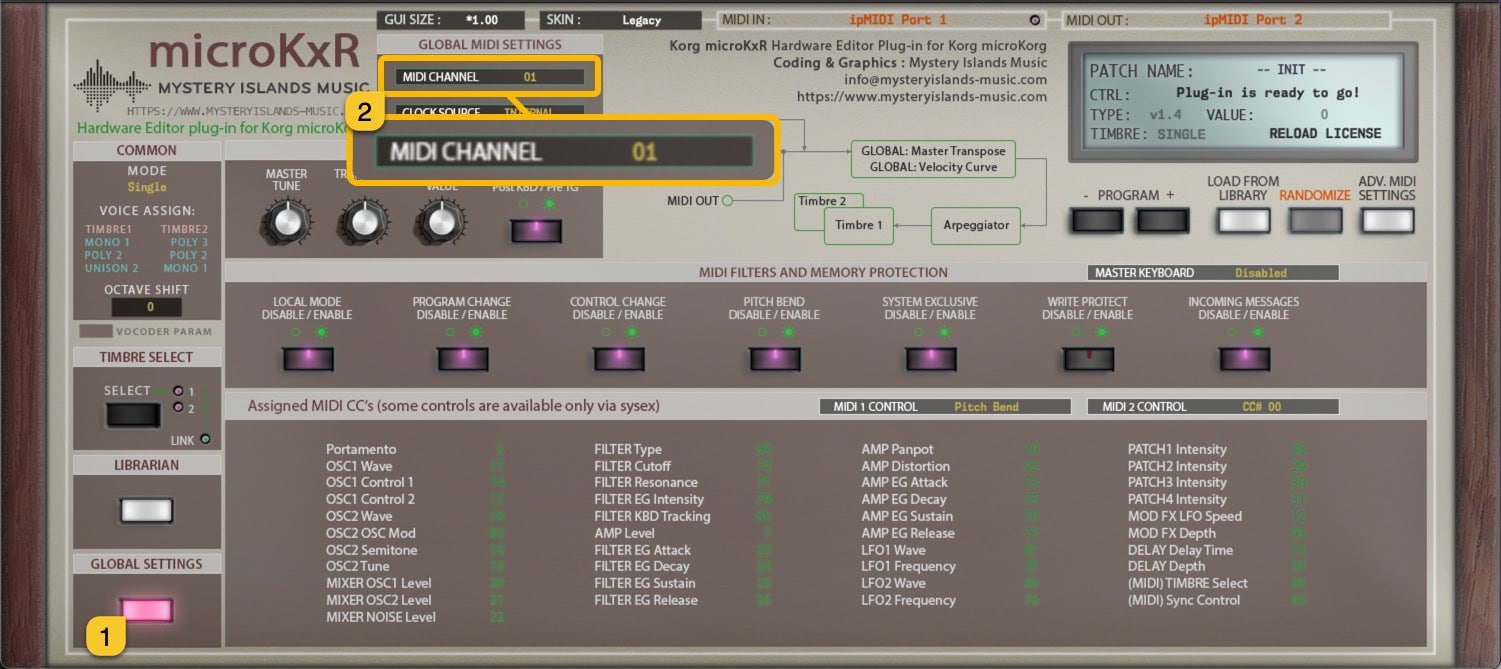
microKxR Editor User Manual – Global MIDI Channel Check
Selecting MIDI In and MIDI Out
First choose MIDI IN [1], where your microKorg MIDI Out is connected in at. Then choose MIDI OUT [2] which will send data to your microKorg MIDI Input.

microKorg Editor User Manual – MIDI In and Out Options
After setting MIDI OUT, plug-in will scan for the hardware and plug-in Control Display will say “Plug-in is ready to go!” if everything is set accordingly.
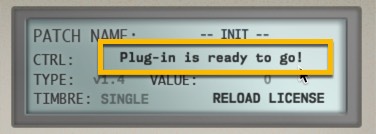
microKorg Editor User Manual – Plug-in established connection to microKorg
If something in your settings is wrong, Plug-in Control Display will inform you that the process has timed out or no response from hardware!
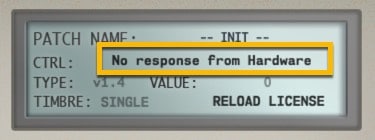
microKxR Editor User Manual – No Response
Synchronize DATA from your synthesizer to plug-in
Open LIBRARIAN [1] window and click SYNC DATA FROM HW [2] button to request current current data from the microKorg to the plug-in user interface.
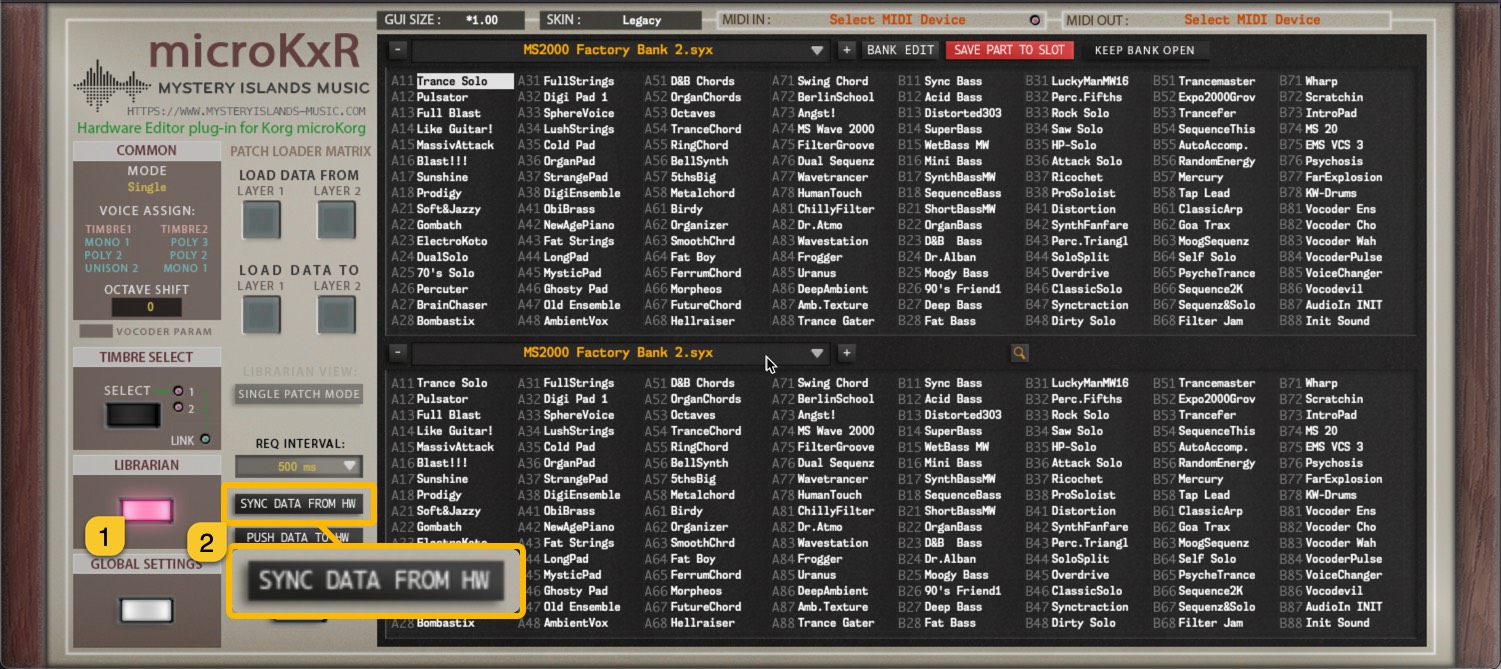
microKxR Editor User Manual – Initial Data Sync to User Interface
Plug-in will now request the currently active hardware data to the plug-in user interface. This is quite important in order to make program changes and / or send data to your synthesizer from the librarian.
Click LIBRARIAN button again after data is synchronized to start tweaking your sounds!
TIP #1: Be patient and do not disturb the data flow with any knob movements or so. This will ensure the data packages are being sent and received as expected and you are not going to receive any SysEx error messages!
DAW Config Scenario
Below you can see how microKxR Plug-in is on Instrument Track [1] and how MIDI track 1 [2] is routed in Studio One to play the part directly to hardware MIDI out ports. MIDI track 1 points to microKorg channel 1.
Audio from microKorg is routed to my Apollo Quad inputs [3] and monitoring should be activated on Studio One to hear the synth when played!
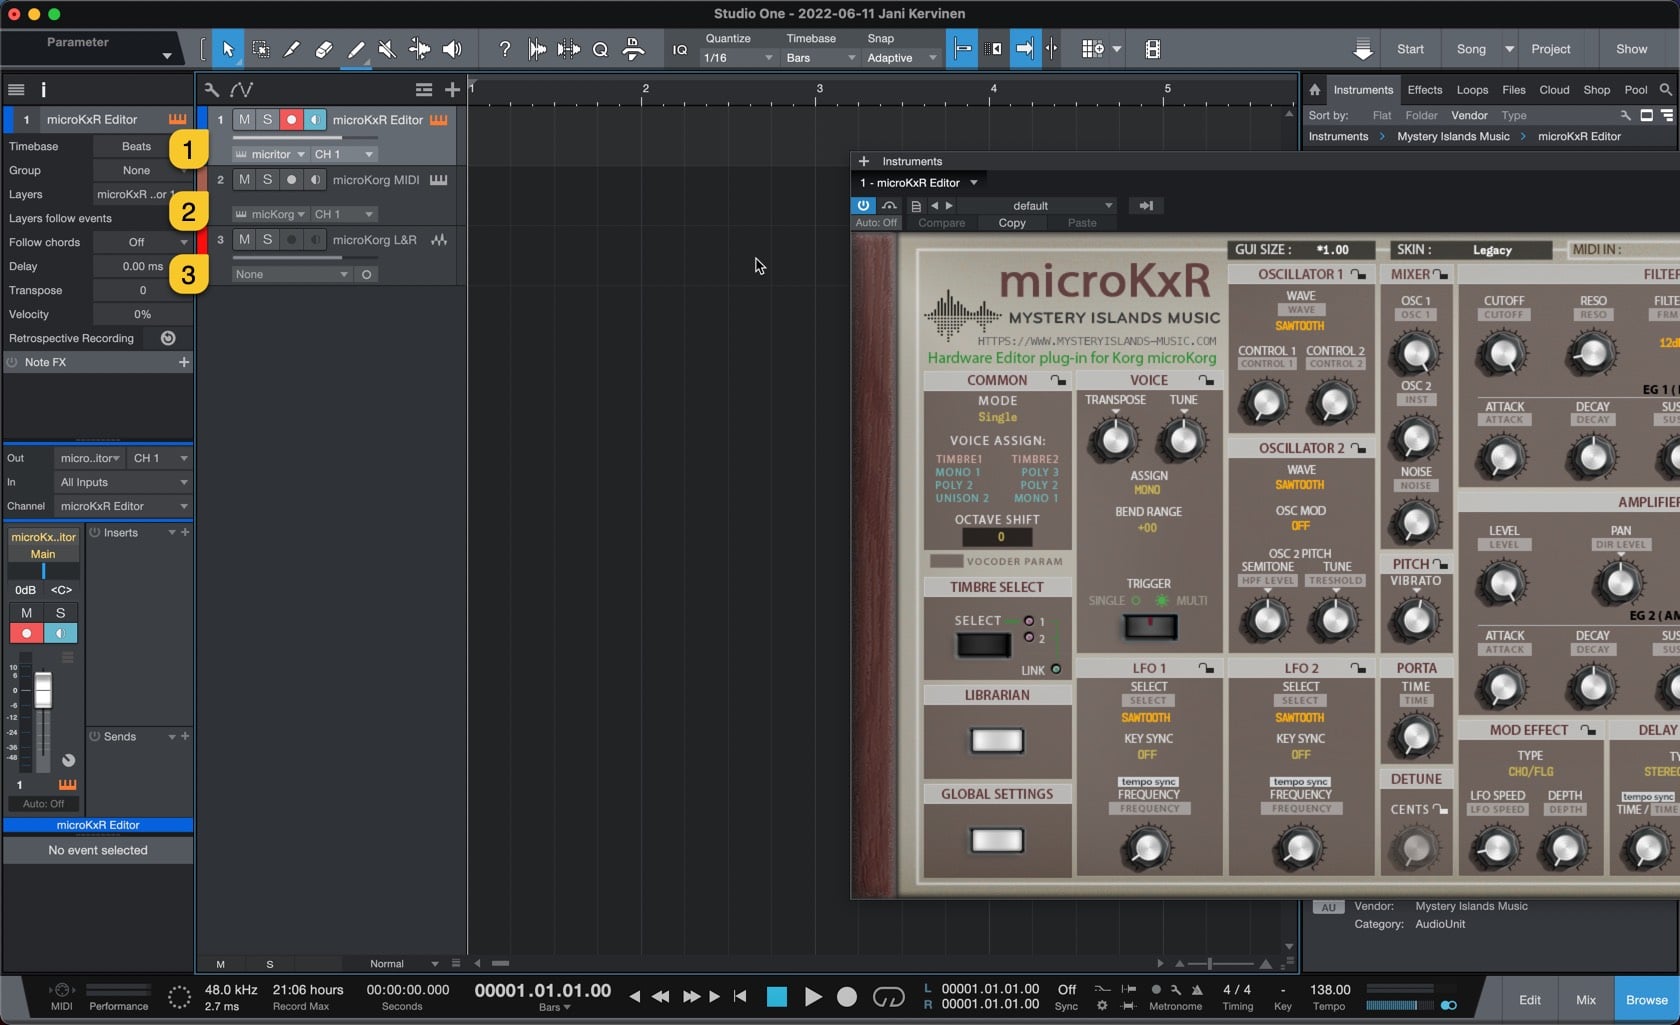
microKxR Editor User Manual – Studio One with microKxR Editor
ADVANCED MIDI SETTINGS
You can control which messages gets processed and which do not. Open GLOBAL SETTINGS [1] window and click ADVANCED MIDI SETTINGS [2] button in the plug-in user interface.
microKxR Editor User Manual – Advanced MIDI Settings Switch
You can block messages being processed from DAW or from the Synthesizer itself. Settings seen in the image below are default values.
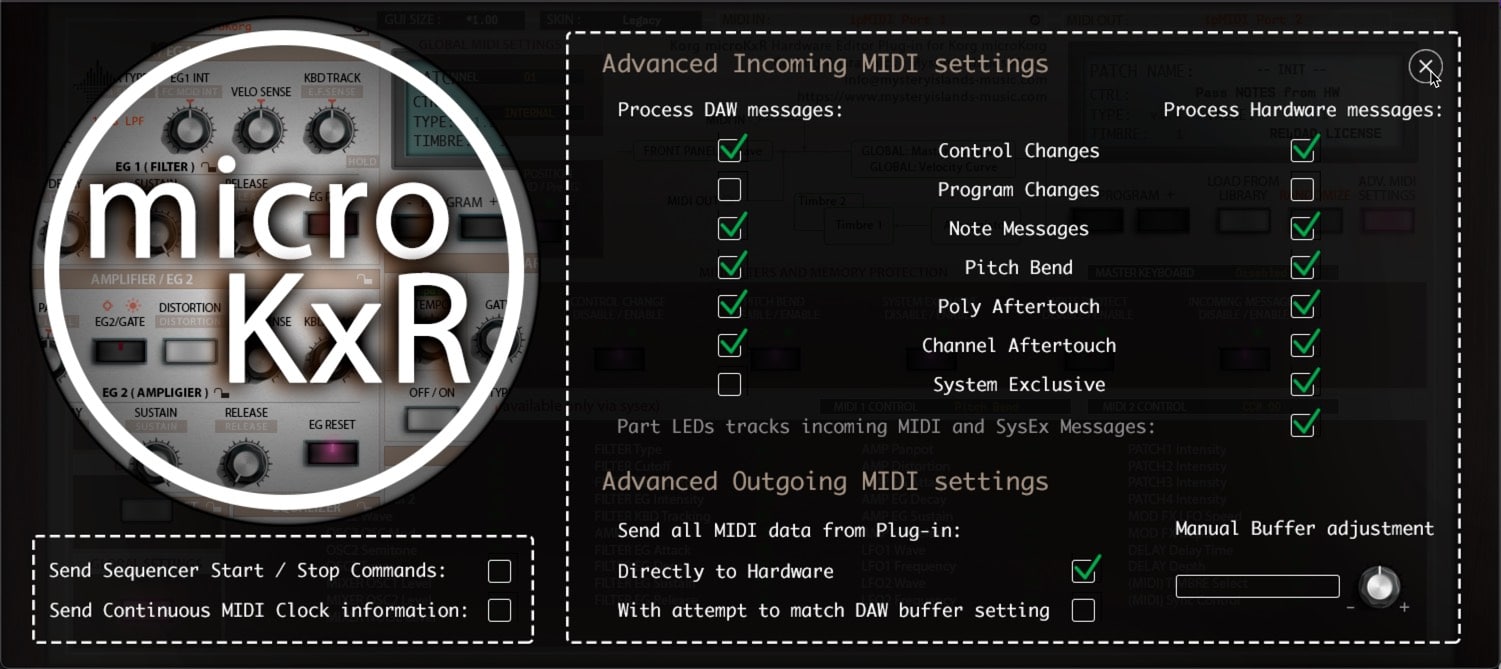
microKxR Editor User Manual – Advanced MIDI Settings
Advanced Incoming MIDI settings
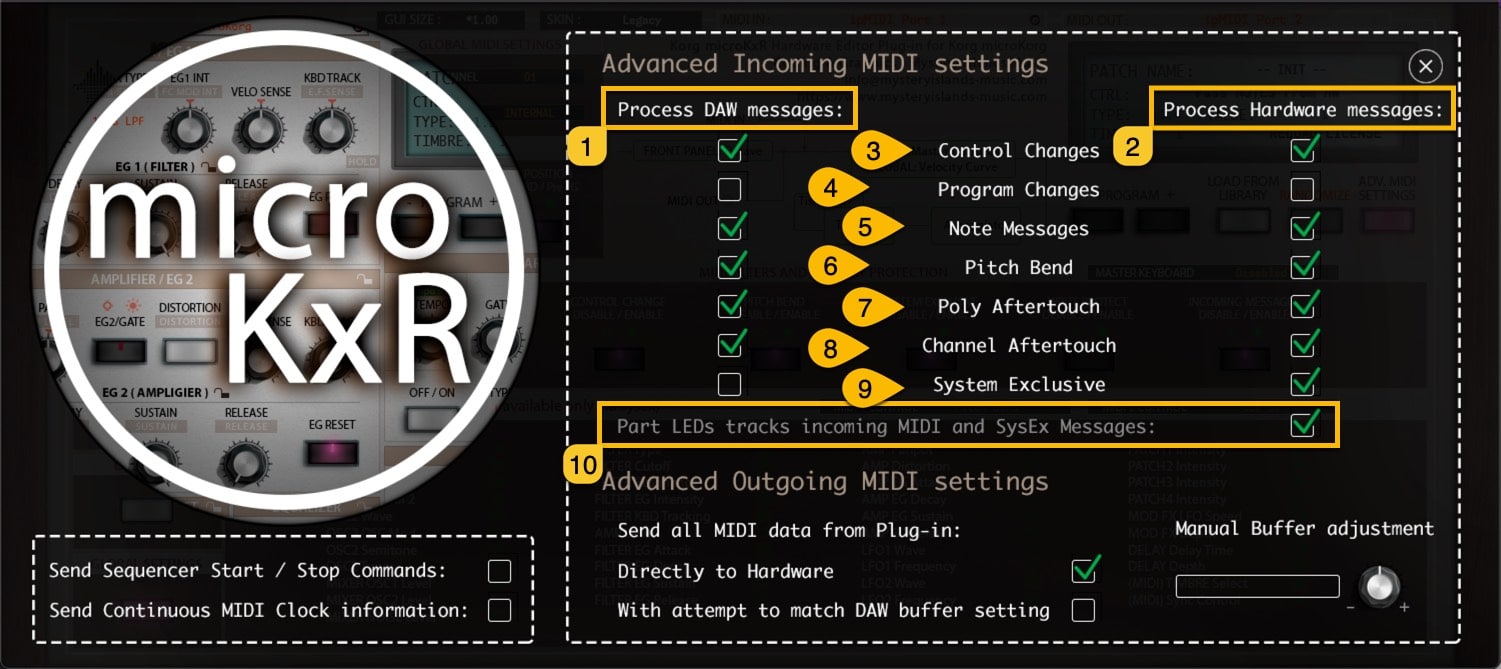
Allow certain MIDI messages to pass into plug-in processor within Incoming MIDI setting section. Green check mark means it will be processed and when there is no check mark, it will be bypassed. Process DAW messages [1] and Process Hardware messages [2] has their own set of data “filters” [3-9] available as follows:
- [3] Control Changes
- [4] Program Changes
- [5] Note Messages
- [6] Pitch Bend
- [7] Poly Aftertouch
- [8] Channel Aftertouch
- [9] System Exclusive
- [10] Part LEDs tracks incoming MIDI and SysEx messages
When green check mark is on, incoming data from DAW and Hardware ports is monitored and LED indicator will flash when data is coming in. When check mark is off, outgoing data is being monitored.
Check LEDs Off function to disable.
microKxR Editor User Manual – Advanced MIDI Settings Tour
Note #1: If you disable Control Changes and System Exclusive messages from Hardware port, your plug-in might stop responding to hardware knob movements completely.
Advanced Outgoing MIDI settings
In Outgoing MIDI settings section, you can adjust few options to fine tune the plug-in behavior.
Send all MIDI data from Plug-in:
- Directly to Hardware [1] = Send all MIDI related command directly to hardware from the MIDI output port.
- With attempt to match DAW buffer setting [2] = experimental attempt to sync with DAW time.
- Manual Buffer [3] = Displays the DAW buffer size – Use the -/+ knob [4] to fine tune.
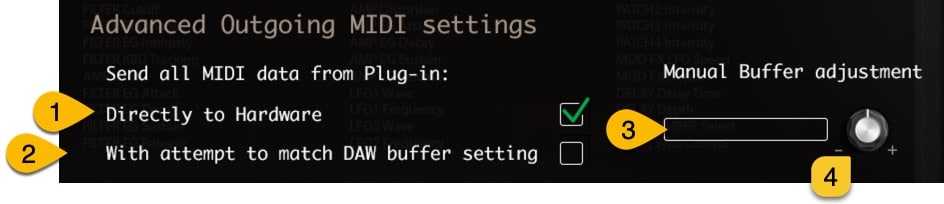
microKxR Editor User Manual – Advanced MIDI Out Options
MIDI Clock (experimental)
We are experimenting to add general MIDI clock to the plug-in by standard feature. This might crash on some systems on a specific setups, so be cautious when using it.
Check Send Sequencer Start / Stop Commands [1] if you want to send MTC start and stop commands.
Check Send Continuous MIDI Clock information [2] if you want to sync MIDI clocked Effects and Arpeggiator to plug-in tempo information.

microKxR Editor User Manual – Advanced MIDI Clock Settings
Note #1: The clock with the plug-in might be inaccurate, so if you have another solution to sync clock information from your DAW to the hardware, use that instead.