
Everything you need to know about our product install, setup steps, configuration and usage of various features
Using the Patch Librarian
In this chapter, we are going to walk through the usage of the Patch Librarian and all its functions & possibilities. It might take some time to understand how it works, but for those who used Emagic SoundDiver in the past, this workflow is pretty much the same.
Pulse2X Editor User Manual – Patch Librarian
We have made the librarian look and feel the same across all our products. i.e., Waldorf Blofeld Editor has the same functions in the librarian, with some additional features like ability to import microQ and Q banks in the librarian.
But in general, you can request data from hardware to the librarian, store data from librarian to hardware, store banks to HDD as you make edits etc.
NOTE #1: Librarian view is not synchronized with hardware memory. Librarian view displays PATCH data stored in your HDD ( [data folder]/Patches/ -folder ).
NOTE #2: Keep your banks organized. If you have too many levels in your folder tree, librarian is not able to solve it. Details below.
- [data folder]/Patches/sub folder 1/sub folder 2/my bank.mid – this is OK.
- [data folder]/Patches/sub folder 1/sub folder 2/sub folder3/my bank.mid – this is NOT OK.
There is a lot to cover in this chapter, so it is perfect time to get some coffee or tea.
Let’s dive in!
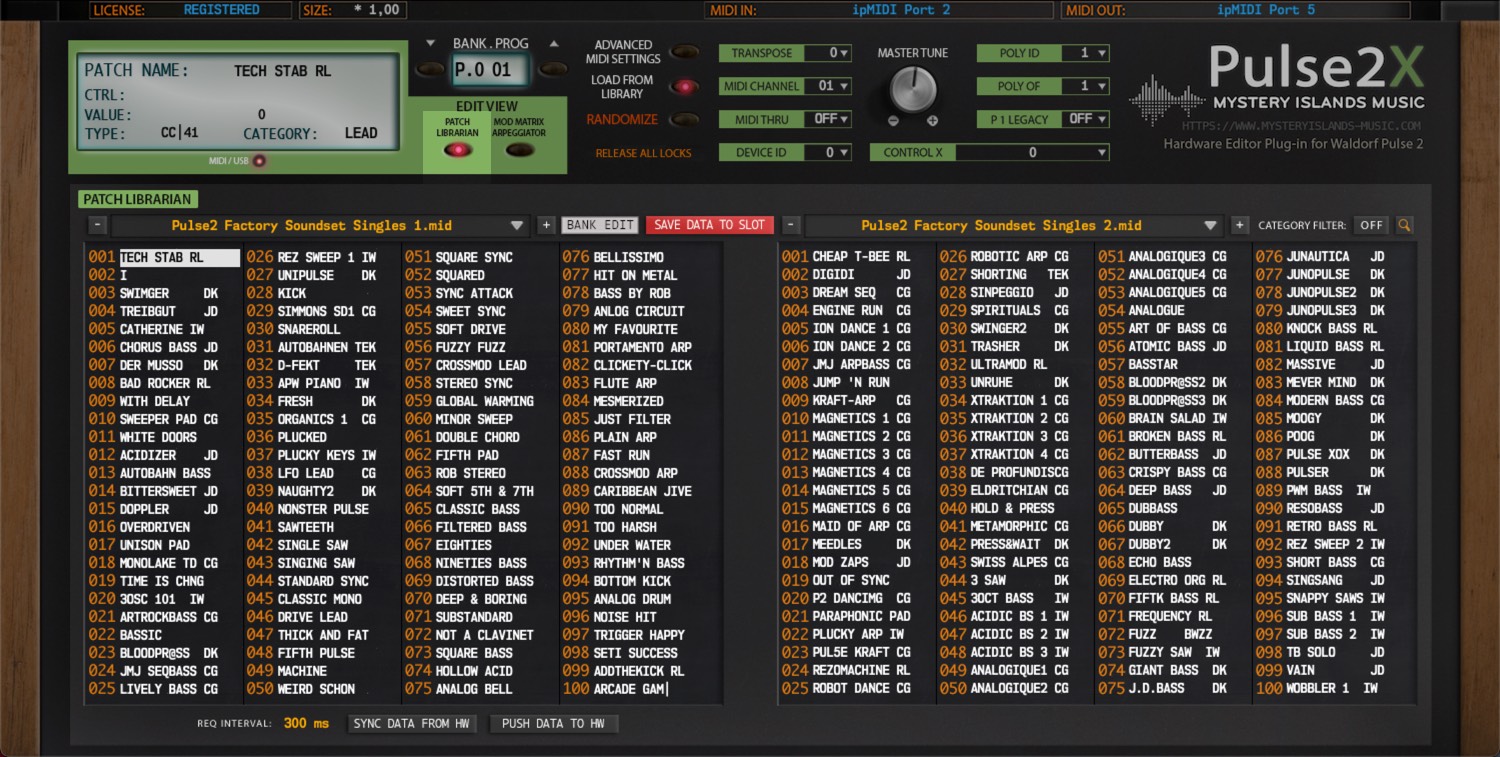
BASIC LAYOUT AND FUNCTIONS
Let’s start with the definitions of basic layout and button / menu explanations.
- [1] & [6] = Select previous PATCH bank from the bank tree.
- [2] & [7] = Display popup menu of PATCH banks. Menu displays banks from data folder.
- [3] & [8] = Select next PATCH bank from the bank tree.
- [4] = Open Bank Edit menu, with most of the available request, write and other utilities.
- [5] = Save data from hardware TO selected librarian slot.
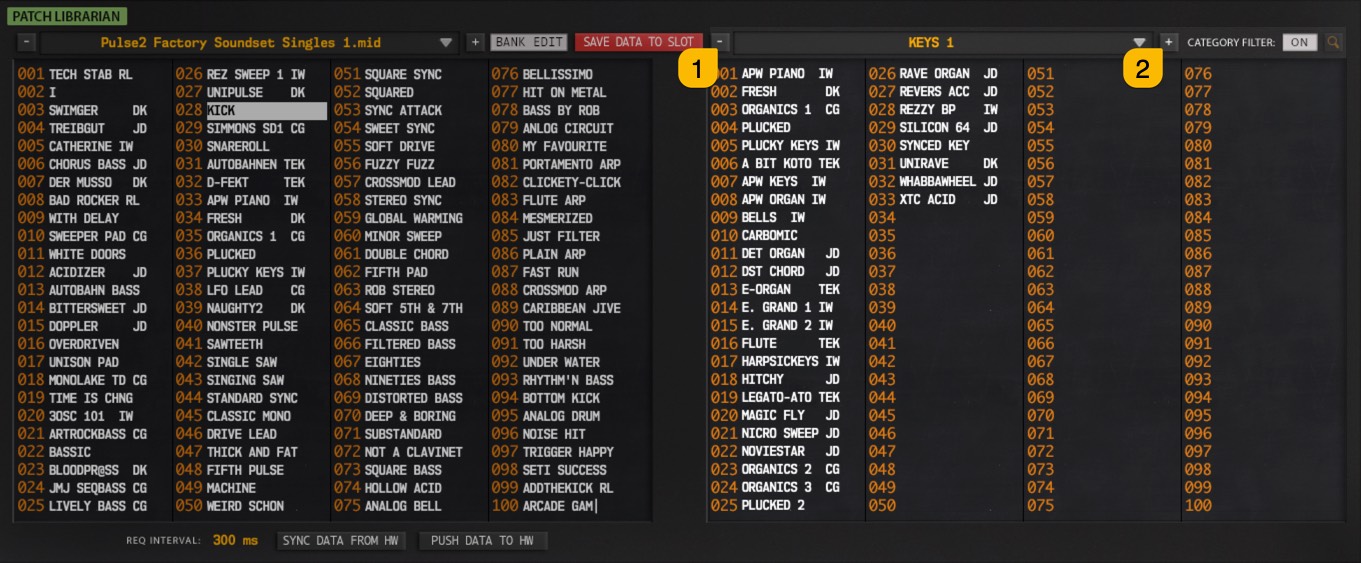
- [9] = Toggle on Category Filtering function. Category results will be shown in the right data view.
- [10] = Toggle on Search function. Search results will be shown in the right data view.
- [11] = Left data view, also used as EDIT BUFFER. Data can be edited only in the left data view. Double click any entry to send the data to hardware temp memory.
- [12] = Right data view. This view can be changed while left data view is locked due to unsaved data changes. Double click any entry to send the data to hardware temp memory.
- [13] = Request Interval – Adjust request interval if you get time-out messages while requesting data.
- [14] = Sync Data From Hw function was explained earlier in the manual.
- [15] = Push Data To Hw function was explained earlier in the manual.
Pulse2X Editor User Manual – Patch Librarian Toggles
Now that we understand the basic layout, we can dive into more specific details per function.
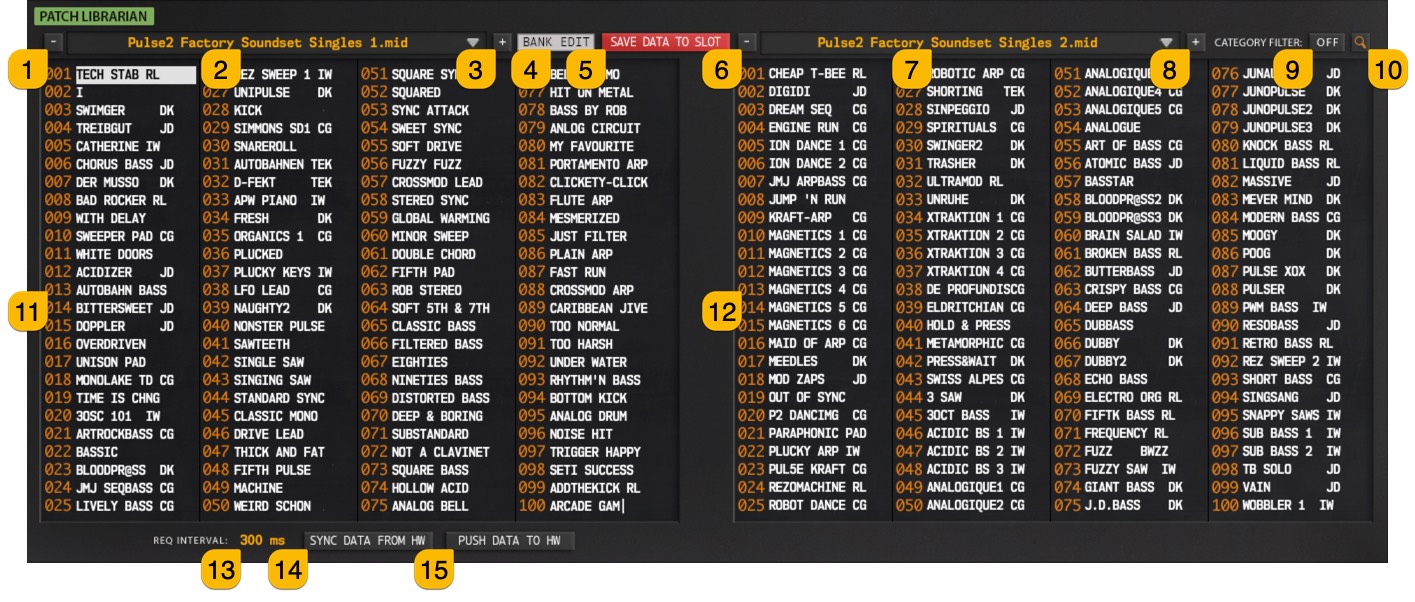
Send PROGRAM to hardware
Double click with Mouse
Sending data from Librarian to hardware is quite simple. Just double click [1] an item from Left or Right list.
This data is sent to hardware edit buffer. It is not written to hardware memory. This also updates the software interface, so you are in sync with parameters on both ends.
Pulse2X Editor User Manual – Double Clicked entry sent to Hardware
Computer keyboard Arrow keys
You can also use keyboard arrow keys to select programs. This works only when mouse cursor is over the left or right list view.
- Arrow down will select patch below the current patch.
- Arrow up will select patch above the current patch.
- Arrow left will select patch left to the current patch.
- Arrow right will select patch right to the current patch.
Plug-in Program Change
Changing librarian programs with – [1] or + [2] buttons works too, but only when LOAD FROM LIBRARY [3] is toggled on.

Pulse2X Editor User Manual – Program Change with Library Control ON
Program Change via MIDI
Program changes via MIDI will select corresponding patch from the librarian and send it to the hardware as well. i.e., Program Change 9 will send patch from slot 9 to the hardware.
TIP #3: Programs are sent to hardware based on the currently active list. Active list is the one which has the white box around the program name.
Pulse2X Editor User Manual – Left list is active and acts as a source for any programs

Pulse2X Editor User Manual – Right list is active and acts as a source for any programs
Selecting Previous or Next Bank
Use – [1] or + [2] to select between previous and next bank from the HDD. You can also select bank by clicking the bank name [3] area. This will show a pop-up menu with all compatible banks in the Patches folder. Both lists behave the same unless Search filter is on.

Pulse2X Editor User Manual – Librarian Bank Select
TIP #4: You can use the right data list if left data list view is locked due to unsaved edits. This is handy if you want to combine patches from different banks to your personal favorites bank.
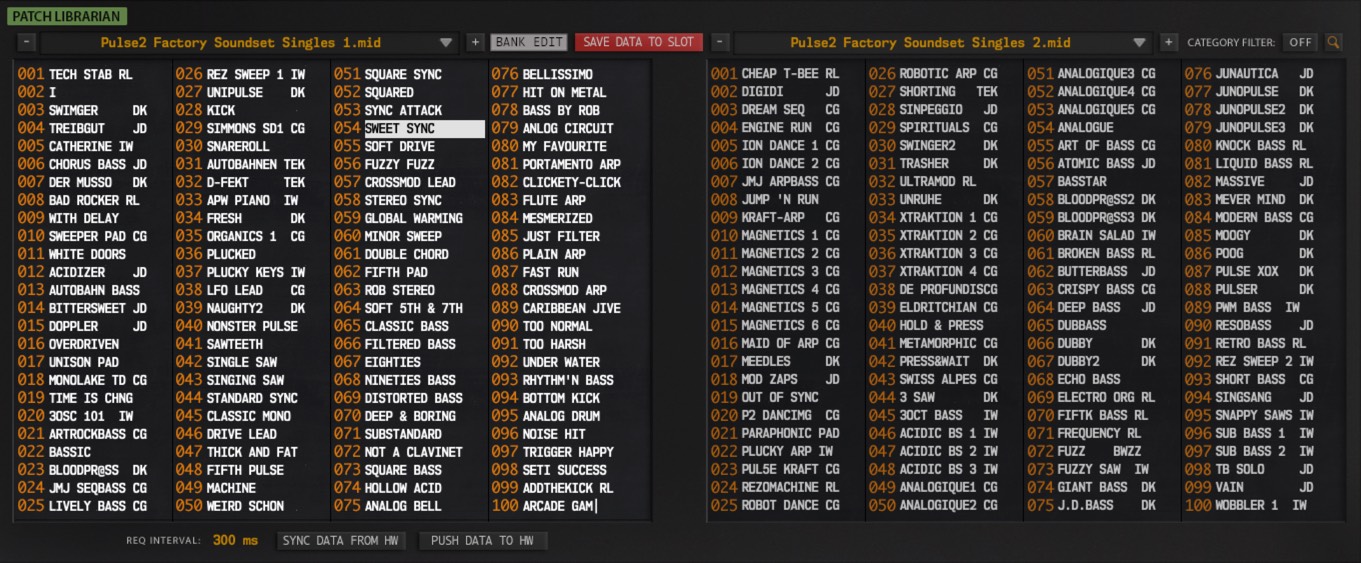
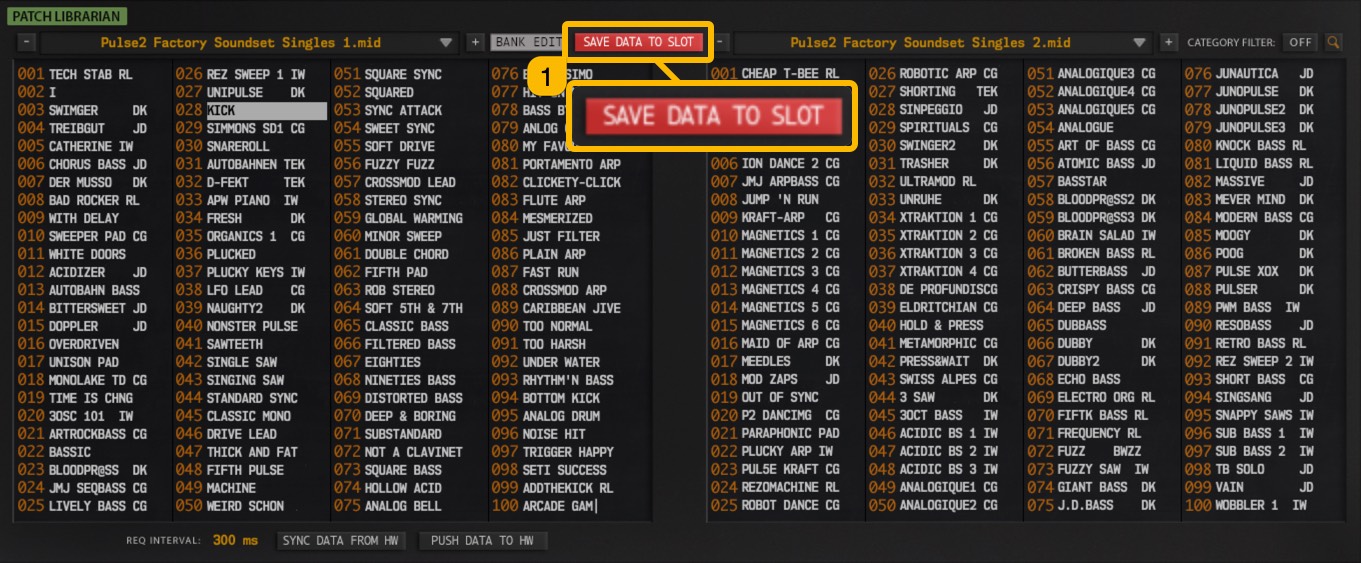
Save DATA to Slot
With SAVE DATA TO SLOT [1] you can quickly get data from the plug-in user interface to the librarian. Data will be put to an active librarian slot on left edit window. If right data view display is chosen, this function will not be available. Once the data is in the chosen librarian slot, you can then save the bank, rename the patch or discard your changes.
Pulse2X Editor User Manual – Save Program Data to Current Slot
Left list bank – / + and bank drop down menus are disabled, until changes are saved or if you DISCARD [1] to trash your changes.
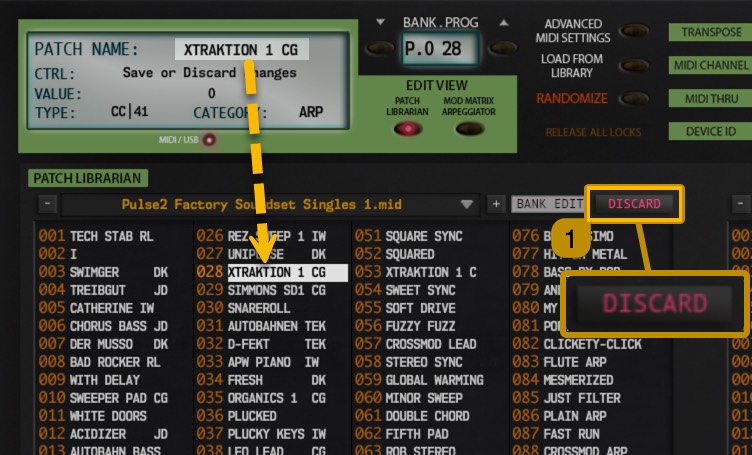
Pulse2X Editor User Manual – Discard Button shown to indicate unsaved changes
You can continue browsing between different banks with the right data view if you wish.
Category Filter
You can sort patches based on the category set in the “Control Display” or in the Librarian with right click. You can set one category tag per patch.
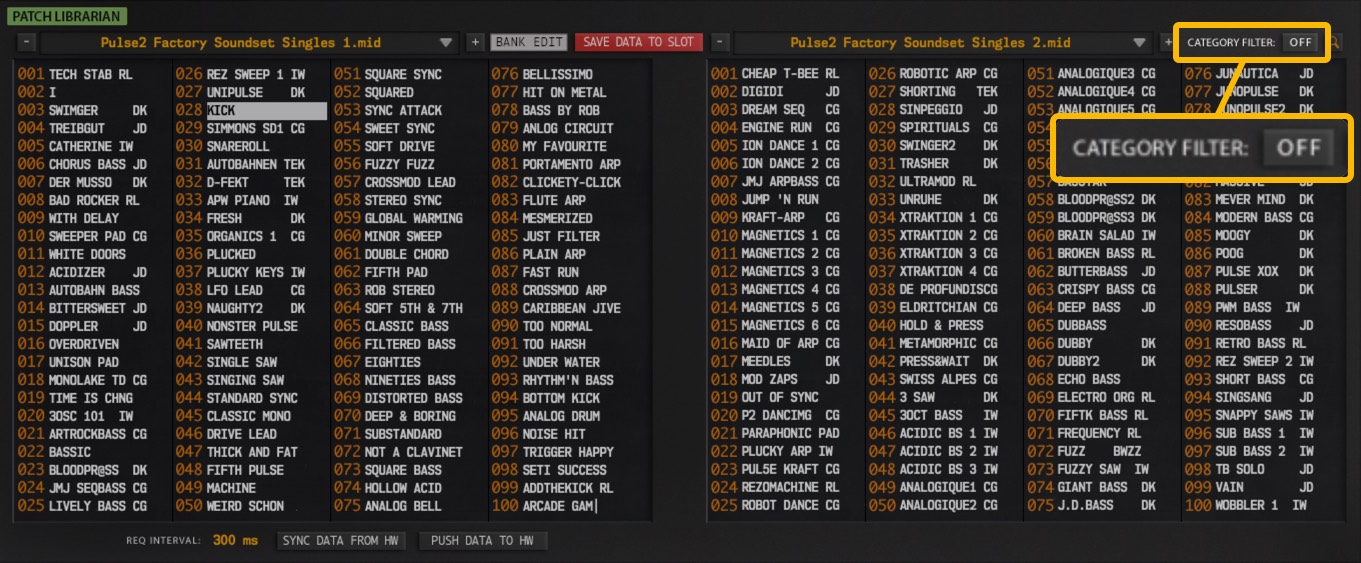
Pulse2X User Manual – Category Filter Button
Category patches will be shown in the right data list view once Category sorting is activated.
This is helpful when you want to get patches from a specific category and copy those patches to your favorite list in the left data list view.
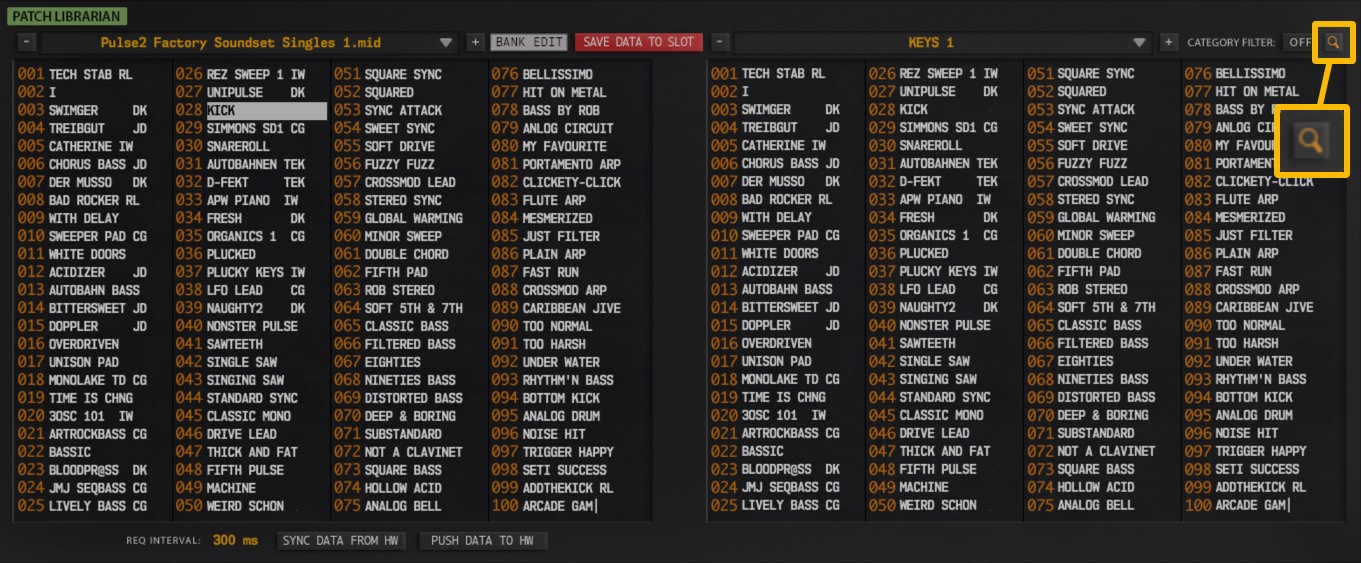
Choose Category from the categories [1] pop-up menu AFTER activating the category sorting by toggling on the Category Filter [2].
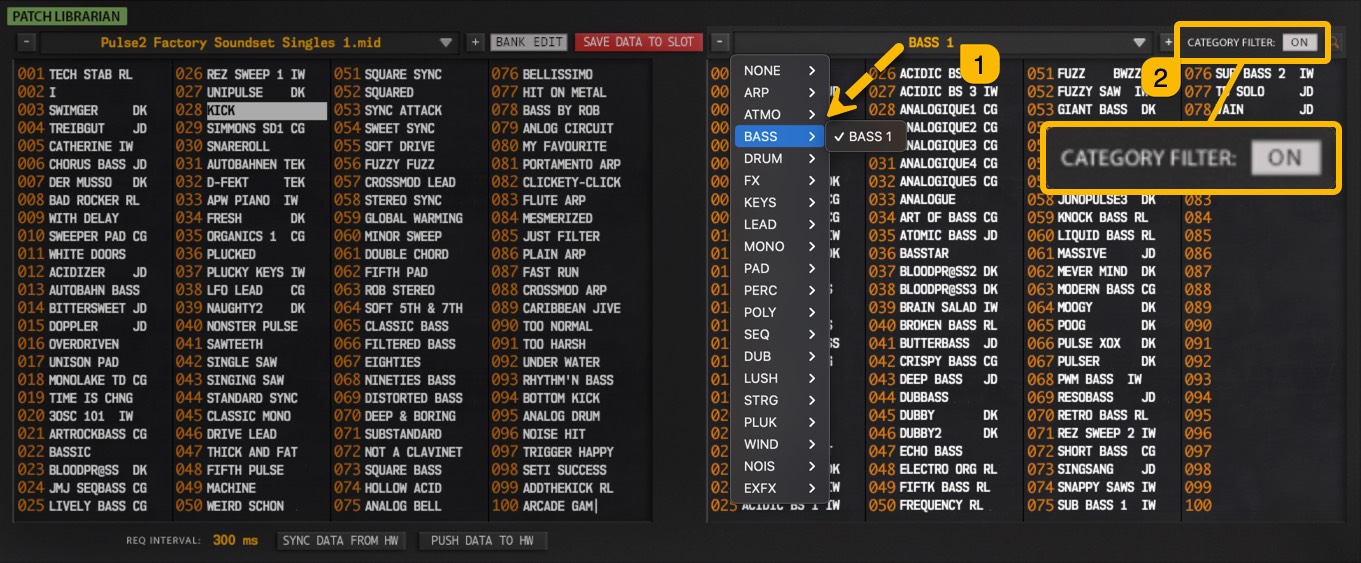
Pulse2X User Manual – Category Filter Active
Once categories are loaded, you can use the bank select – [1] or bank select + [2] buttons to browse through the category search results.
Pulse2X User Manual – Category Filter Bank Select
TIP #10: If category filter and LIBRARY CONTROL ON are on and right list is active, you can change category organized patches with same MIDI, mouse and keyboard commands as mentioned earlier.
Toggle off Category Filter button to display normal patches in the right data list.
Search Filter
You can search patches from the entire patch catalogue based on your search terms. Activate search function by clicking the magnifying glass [1].
Pulse2X Editor User Manual – Search Option
Once Search icon is toggled on, search field [1] is shown.
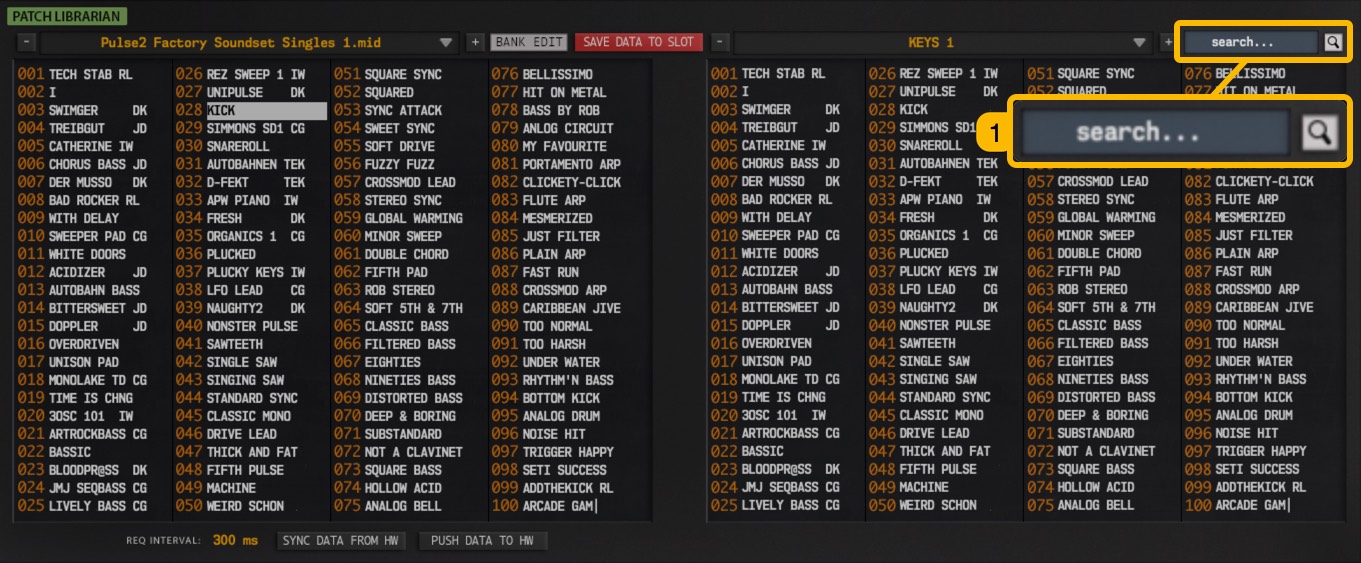
Pulse2X Editor User Manual – Search Field
In order to perform a successful search, type in at least three characters to get some results. Search results are then shown in the right list and selecting patches happens like mentioned earlier. You can also copy and paste search results to left list as you wish.
If search term gives you multiple banks or results, you can view them by choosing different bank with – / + buttons or bank select drop down menu.
Toggle of magnifying glass to display normal patches in the right data list.
Request Interval
If under any case you run into a situation where our plug-in constantly scans for different MIDI Channels while it is requesting data from the hardware, it might be wise to increase the Request Interval [1] by next value.
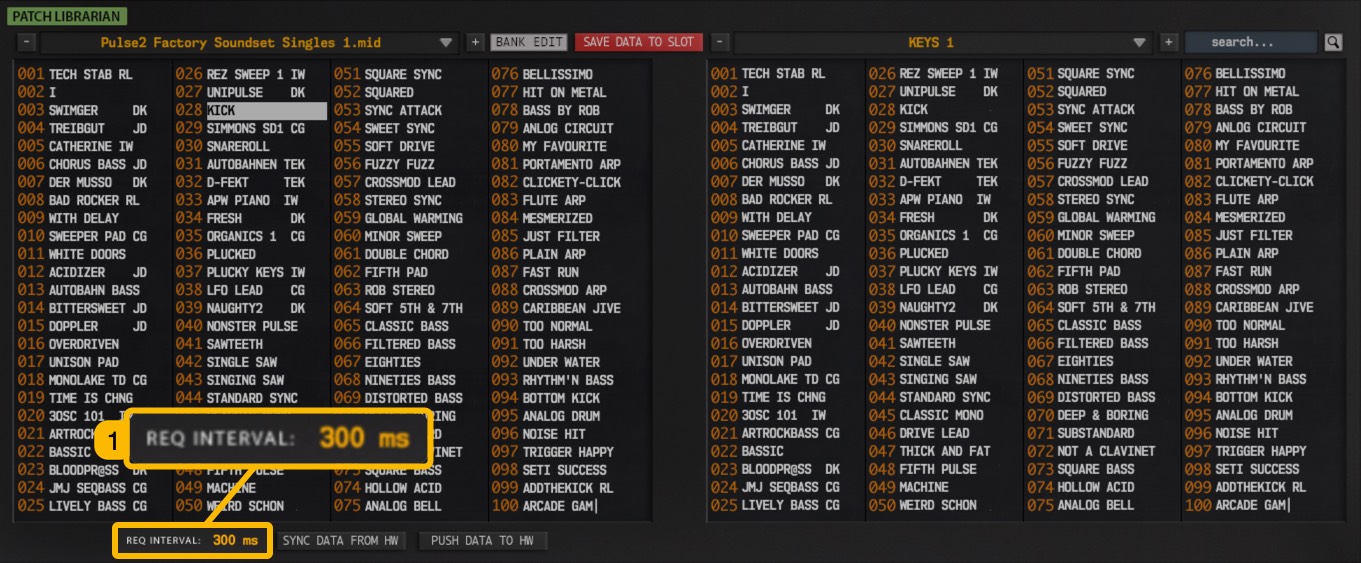
Pulse2X Editor User Manual – Request and Write Interval
This could happen due to bad MIDI or bad driver for the specific MIDI interface.
You can experiment with the Request Interval setting yourself. What we have set as a default is good starting point.
Left Data View
Left [1] and right data list views has different function in the plug-in behavior. Left list acts as an edit buffer or “destination” for your bank editing.

Pulse2X Editor User Manual – Left Data List View
Here is what you can do:
- drag and drop data from right list slot to left list slot.
- copy data from right list slot and paste the data to any of the left list slots.
- rename any single patch program in left list view.
- initialize single slot from left list view or initialize the entire bank at once.
Here is what you cannot do:
- drag and drop data from left list to right list.
- drag and drop data from left list to left list.
Right Data View
Right [1] data list acts as a “source” & search results display area. What this means is that if there are on-going edits in the left list view, you can still browse right list to select different programs from different banks.
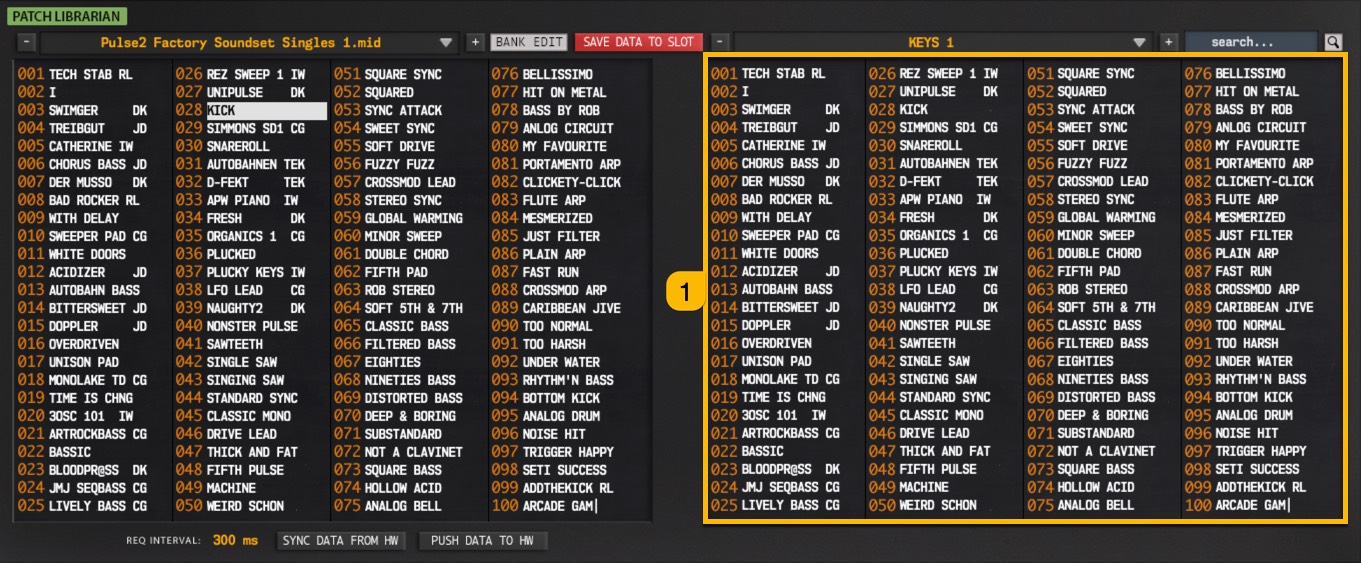
Pulse2X Editor User Manual – Right Data List View
You can also initiate search for a certain patch from the entire catalogue, even when bank editing is active.
Drag and Drop Examples: 3 is OK – 1 and 2 are not going to work
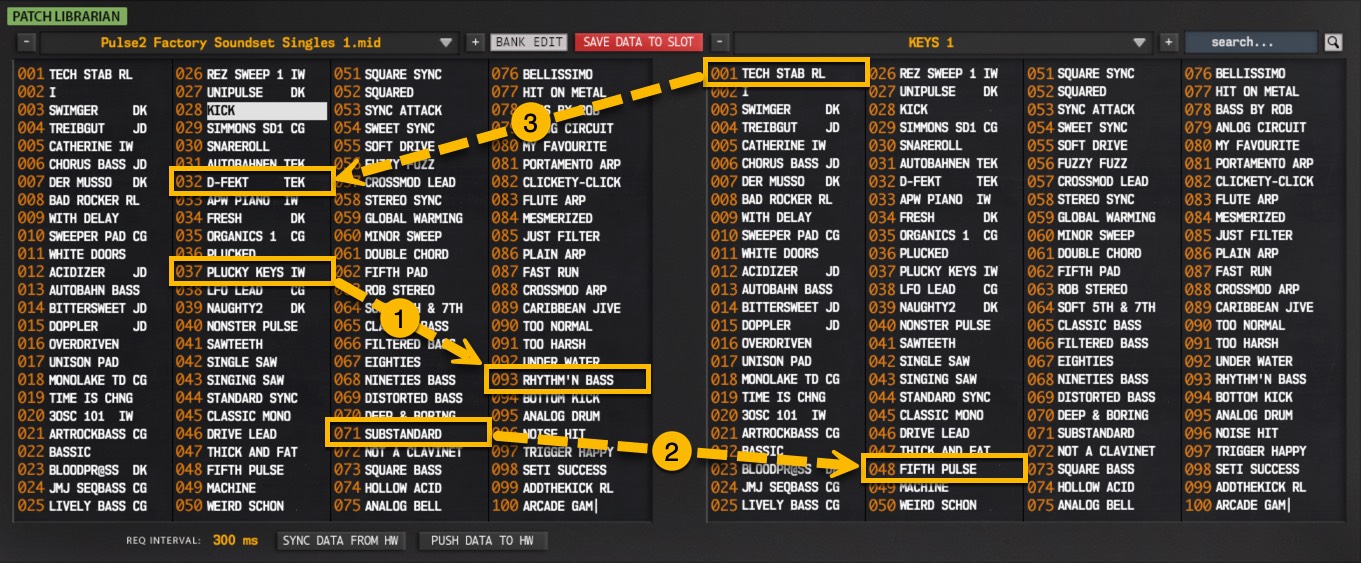
Pulse2X Editor User Manual – Drag and Drop options