
Configuration articles and guides for software and hardware. These settings are mandatory unless otherwise stated
PREPARE YOUR SYNTHESIZER FOR THE EDITOR
First, we need to Configure Roland JP-8000 / JP-8080 so that it is ready to communicate with the software.
Connect the MIDI cables to the MIDI interface and Audio Jacks to your console / sound card. MIDI out from synth to MIDI interface IN and vice versa. No MIDI thru configurations does not work.
- MIDI Out from MIDI interface to JP-8000 / 8080 MIDI In port.
- MIDI Out from JP-8000 / 8080 to MIDI interface MIDI In port.
- double check your cables!
- Audio from JP-8000 / 8080 Main Out L&R to console or sound card inputs.
NOTE for JP-8080 Users: If you want to trigger the arpeggiator with note on / off messages, use Remote KBD In port. This port does not support data transfers!
Additional MIDI cable from MIDI Interface MIDI Out port is required.
Wiring diagram example

Roland JP-80×0 Wiring Schematics
Power up your JP-8000 / 8080. Our editor is designed to work “out of the box” and control all parameters from single application instance.
NOTE: Our editor is designed to work only in Performance mode. Patch mode is supported, but there is more benefits of using Performance mode.
In fact, when JP is in Performance mode, you have two instances of JP sound engines available!
Configure JP-8000

Configure Roland JP-8000 – Shift Function Buttons
Click and hold SHIFT + MIDI SW (button 5) and scroll until you came across these settings:
Next click MIDI PRM (button 4) and scroll until you came across these settings:
Click PFM PART (button 2)
- Check both layers and make sure Part MIDI CH for LOWER is set to 1 and UPPER is set to 2.
NOTE for External Clock: Arpeggiator will not play unless DAW is unable to provide MIDI Clock. Windows: Check our method of using MIDI OX and LoopBe together to provide MIDI clock from DAW to your synth.
Configure JP-8080
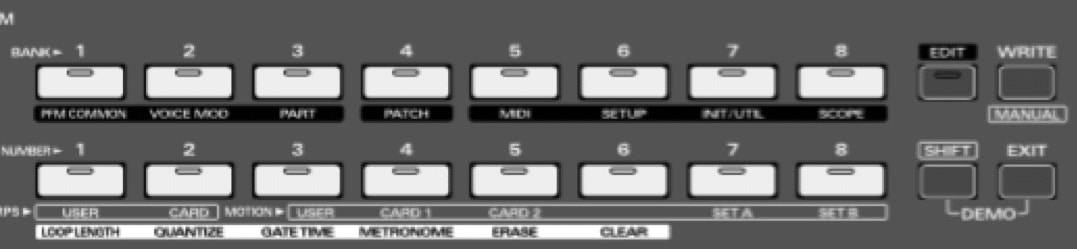
Configure Roland JP-8000 – Edit Function Buttons
Click EDIT and choose MIDI (button 5) and scroll until you came across these settings:
Click PART (button 3)
- Check both layers and make sure Part MIDI CH for LOWER is set to 1 and UPPER is set to 2.
All set! We are now ready to open our plug-in in DAW!
To get more information about how to adjust your synth, read the Roland JP-8000 / JP-8080 User Manual.
NOTE for External Clock: Arpeggiator will not play unless DAW is unable to provide MIDI Clock. Windows: Check our method of using MIDI OX and LoopBe together to provide MIDI clock from DAW to your synth.