wiring schematics microqxr editor

Configure Waldorf microQ

Configuration Knowledge Level

Configuration articles and guides for software and hardware. These settings are mandatory unless otherwise stated

PREPARE YOUR SYNTHESIZER FOR THE EDITOR

First, we need to Configure Waldorf microQ so that it is ready to communicate with the software.

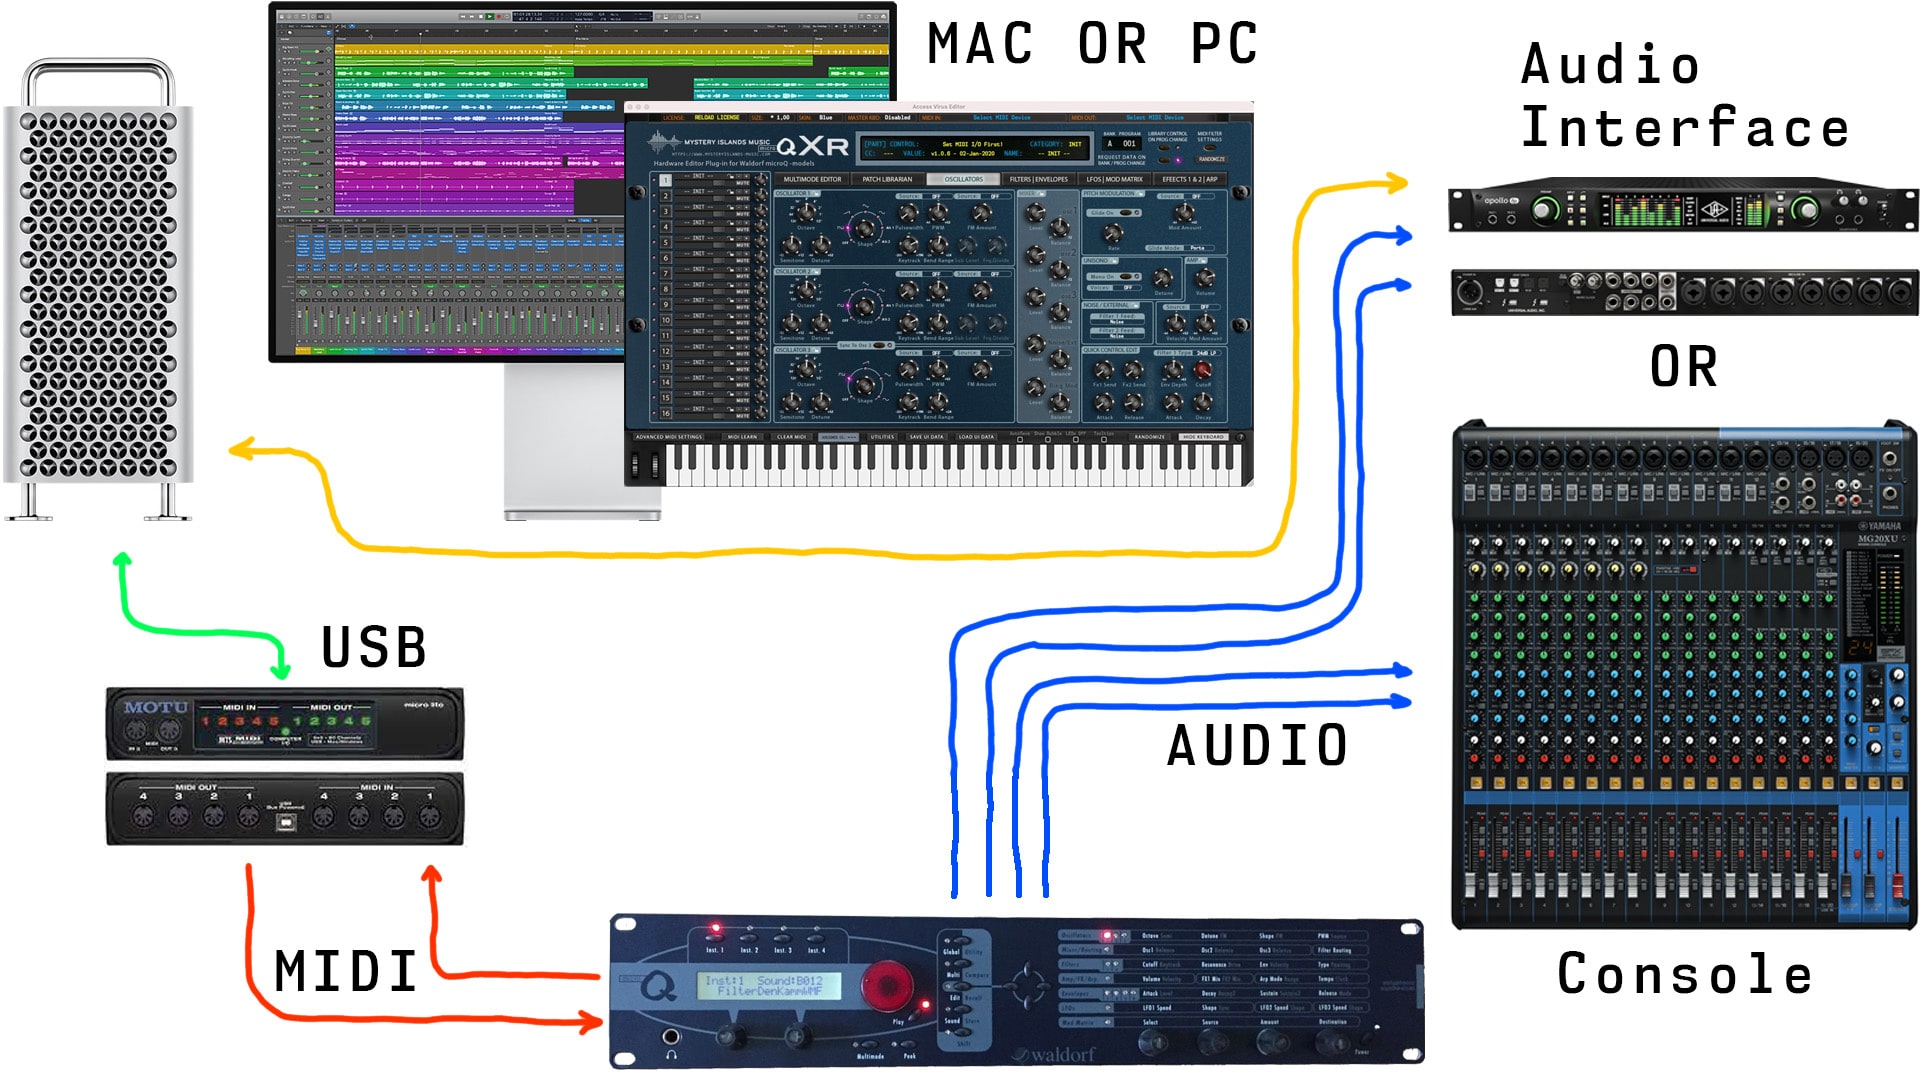
Connect the MIDI cables to the MIDI interface and Audio Jacks to your console / sound card. MIDI out from synth to MIDI interface IN and vice versa. No MIDI thru configurations does not work.


  • MIDI Out from MIDI interface to microQ MIDI In port.
  • MIDI Out from microQ to MIDI interface MIDI In port.
    • double check your cables!
  • Audio from microQ Outputs to console or sound card inputs.

Wiring diagram example

wiring schematics microqxr editor

Waldorf microQxR Wiring Schematics

Power up your microQ and put it into Multi mode. Our editor is designed to work “out of the box” and control all parameters from single plug-in instance.

Configure microQ

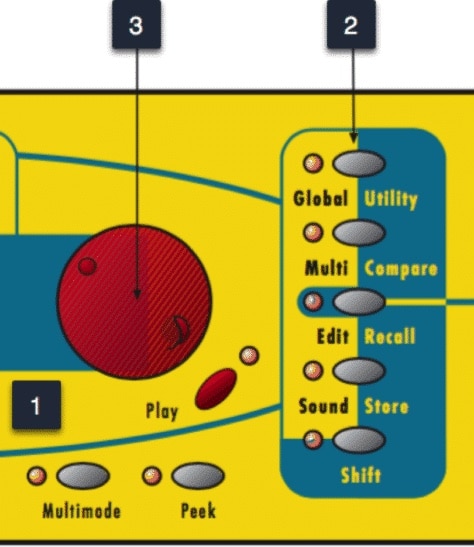
Enter Multimode [1] and press Global / Utility [2] to start the configuration. Use wheel [3] to navigate the menu.

microQ panel controls 474x547 1

Waldorf microQ panel

GlobalChn = 16
SysEx ID = 1
Arp Send = Your choice
Ctl.Send = Ctl+SysEx
Ctl receive = on
Clock (*) = Auto
Rx PrgChg = Nmb.+Bank
Tx RgChg = Nmb.+Bank

External Clock Note: Arpeggiator will not play unless DAW is unable to provide MIDI Clock. Windows: Check our method of using MIDI OX and LoopBe together to provide MIDI clock from DAW to your synth.

0
0
603
Rate this article


Spread the word in socials and support us via Ko-fi! ☕️

WordPress Cookie Notice by Real Cookie Banner
0 Shares
Tweet
Share
Reddit
Share
Pin
More