
Configuration articles and guides for software and hardware. These settings are mandatory unless otherwise stated
PREPARE YOUR SYNTHESIZER FOR THE EDITOR
First, we need to Configure Waldorf Blofeld so that it is ready to communicate with the software.
Connect the MIDI cables to the MIDI interface and Audio Jacks to your console / sound card. MIDI out from synth to MIDI interface IN and vice versa. No MIDI thru configurations does not work.
- MIDI Out from MIDI interface to Blofeld MIDI In port.
- MIDI Out from Blofeld to MIDI interface MIDI In port.
- double check your cables!
- Audio from Blofeld Outputs to console or sound card inputs.
Wiring diagram example
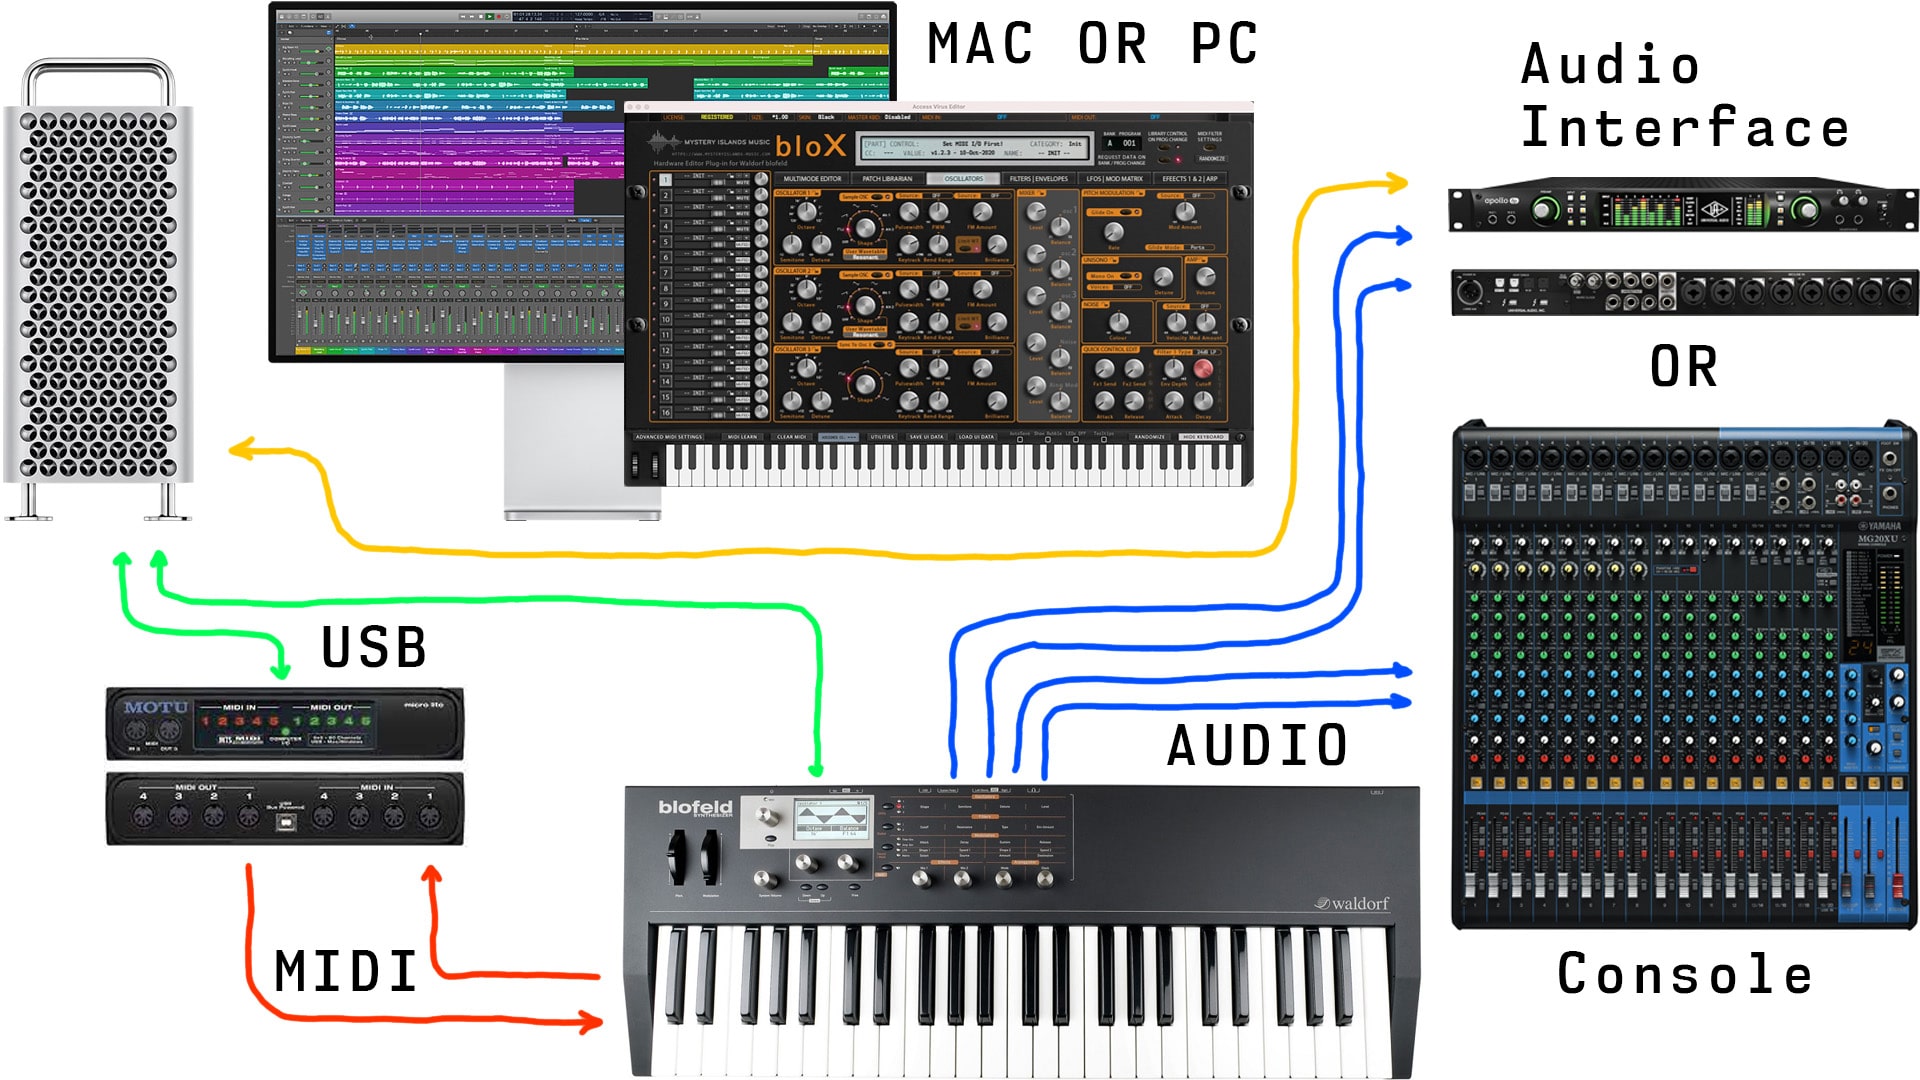
Waldorf bloX Wiring Schematics
Power up your Blofeld and put it into Multi mode. Our editor is designed to work “out of the box” and control all parameters from single plug-in instance.
Configure Blofeld
Enter Multimode, open Global settings by click & hold shift + global. Scroll to first “page” with the Jog wheel above play button.
- Scroll the jog wheel until display indicates “receive” in the top row and make sure every part has a different MIDI channel number. Also, we recommend to MUTE every part which is not in use. This will speed up the plug-in total recall process and some multi functions as well.
- Scroll the jog wheel again until display indicates “receive 1/5” in the top row and make sure all channels are set to “receive” for MIDI and USB – Same thing on the next page for Local (2/5).
- Adjust pages 3/5 and 4/5 to your desired settings for Pitch Bend, Mod Wheel, Pressure and Sustain.
- Set Edits and Prg Change to “receive” mode in page 5/5.
You can choose next part by holding the Play button and then turning the Job wheel onwards or backwards.
External Clock Note: Arpeggiator will not play unless DAW is unable to provide MIDI Clock. Windows: Check our method of using MIDI OX and LoopBe together to provide MIDI clock from DAW to your synth.