
Configuration articles and guides for software and hardware. These settings are mandatory unless otherwise stated
PREPARE YOUR SYNTHESIZER FOR THE EDITOR
First, we need to Configure Korg microKorg so that it is ready to communicate with the software.
Connect the MIDI cables to the MIDI interface and Audio Jacks to your console / sound card. MIDI out from synth to MIDI interface IN and vice versa. No MIDI thru configurations does not work.
- MIDI Out from MIDI interface to microKorg MIDI In port.
- MIDI Out from microKorg to MIDI interface MIDI In port.
- double check your cables!
- Audio from microKorg Main Out L&R to console or sound card inputs.
Wiring diagram example
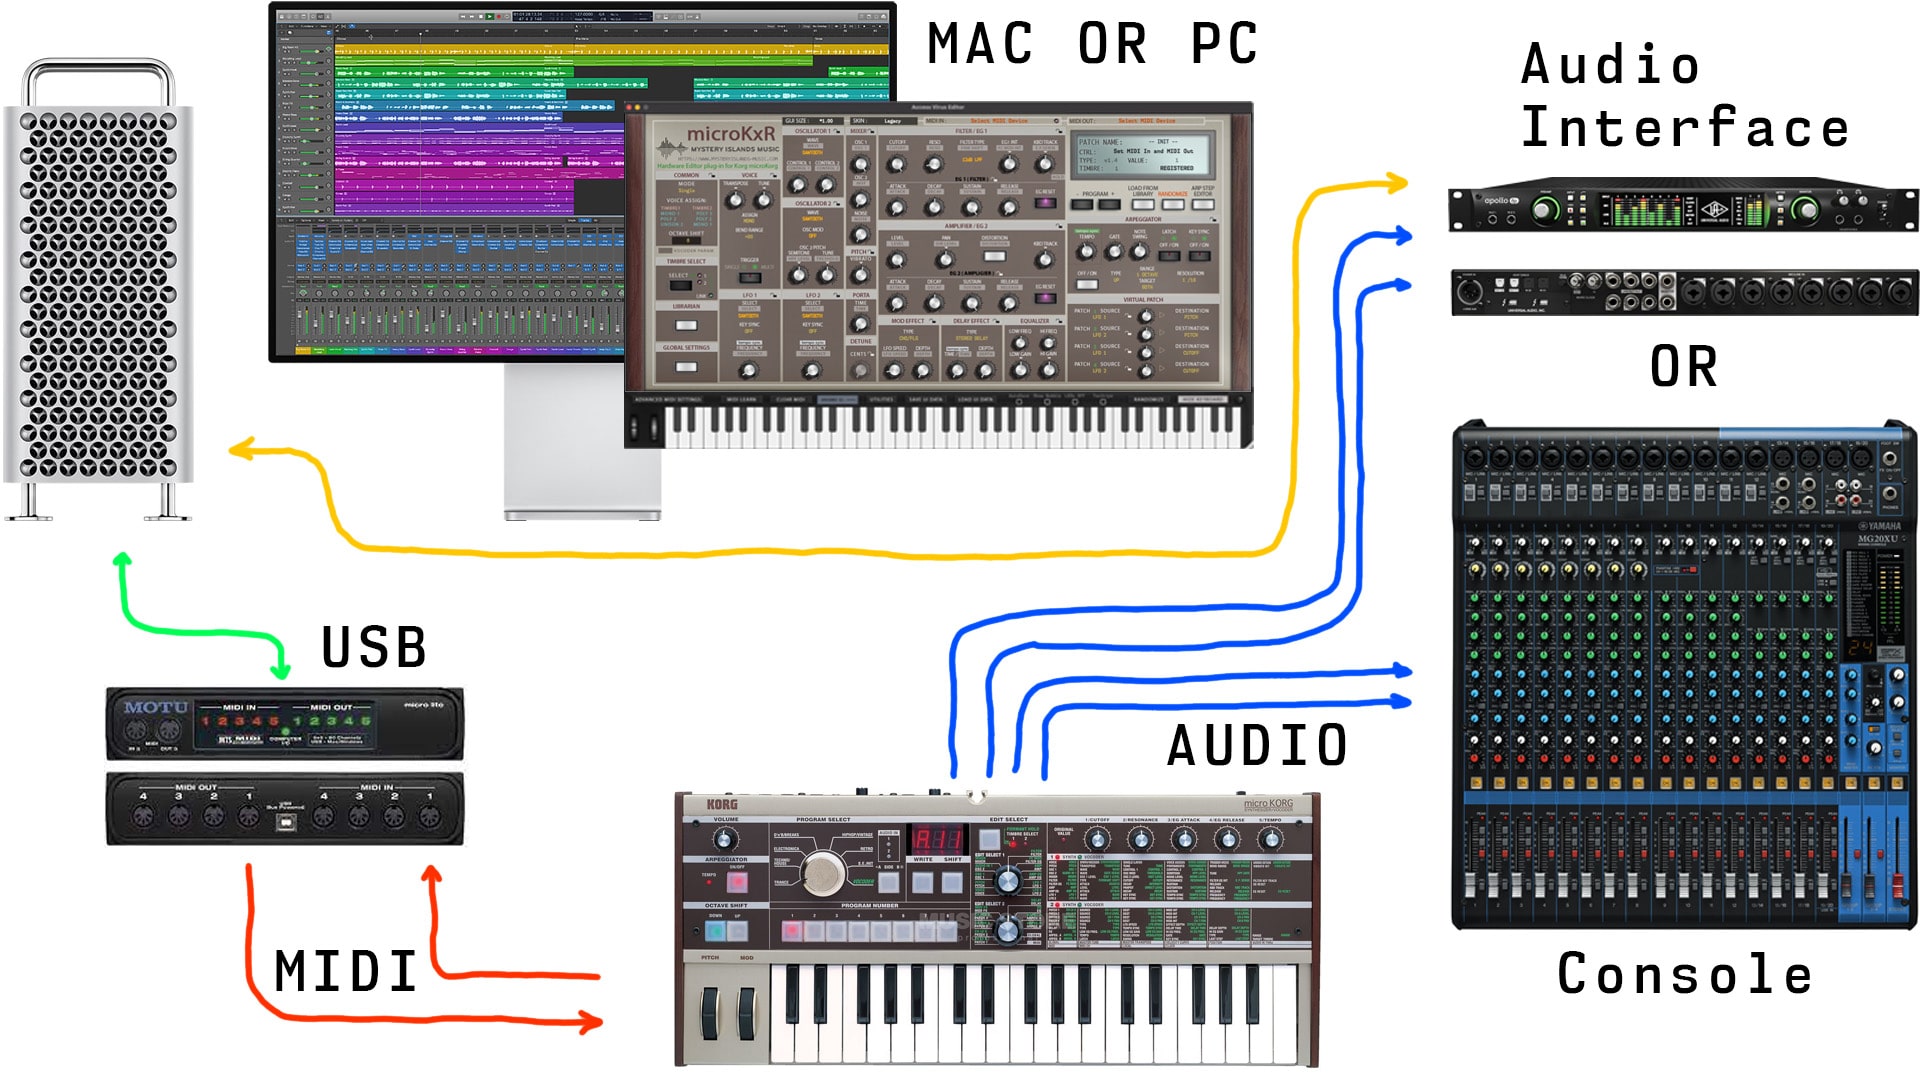
Korg microKxR Wiring Schematics
Power up your microKorg. Our editor is designed to work “out of the box” and control all parameters from single plug-in instance.
Configure microKorg
Enter MIDI settings with “EDIT SELECT 2” knob.
Set MIDI CH for your microKorg as you wish – just remember what it is when launching our plug-in.
Set LOCAL to OFF if you control your microKorg sound engine via master keyboard.
Set CLOCK to Ext if you don’t plan to use the arpeggiator AND always when you transfer data *.
Hold down the SHIFT key and press the 4 key – Display indicates FLT.

Korg microKorg Config scheme #1
Exit this view by clicking shift – Display returns to normal state.
Hold down the SHIFT key and press the 8 key – Display indicates utP.
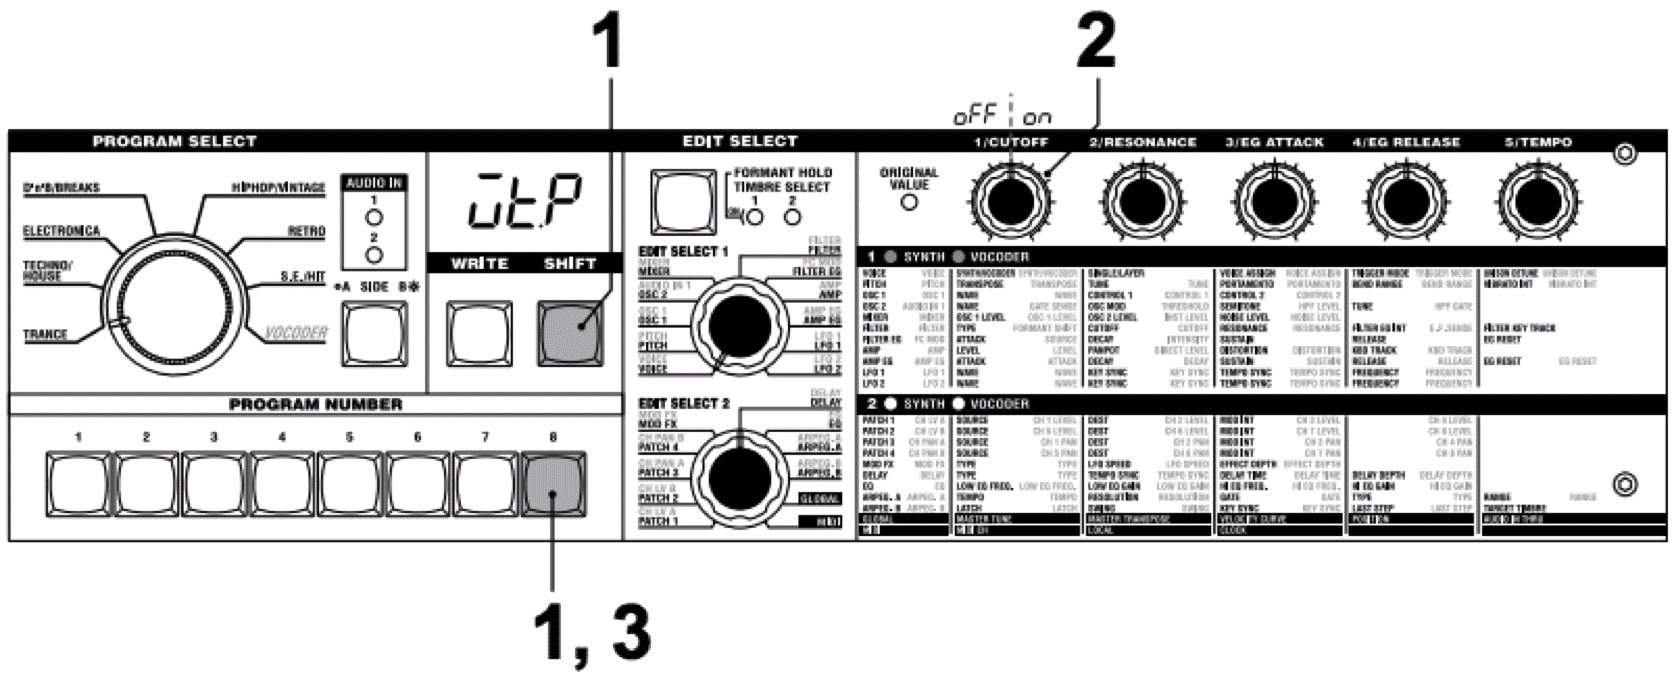
Korg microKorg Config scheme #2
Exit this view by clicking shift – Display returns to normal state.
You might have to adjust the write protect setting each time you power-up your microKorg, so check that time after time to make sure it is oFF.
Note: Switch the CLOCK to Ext mode always when transferring data from plug-in to hardware and vice versa!
External Clock Note: Arpeggiator will not play unless DAW is unable to provide MIDI Clock. Windows: Check our method of using MIDI OX and LoopBe together to provide MIDI clock from DAW to your synth.