
Everything you need to know about our product install, setup steps, configuration and usage of various features
Custom Added Functions
Our plug-in includes a lot of custom added functions as requested by the users.
In this part we will walk you through each of the functions and how they can improve your workflow.
MODEL SELECT
You can choose your hardware model from the dropdown menu [1].
- If you use microQ Rack or microQ Keyboard, choose microQ series
- If you use microQ lite, choose microQ liteQ
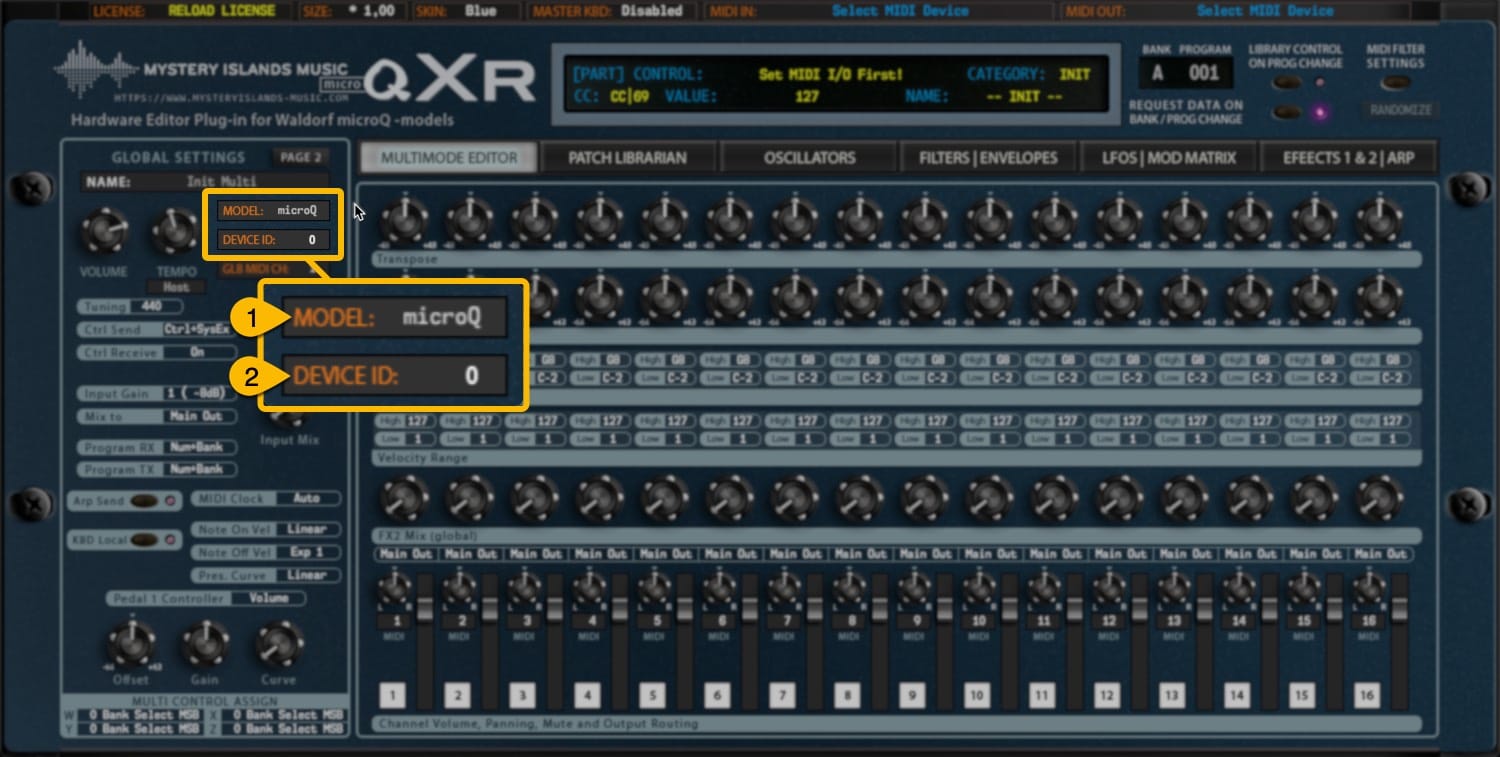
microQxR User Manual – Select Model
When microQ or microQ lite is chosen, user interface will have slight changes to reflect the available hardware options.
USER INTERFACE SIZE
You can adjust the plug-in user interface size with * 0,85 / * 1,15 zoom function. Click * 1,00 [1] in the plug-in and choose a different size. Note that our graphics are not yet vector based, which means the plug-in will zoom the graphics making them a bit blurry if I may say so.
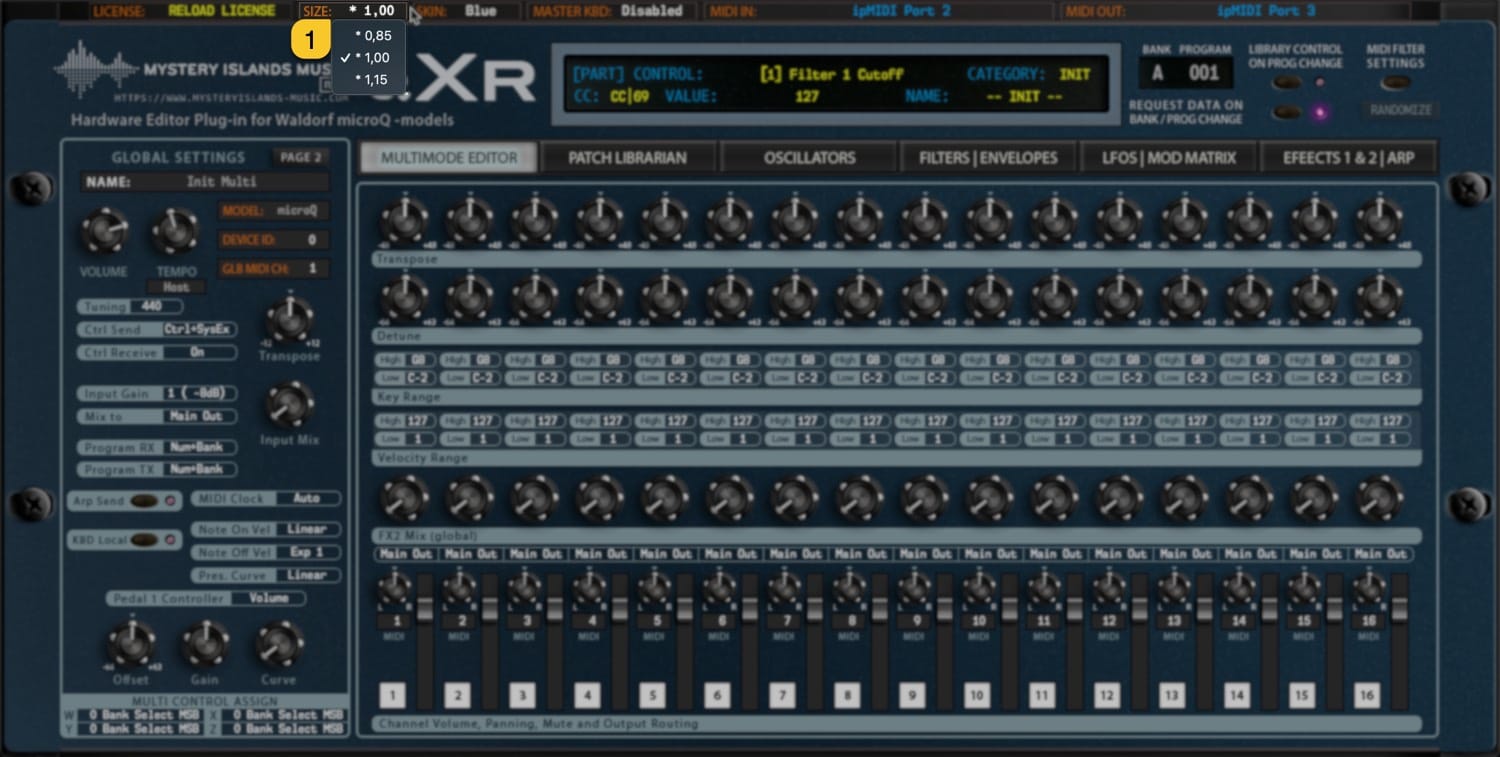
microQxR User Manual – User Interface Size
Basic user interface size is 1500 pixels by 757 pixels which is more than enough for modern setups.
Note #1: You must reload your project / session in order to reload the plug-in graphics with new size option.
UI SCHEME
You can choose from different user interface scheme that suits your setup. This setting is saved with DAW project data, but new instance always reverts to default “skin” when plug-in is inserted again.
Click SKIN [1] name to reveal the menu.
- Yellow – Replicates yellow microQ color scheme.
- Blue – Replicates blue microQ color scheme.
- Phoenix – Replicates Phoenix Edition microQ color scheme.

microQxR User Manual – User Interface Scheme
Once scheme is changed [1], Plug-in Control Display [2] indicates that you must reload your session or reload the plug-in instance for the skin change to take effect.
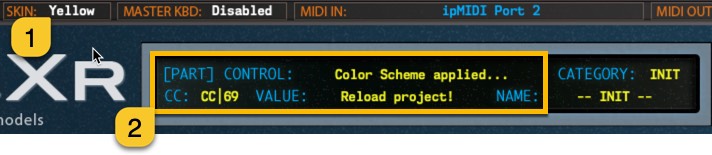
microQxR User Manual – Color Scheme Changed
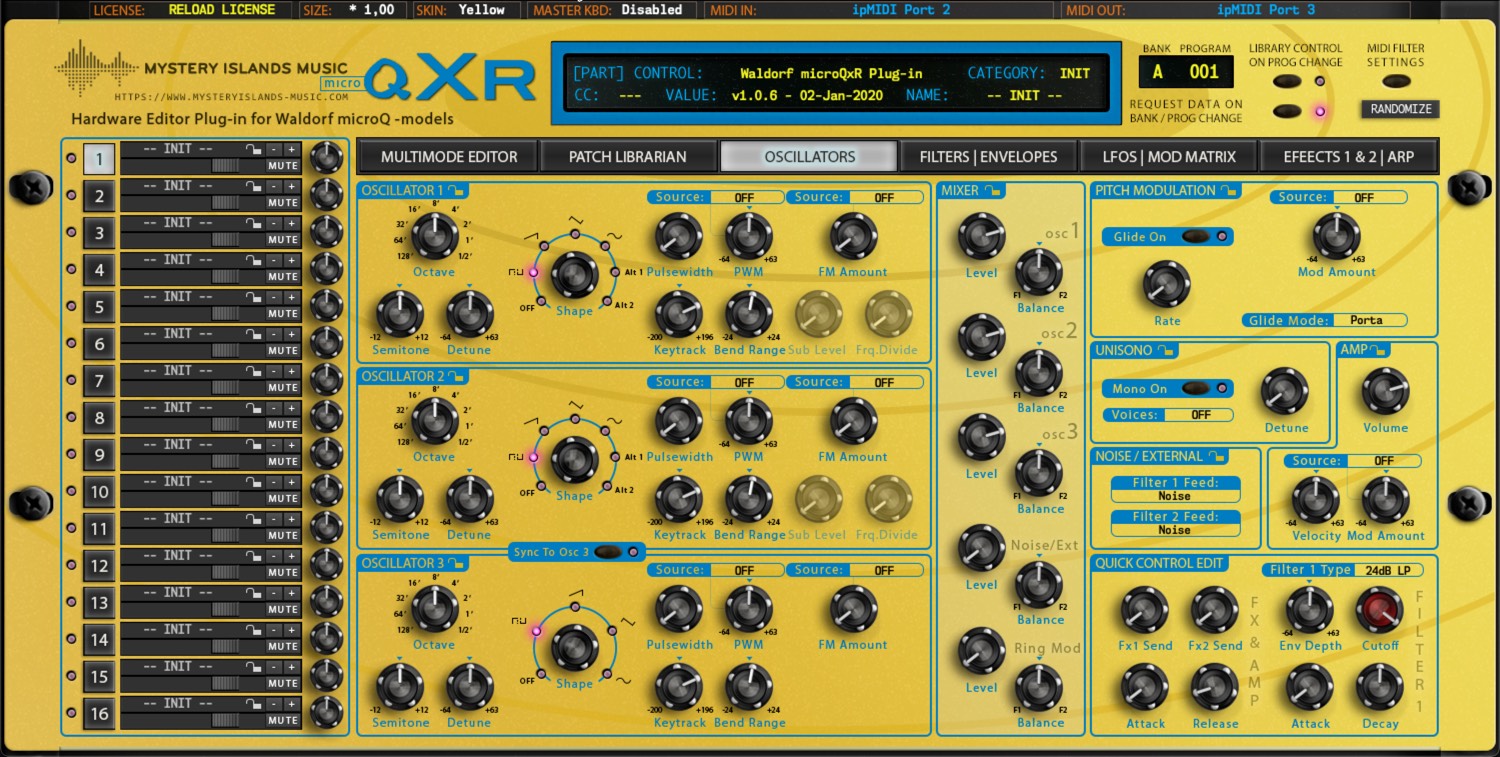
microQxR User Manual – Yellow Scheme

microQxR User Manual – Phoenix Edition Scheme
Note #1: You must reload your project / session in order to reload the plug-in graphics with new scheme option.
MASTER KEYBOARD SWITCH (deprecated)
Always keep it Disabled. This is deprecated function and no longer needed. 😆 We will remove this function and UI elements in the upcoming release later on.
EXPANDED / GLOBAL SETTINGS
Click MULTIMODE MIXER [1] button to open global settings window. From this view you can access some of the microQ Global Settings and modify them as needed. More settings available on Page 2 [2].
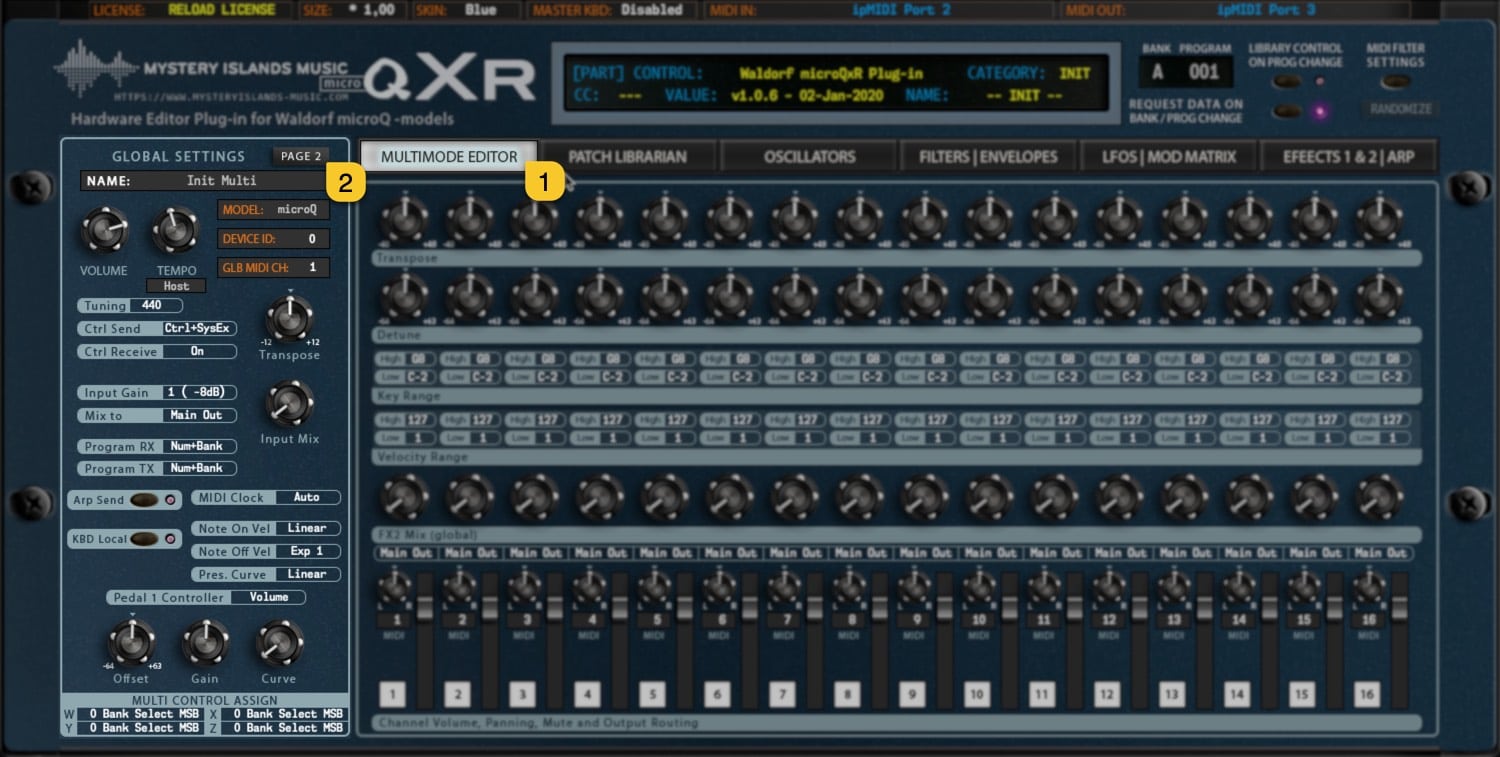
microQxR User Manual – Global / Multi Settings View
Global Settings Expanded in image below
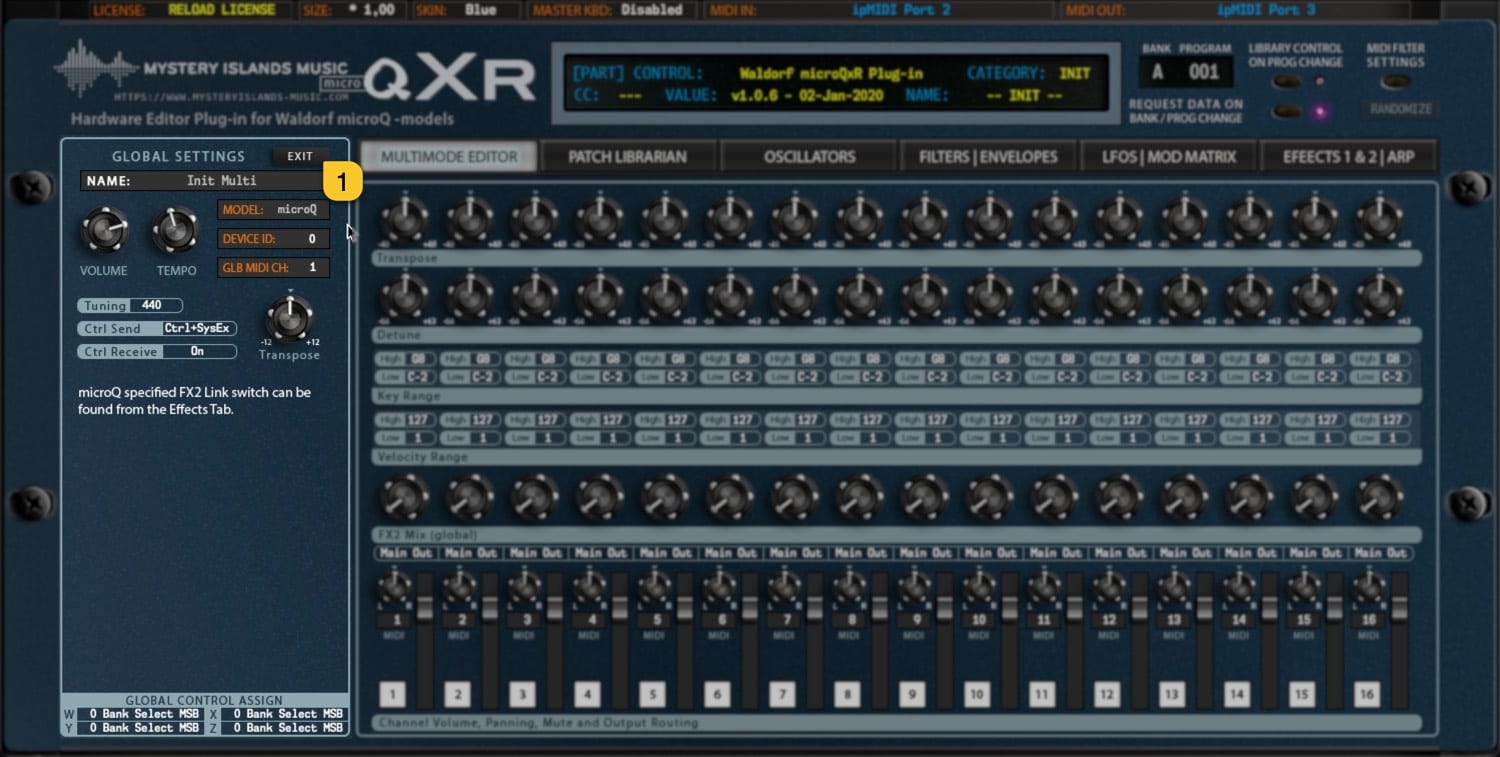
microQxR User Manual – Global Settings expanded
RANDOMIZE PATCH
With RANDOMIZE [1] button, you can trigger randomizing process for currently selected part.
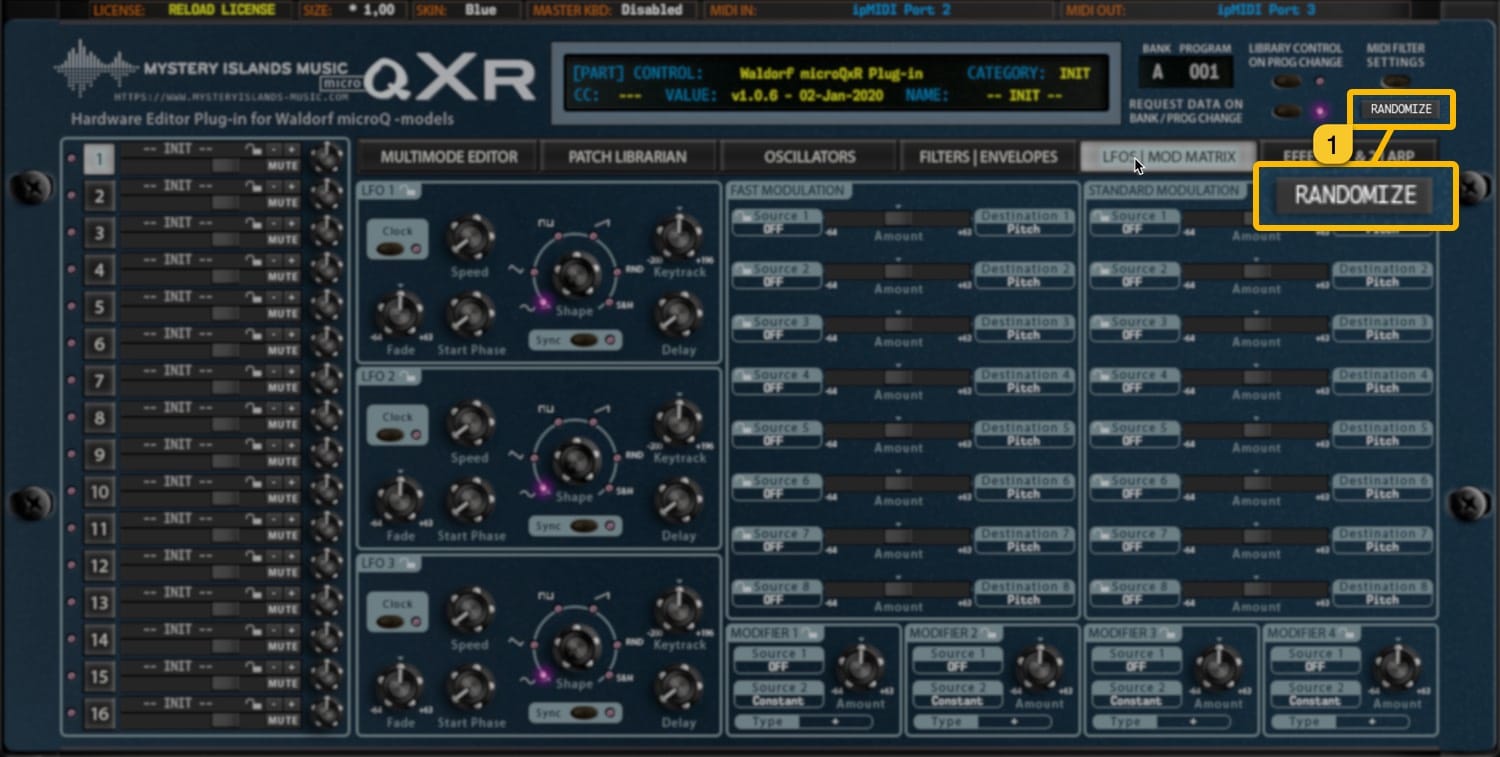
microQxR User Manual – Randomize Button
TIP #2: To make the most out of Randomizer, use Section Locks [1] in conjuction with Randomizer to get better results. i.e. If your randomized Patch has a great Pitch Envelope & Oscillator setting, toggle on the Section Lock for those sections in order to prevent them being randomized! Read more about the Section Locks further below.

microQxR User Manual – Locked Sections
SECTION LOCKS
We added functionality to lock certain sections of the plug-in to prevent changes up on part program changes. If you find a perfectly adjusted filter or lfo modulation you can lock the section to keep those settings while browsing other patches.
You are able to lock any of the sections which has the LOCK [1] symbol in it. More locks are available on different tabs, i.e. Oscillators tab.
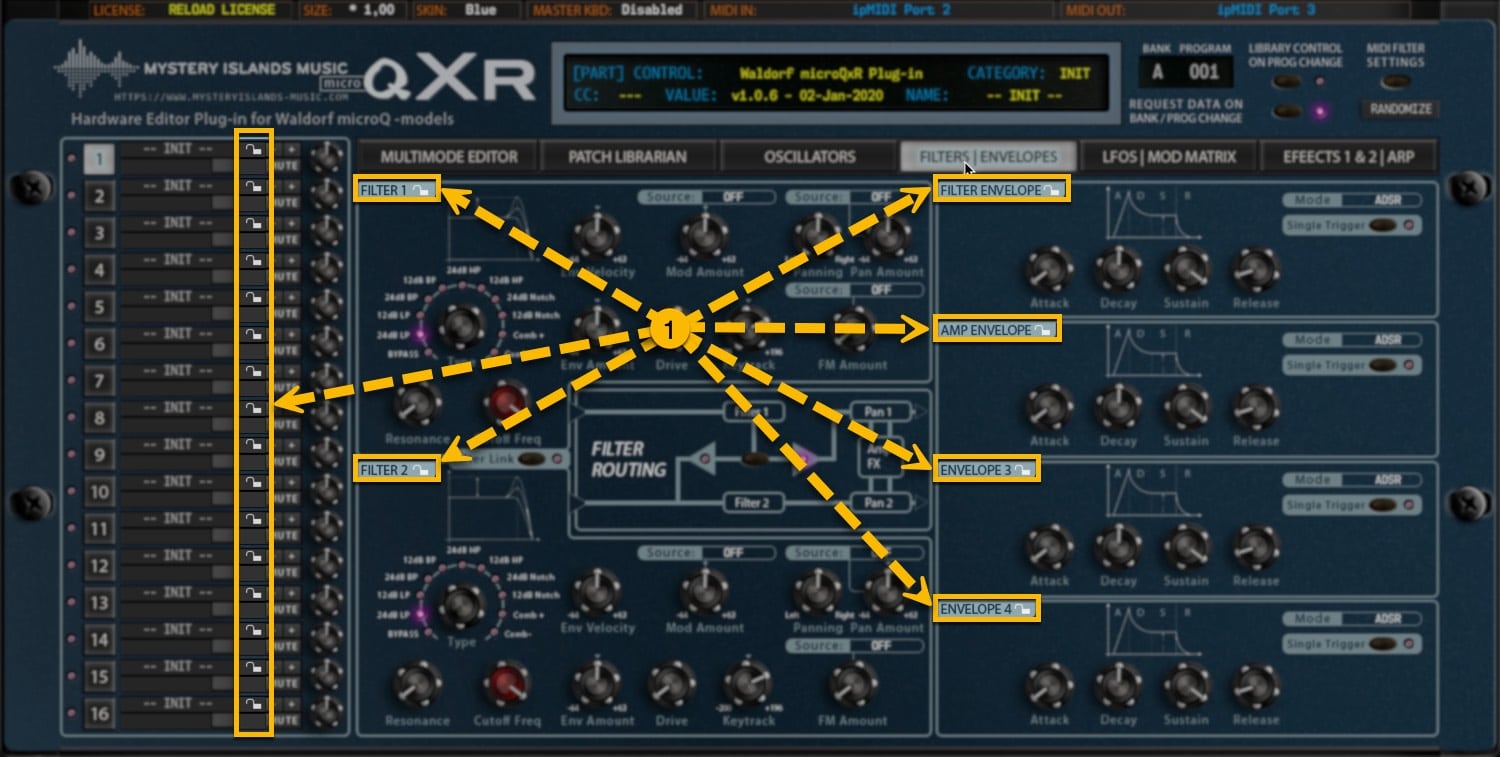
microQxR User Manual – Section Locks
Note #1 While you have sections locked, there will double the amount of SysEx traffic in the MIDI stream due to the fact that the plug-in has to send the ”locked” info back to hardware after the patch is requested. If you scroll patches from librarian, then the data stream is normal.
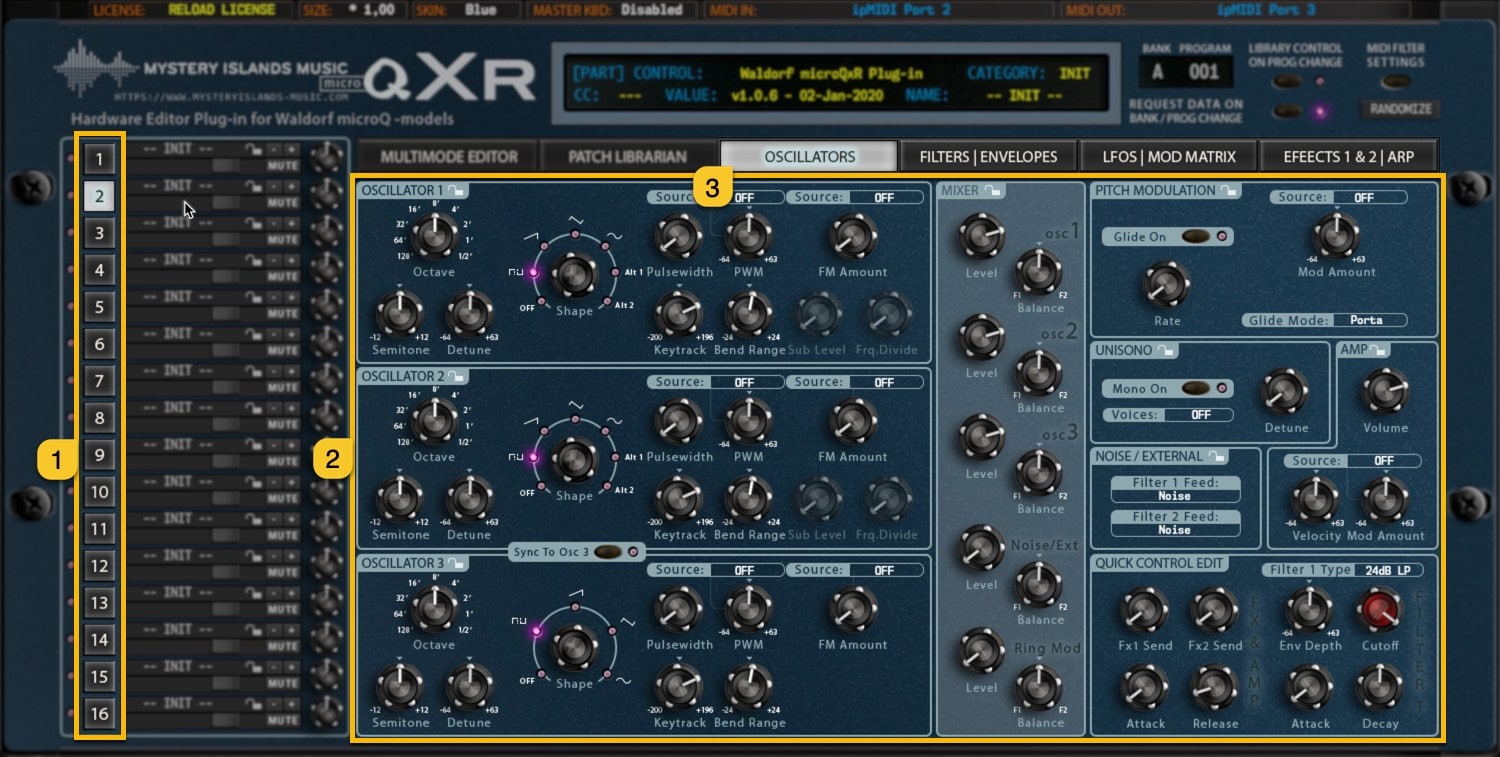
PART SELECT
Part Select [1] is standard feature of the microQ, which will change the current MULTI Part of the synthesizer. Based on the currently set Part, data from the plug-in user interface will be sent to it. i.e., if you move Filter Cutoff from the UI while Part 1 is selected, then Filter Cutoff in the Part 1 of the synth will change.
Each part has its own set of Parameters [2] – These parameters are spread across four different tabs [3].
microQxR User Manual – Part Switches
- PART DATA TAB #1: OSCILLATORS.
- PART DATA TAB #2: FILTER / ENVELOPES.
- PART DATA TAB #3: LFO / MODULATION MATRIX.
- PART DATA TAB #4: FX 1 – FX 2 / ARPEGGIATOR.
Note #1 Part Select increases the amount of outgoing DATA and could cause delay in outgoing note / controller data. It is useful when editing sounds, but not ideal when live playback is used.
REQUEST DATA ON PROGRAM CHANGE
REQUEST DATA ON PROGRAM CHANGE [1] means that if the plug-in receives program and/or bank change message from MIDI input, plug-in will initiate Patch request from the microQ to the plug-in user interface.
Inputs valid for this function:
- Plug-in MIDI In port (Plug-in).
- DAW gateway (Plug-in).
- Plug-in Program Change buttons (per part) (*1).
- Plug-in Program Number display (per part) (*2).
- Plug-in Bank Number display (per part) (*3).
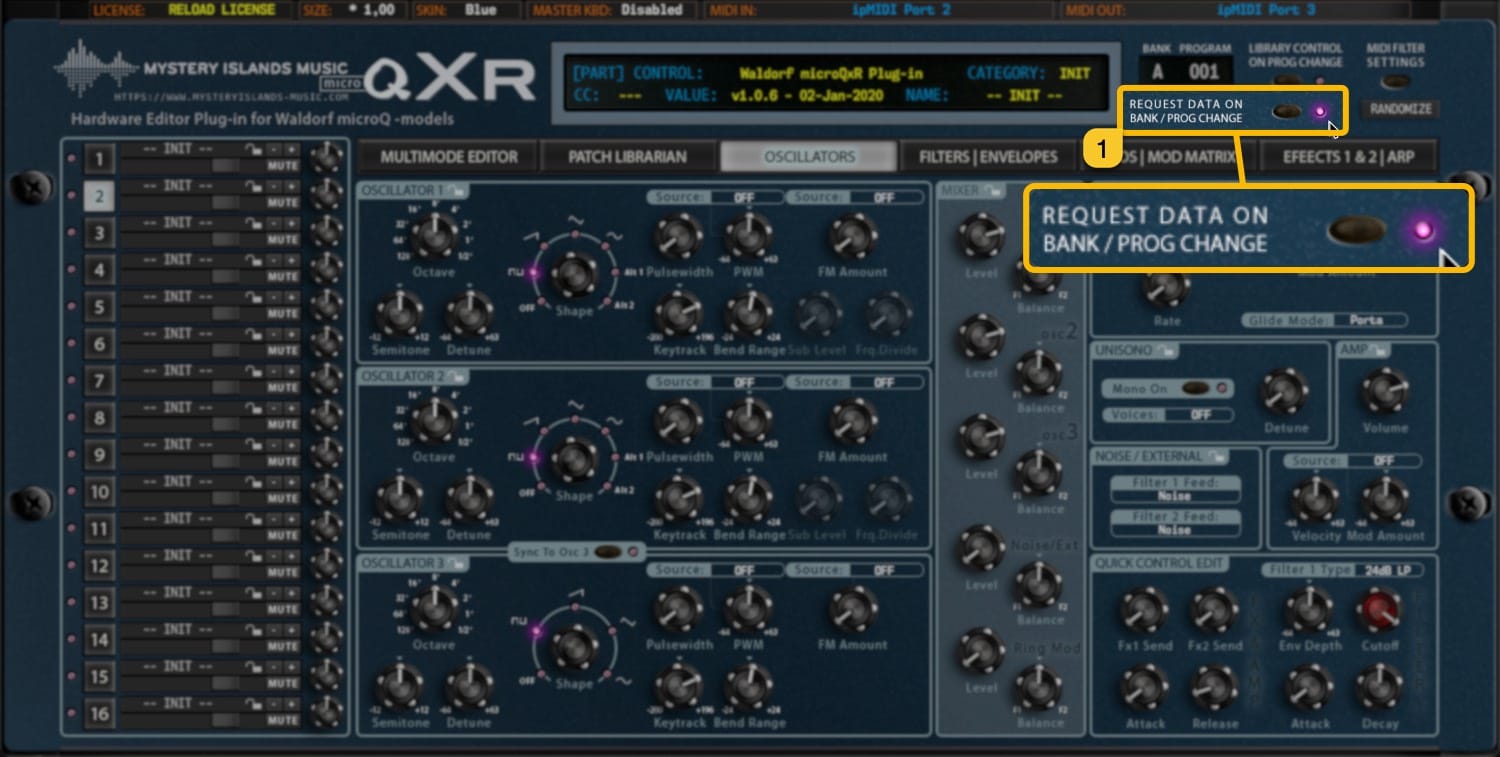
microQxR User Manual – Request Data on Program Change
If this switch is toggled off, plug-in will only send the program change messages to the hardware but won’t request any data back. This is good in some cases where you might want to quick browse hardware patches.
(*1 See below for Program Change Buttons).
(*2 See below for Program Number Display).
(*3 See below for Bank Number Display).
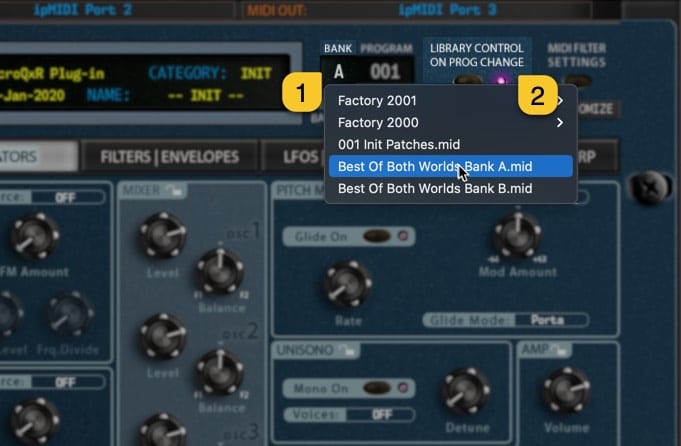
LIB CONTROL SWITCH
Library Control On Prog Change [1] switch allows you to take control of your library patches with incoming program changes via MIDI or with the plug-in user interface – / + buttons and Bank Number Display / Program Number Display menus.

microQxR User Manual – Library Control On Prog Change
If the Library Control On Prog Change switch is toggled on and you send a program change message from your master keyboard / controller to the plug-in, it will send the corresponding program from the librarian to the hardware – isn’t that just neat?!
You can also quickly view the banks located in your Patches folder and programs contained in the current bank with the Bank / Program Control Displays. See below for instructions.
Note #1 Patches are sent to the hardware only to the currently selected part.
Note #2 Program Change message received on part channel, will change the corresponding part program. Otherwise no action is taken.
Note #3 If the program change message is received from MIDI channel 1 and all parts are set to channel 1, no action will be taken. Change the MIDI channel temporarely to different value.
BANK & PATCH NUMBER CONFLICT
Since microQ models are not equipped with proper TEMP memory, each part should have its own combination of BANK & PATCH number in order to prevent overwriting scenarios.
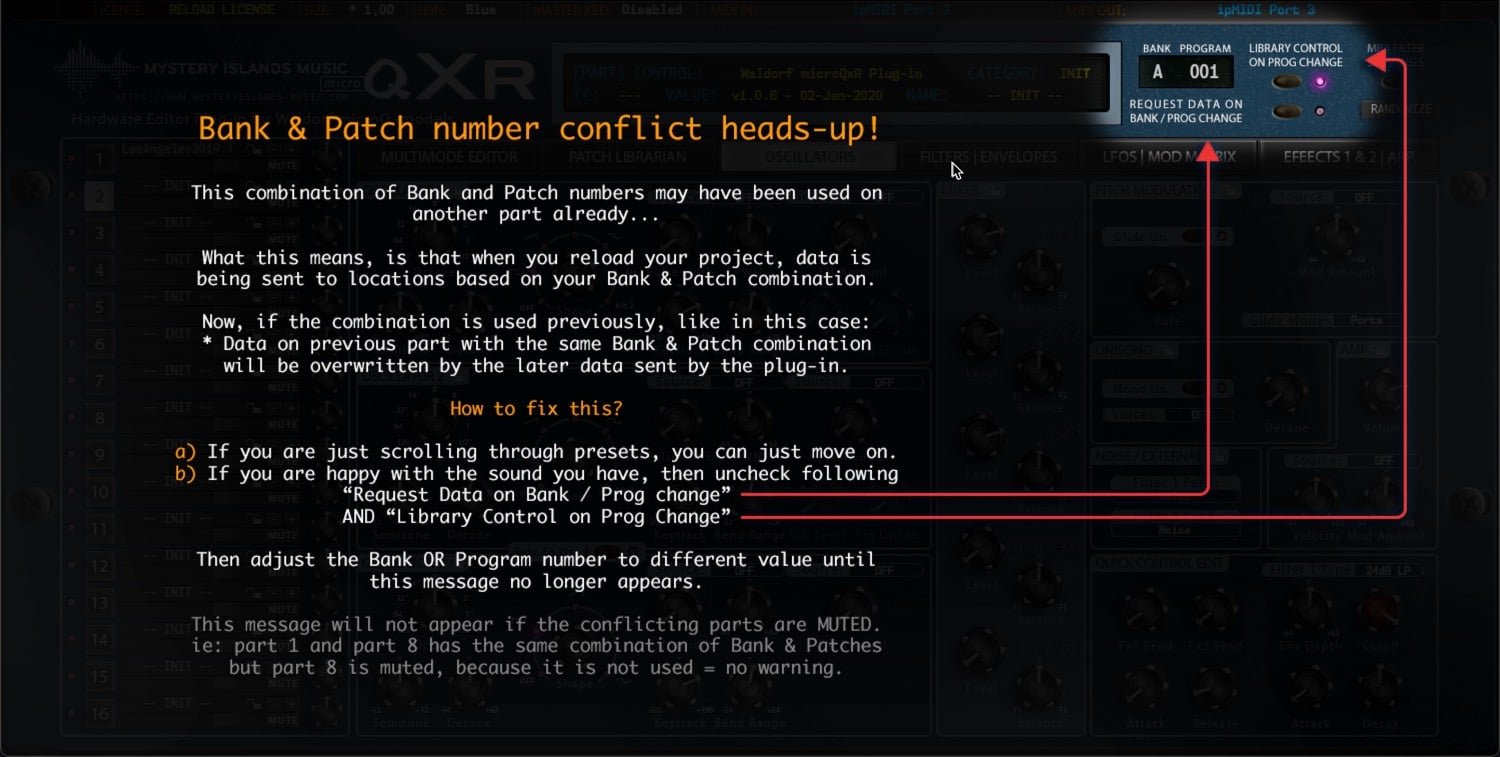
microQxR User Manual – Bank & Patch Number Conflict Warning
Here is why: If PART 1 and PART 14 has the same combination of BANK & PATCH number set in it, data pushed to part 1 will be overwritten with PART 14 data, since they share the same memory address.
In case of incident like above, you will see a warning dialog appearing. See image below.
PROGRAM INC / DEC BUTTONS (*1)
– [1] button will change to previous program.
+ [2] button will change to next program.
This will trigger MIDI Out message with appropriate program number based on the Program Number Display (*2) value. Each part has its own set of Program Change buttons.
See above how it will behave when Request Data on Program Change is toggled on / off.

microQxR User Manual – Program Change Buttons
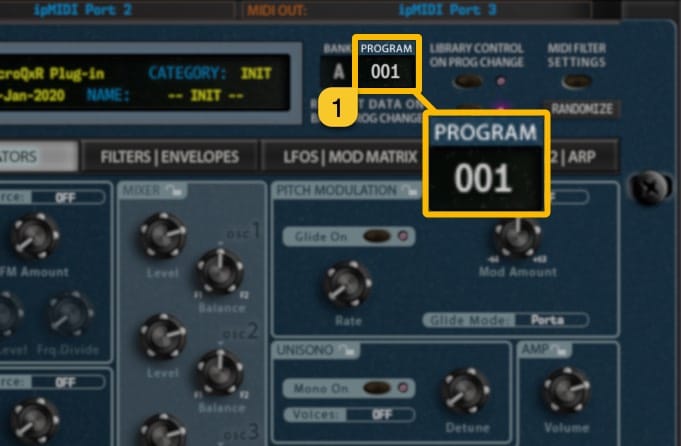
PROGRAM NUMBER DISPLAY / SELECTION MENU (*2)
Program Number Display [1] acts as a menu as well as a display to show the current Part Patch program number depending on the currently set mode. You can quickly navigate to different banks of programs without having to click INC / DEC buttons like crazy.
microQxR User Manual – Program Change Trigger
In default status, program popup menu will display program numbers in different banks of programs. See image below.

microQxR User Manual – Slot Program Menu without Lib Control
But things get exciting when you toggle on LIBRARY CONTROL ON PROG CHANGE [1] switch: You can now view currently active Program Bank program names being listed on the popup menu and browse them directly from the main UI!
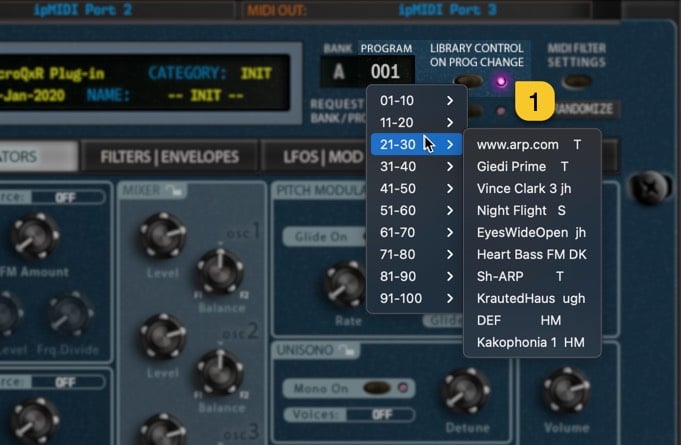
microQxR User Manual – Part Program Menu with Lib Control On
Check above for further details about the Library Control function.
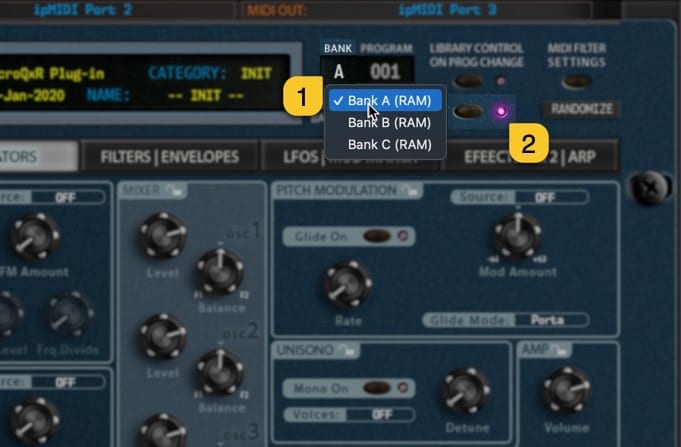
BANK NUMBER DISPLAY / SELECTION MENU (*3)
Bank Number Display [1] acts as a menu as well as a display to show the active Part Program bank number. You can navigate to different banks based on your selected microQ model. Request Data On Prog Change [2] is on!
microQxR User Manual – Part Bank Select
Like with Program Number Display, Bank Number Display [1] menu will behave completely different when LIBRARY CONTROL ON PROG CHANGE [2] is toggled on. You can now view all available Program Banks located in Patches folder.
microQxR User Manual – Part Bank Select Menu with Lib Control On
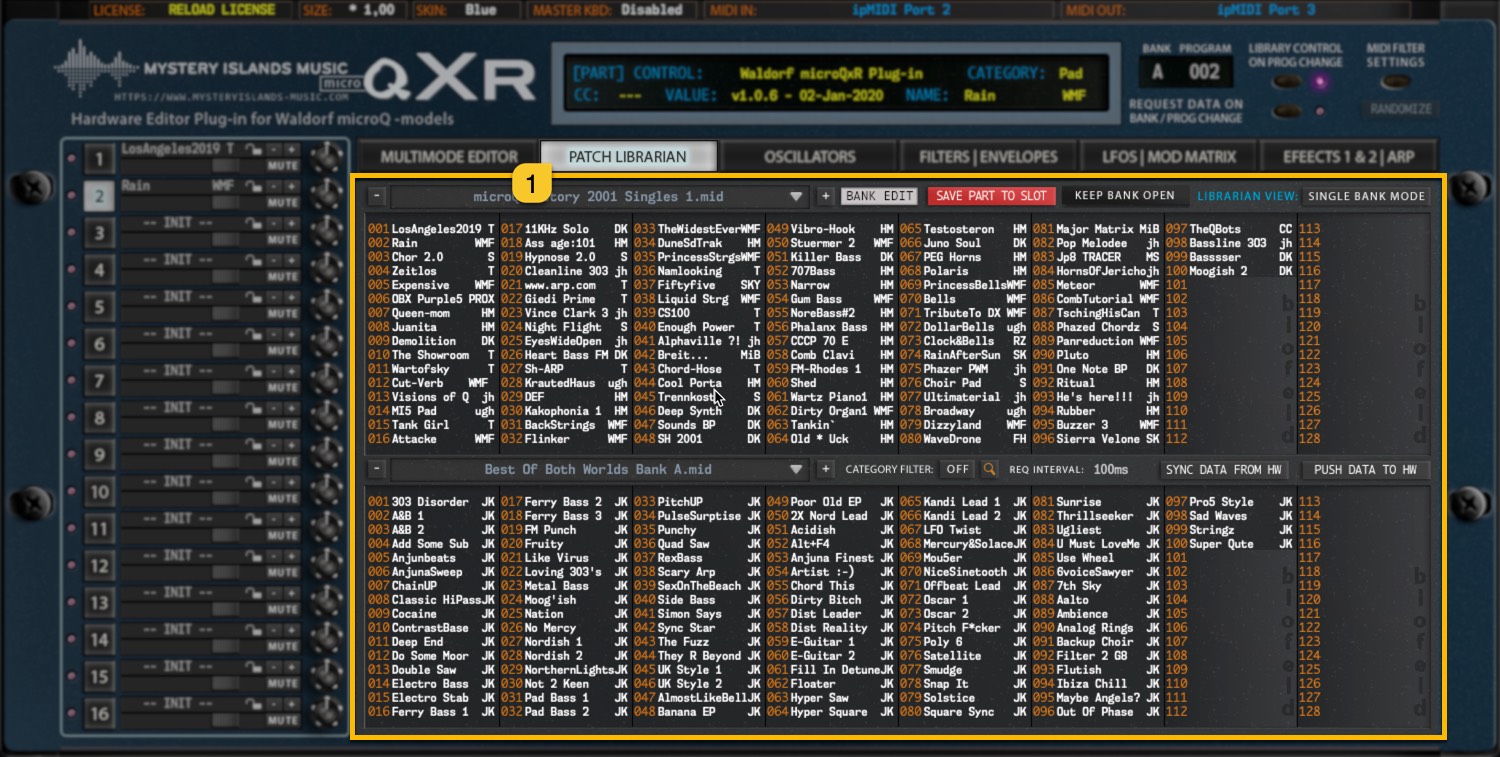
PATCH / MULTI LIBRARIAN
LIBRARIAN [1] tab allows you to send, request, store and manipulate your patch and multi banks.
Double click any item to send it to currently active part. Drag and drop patches from one slot to another and save your custom bank as you go. Rename patches directly in librarian view.
Read more about patch / multi librarian functions in its own section.
microQxR User Manual – Librarian
PATCH NAME DISPLAY
Patch Name Display [1] is individual per part. Rename part by clicking the patch name.

microQxR User Manual – Part Name
NOTE #1: Renaming single program from the “Control Display” does not change the name in the librarian. If you want to rename librarian items, check further down the manual for librarian functions.
MULTI NAME DISPLAY
Open Multimode Mixer [1] tab to see the Multi Name Display [2]. You can edit the multi name by clicking the name.
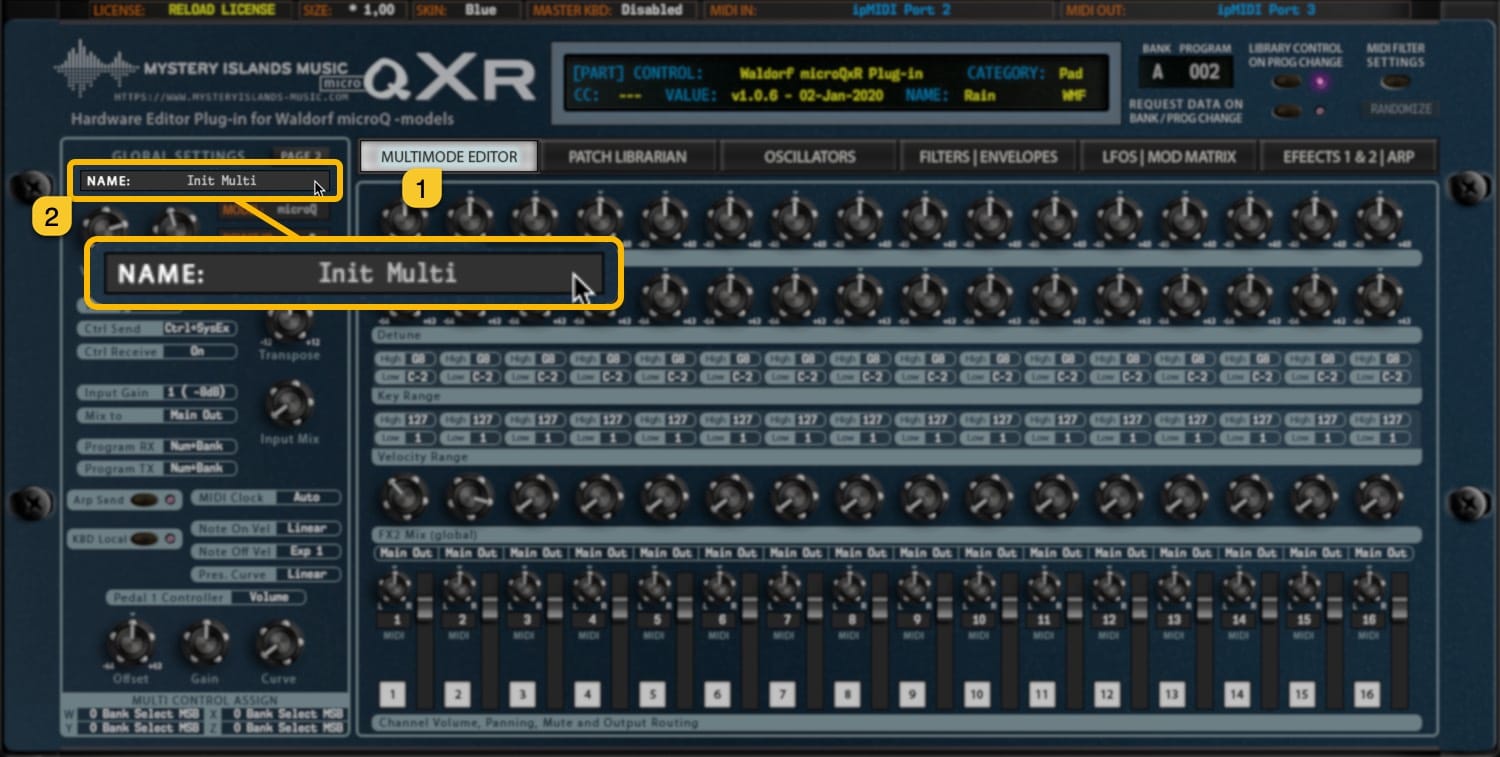
microQxR User Manual – Multi Name Display
NOTE #1: Renaming Multi from the “Control Display” does not change the name in the librarian. If you want to rename librarian items, check further down the manual for librarian functions.
TOTAL RECALL
This is one of the best features we can think about our plug-in, total recall. It does what it says: recalls your saved session data from the plug-in user interface to your synthesizer, without the need of doing it manually! It is all automated, if you have the same MIDI device hooked into your setup as it was when saving the project.
It there are any trouble with the total recall, please check below for further instructions how to Push Data to HW manually.
Possible reasons for failure of total recall are:
1) Your MIDI interface is no longer in the system, or it is hooked into a different USB port.
2) Plug-in update does not fully support the previous version data package. There is a work-around for that as well, so be sure to check out our knowledge base for more details about that.
ABORT PROCESS
Cancel current request / writing task by clicking ABORT PROCESS [1] button, if process is taking too long, or if you get constant Device ID checks while any data request is active.
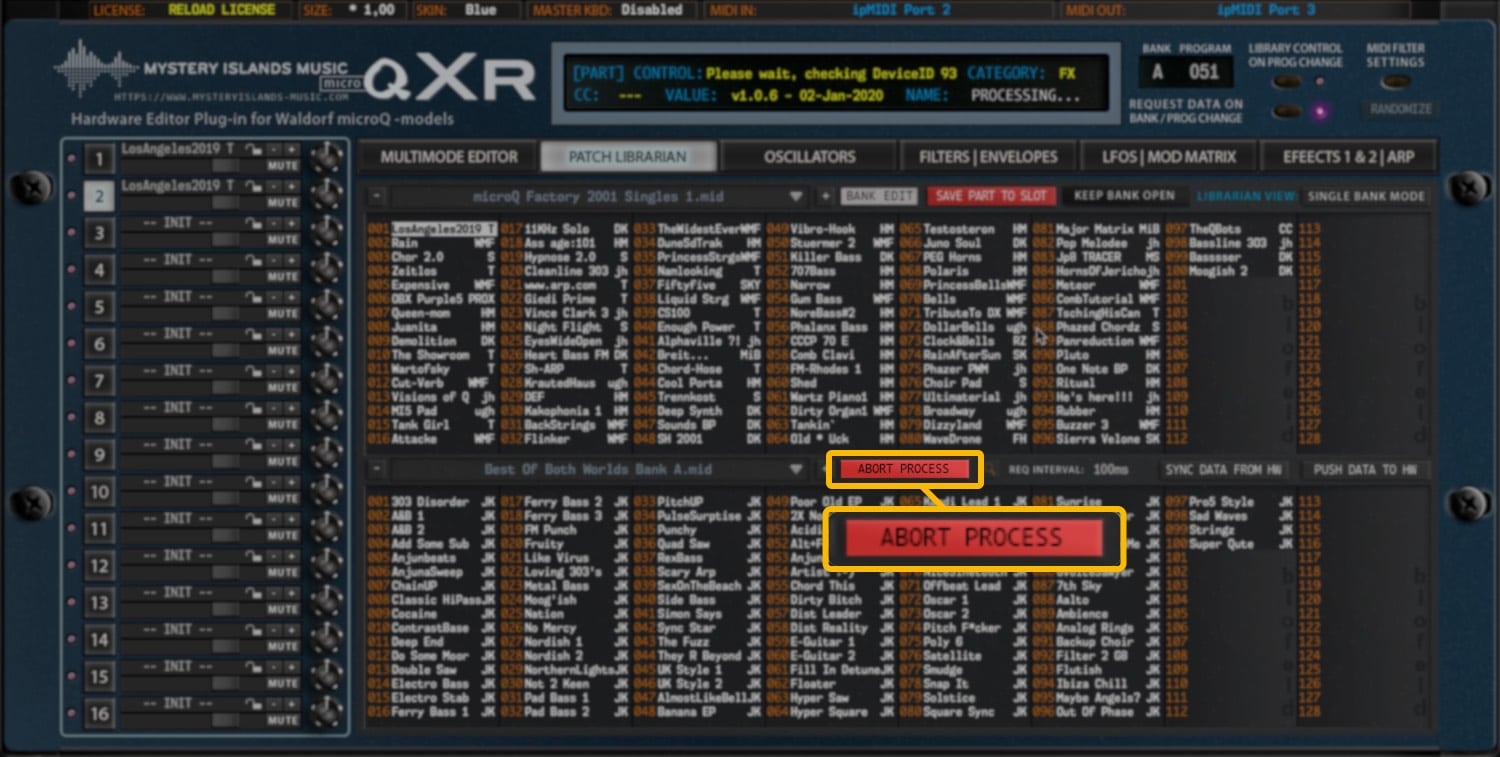
microQxR User Manual – Abort Process in Librarian View
Abort Process button appears next to plug-in control display when Librarian tab is not open.
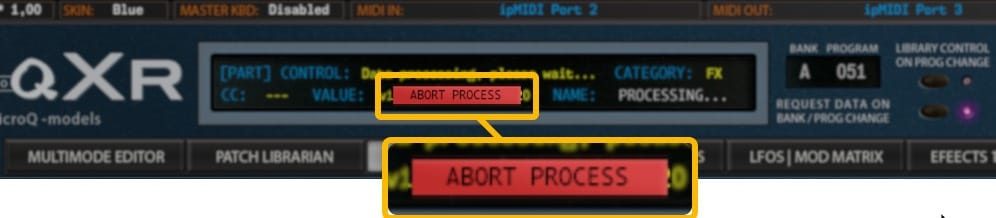
microQxR User Manual – Abort Process in Main View
Abort Process button will disappear after plug-in has scanned Device IDs and if the request process has timed out.
Loading patches between different models?
You can load patches and multi files created on Q-family synthesizers. Q banks work as well as Blofeld banks. Keep in mind that Blofeld and Q banks are converted with librarian and they might miss some features the microQ has.