
Everything you need to know about our product install, setup steps, configuration and usage of various features
Global MIDI Channel and MODEL
Before we kick off with MIDI setup, set the Global MIDI Channel [1] to 16, if you haven’t done so already. Next, choose your Model [2] from the menu.
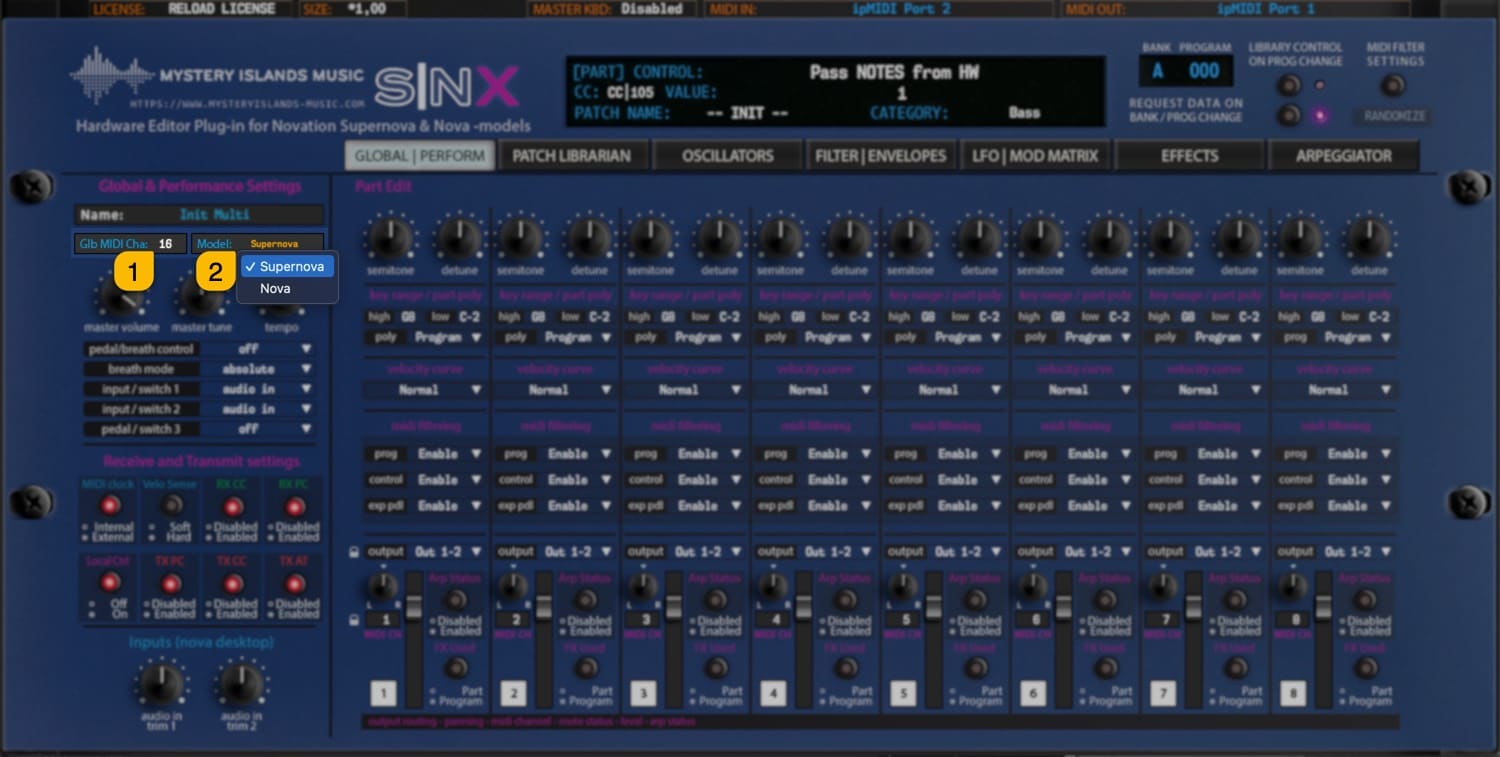
SNX User Manual – Set Global Channel and select Model
Selecting MIDI In and MIDI Out
First choose MIDI IN [1], where your Nova/Supernova MIDI Out is connected in at. Then choose MIDI OUT [2] which will send data to your Nova/Supernova MIDI Input.

SNX User Manual – Plug-in MIDI Ports
After setting MIDI OUT, plug-in will scan for the hardware. Plug-in Control Display will say “Plug-in is ready to go!”, if SysEx data is valid and ports are configured properly.
If something in your settings is wrong, Plug-in Control Display [1] will inform you that the process has timed out or no response from hardware!

SNX User Manual – No Response
Synchronize DATA from your synthesizer to plug-in
Open LIBRARIAN [1] window and click SYNC DATA FROM HW [2] button to request current data to the plug-in user interface.
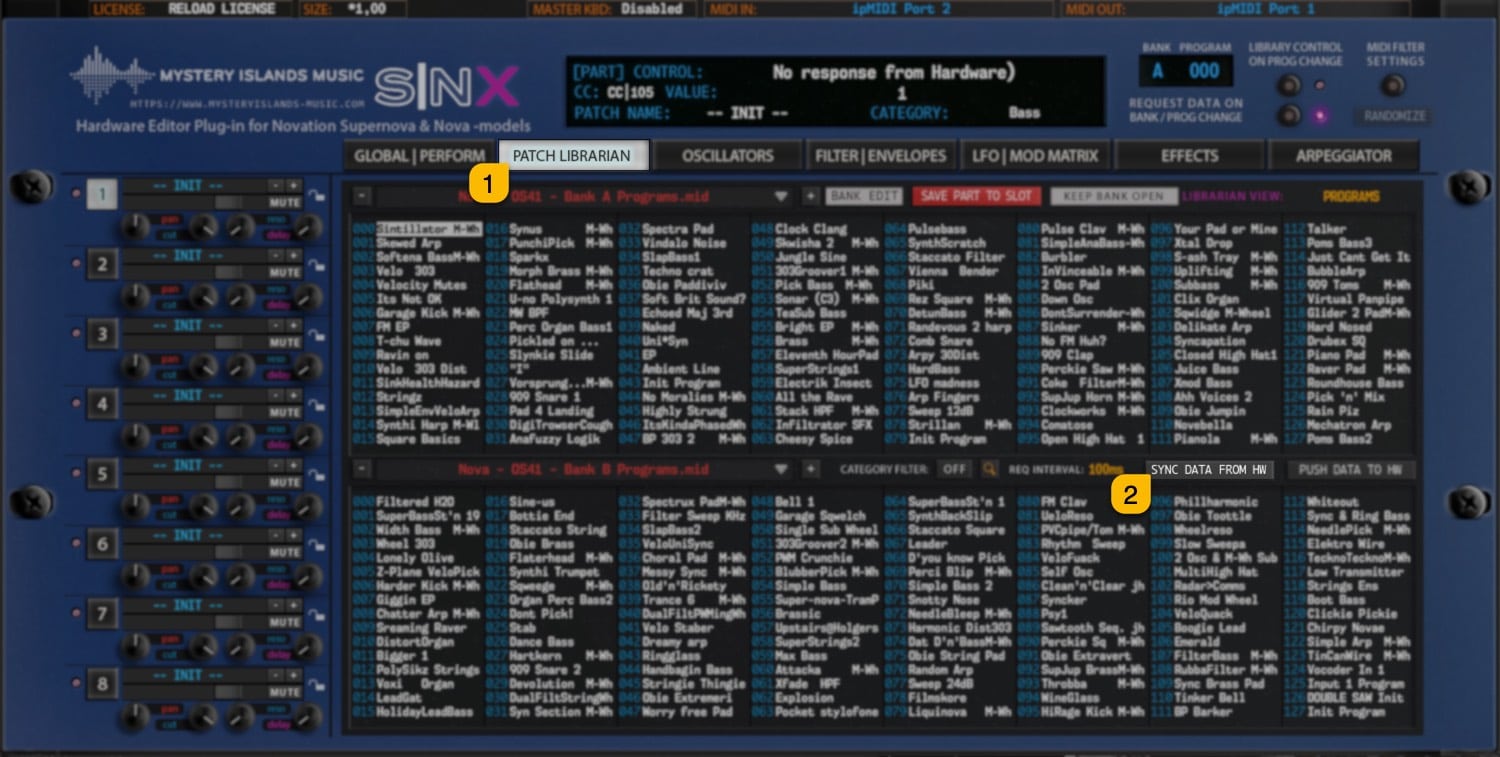
SNX User Manual – Sync Data From HW
This command will request Multi data, which includes individual parts, and it will also request global data from the Nova/Supernova to the user interface.
Once the request command is completed, plug-in control display will indicate “Data request completed!”.
TIP #1: Be patient and do not disturb the data flow with any knob movements or so. This will ensure the data packages are being sent and received as expected and you are not going to receive any SysEx error messages!
Playing Parts individually (Multiple SuperNova’s in 1 huh!?)
In case you did not know, Nova models have 6 and Supernova models have 8 individual layers (also referred to as “Parts”), which can be triggered separately. This is quite easy thing to setup, and we’ve got this covered in the manual too.
Playing it multitimbral
Open Multimode Mixer [1] and set each of the parts MIDI channel [2] to different value. Note that MIDI channels can be locked to a certain value with Lock [3] button so that they won’t change if you change your performance.
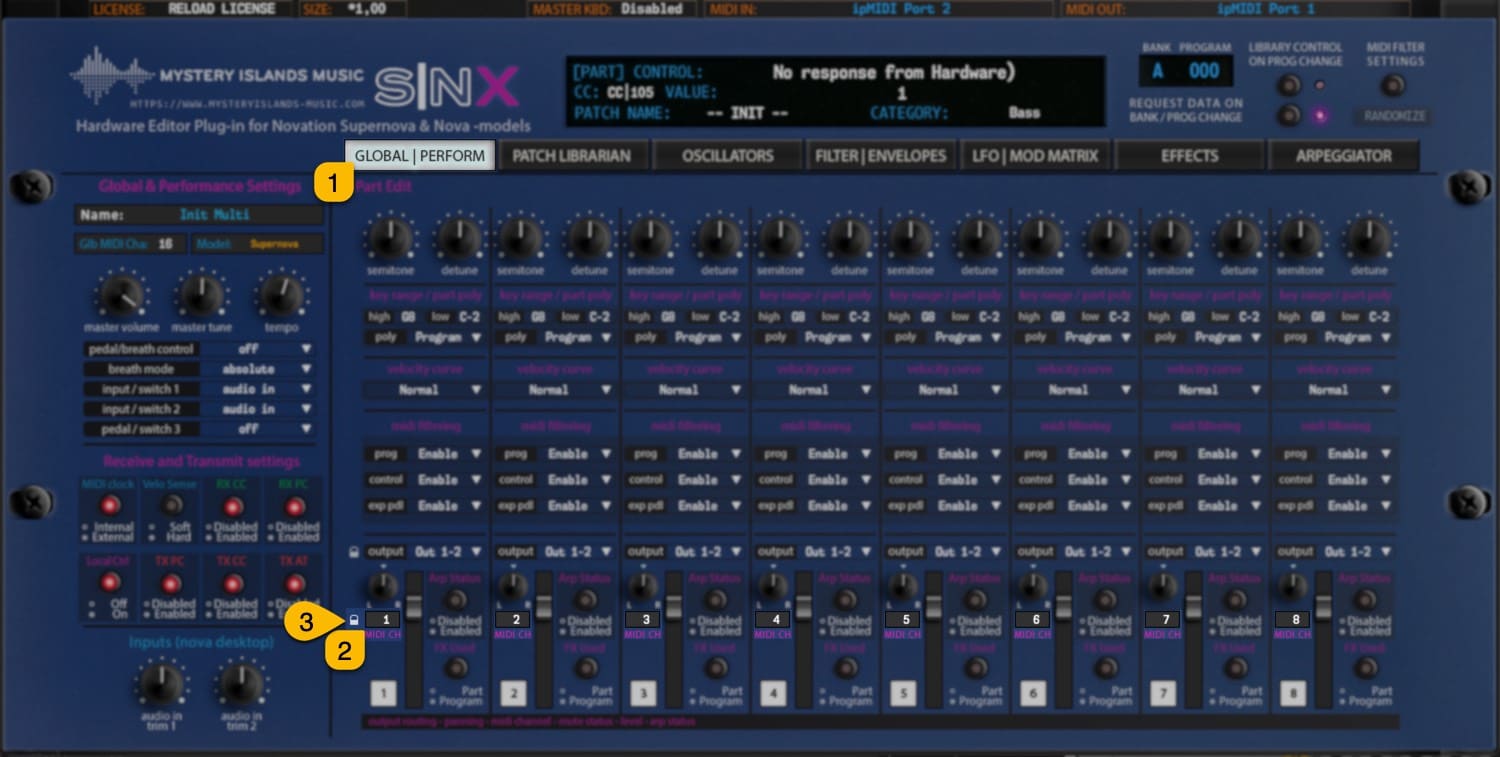
SNX User Manual – Set Part MIDI Channels
Part 1 = Channel 1.
Part 2 = Channel 2.
Part 3 = Channel 3.
…
Part 8 = Channel 8
- See further instructions below for each OS…
[mac]: … Add 6/8empty MIDI tracks to your DAW and point the MIDI output directly to your Nova/Supernova MIDI port, each with corresponding channel mentioned above!
NOTE: If you play notes / sequence blocks directly through the plug-in, there is no delay compensation applied.
[pc]: … Add 6/8 empty MIDI tracks to your DAW and point them to virtual out port i.e. Nova/Supernova vMIDI Out, each with corresponding channel mentioned above!
Now if you choose MIDI track 1 (Nova/Supernova channel 1) from your DAW and play some notes, you will hear the patch from Part 1 being played.
Now choose MIDI track 2 (Nova/Supernova channel 2) from your DAW and when you play it, you will hear the patch from Part 2 being played! You get the idea.
DAW Config Scenario
Below you can see how SNX Editor Plug-in is on Instrument Track [1] and how MIDI tracks 1-8 [2] are routed in Studio One to play each part separately directly to hardware MIDI out ports. MIDI track 1 points to Nova/Supernova part 1, etc.
Audio from Nova/Supernova is routed to my Apollo Quad inputs [3] and monitoring is active on Studio One to hear the synth when played!
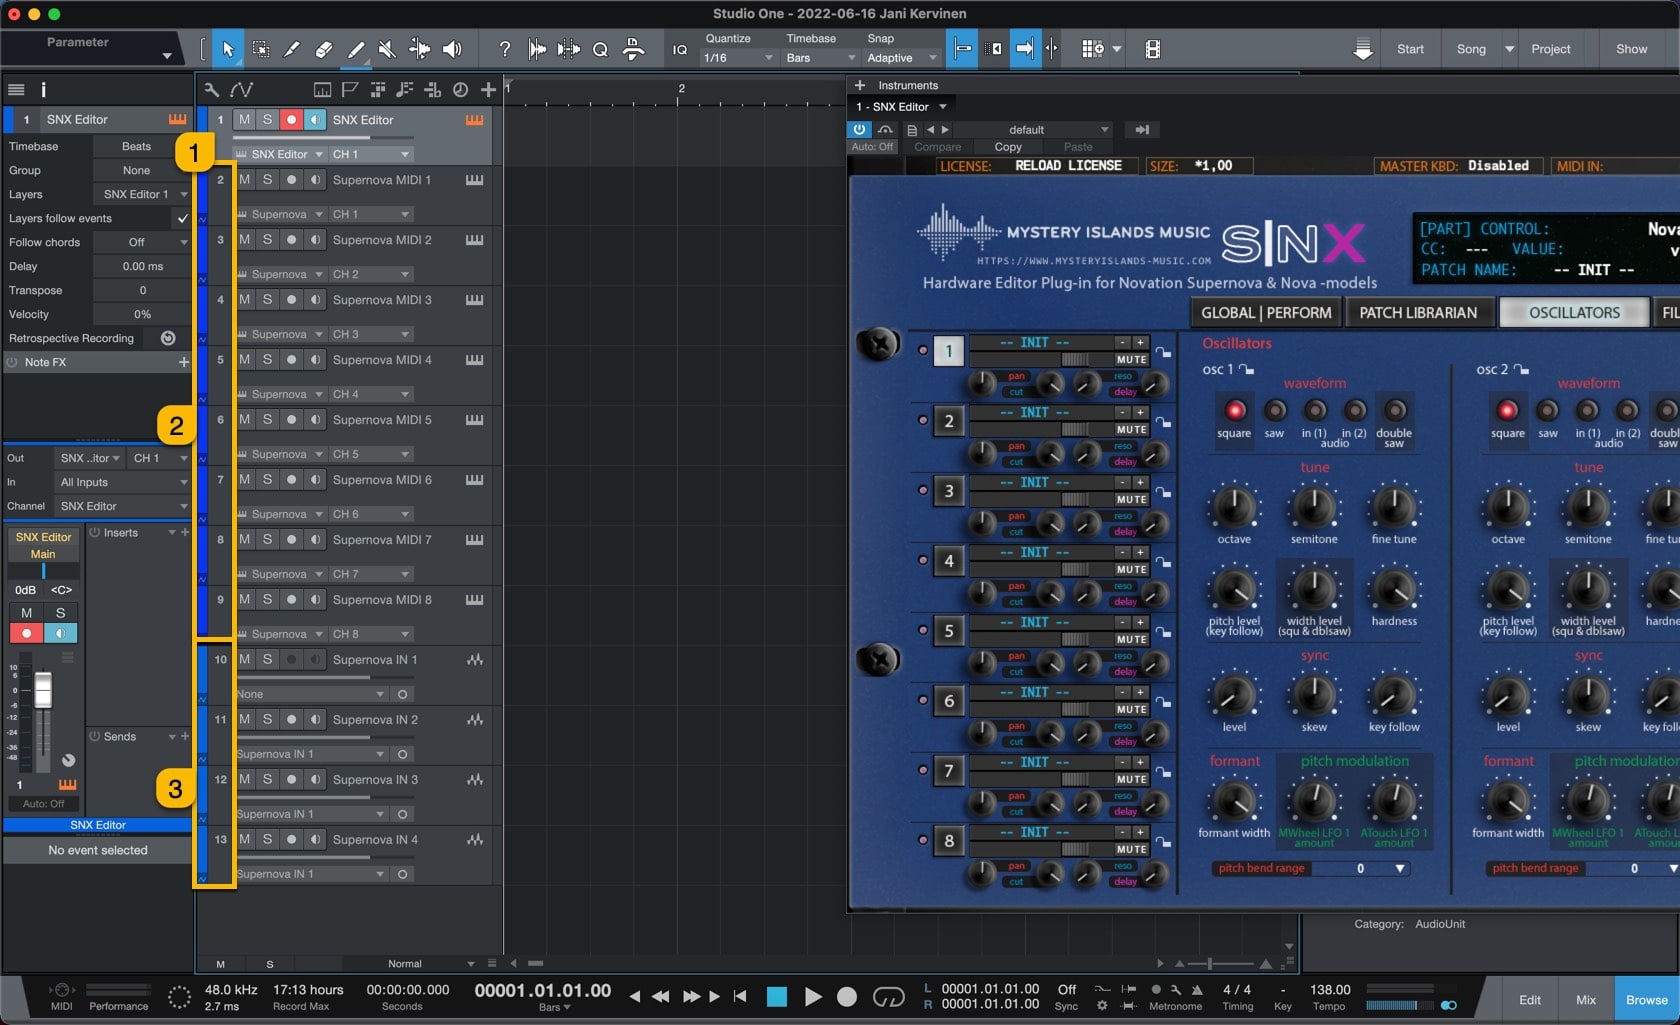
SNX User Manual – Studio One Setup
Taking things even further
Most synths with Multitimbral functions come with individual outputs. On SNX Editor Multimode mixer view you can choose outputs per part. With Nova, you can assign up-to 6 mono or 3 stereo outputs to your input device and if you have Supernova, you can have up-to 8 mono or 4 stereo outputs to your input device for further mix control.
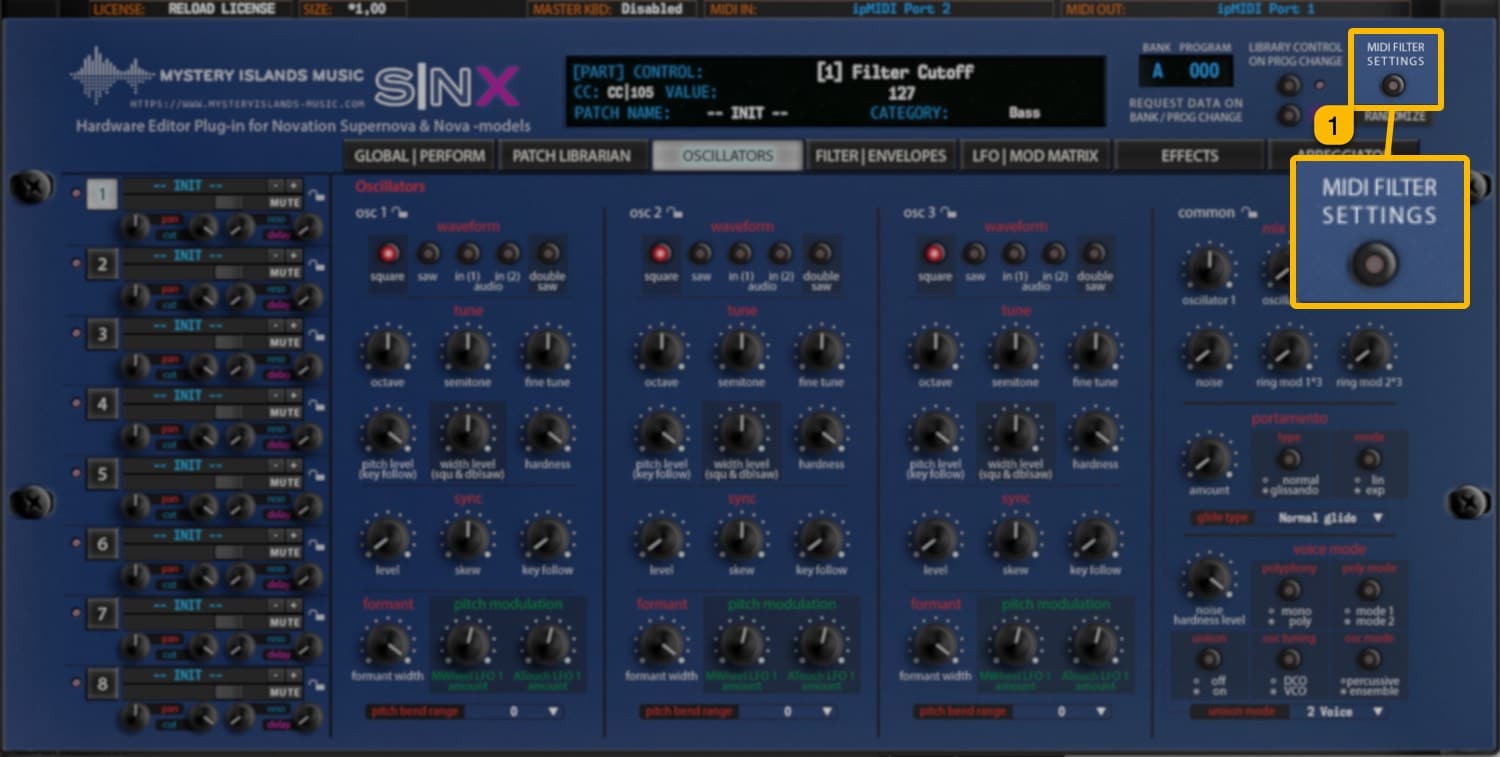
ADVANCED MIDI SETTINGS
You can control which messages gets processed and which do not. Open Advanced MIDI Settings window by clicking MIDI FILTER SETTINGS [1] button (top right corner) in the plug-in user interface.
SNX User Manual – Advanced MIDI Settings switch
You can block messages being processed from DAW or from the Synthesizer itself. Settings seen in the image below are default values.
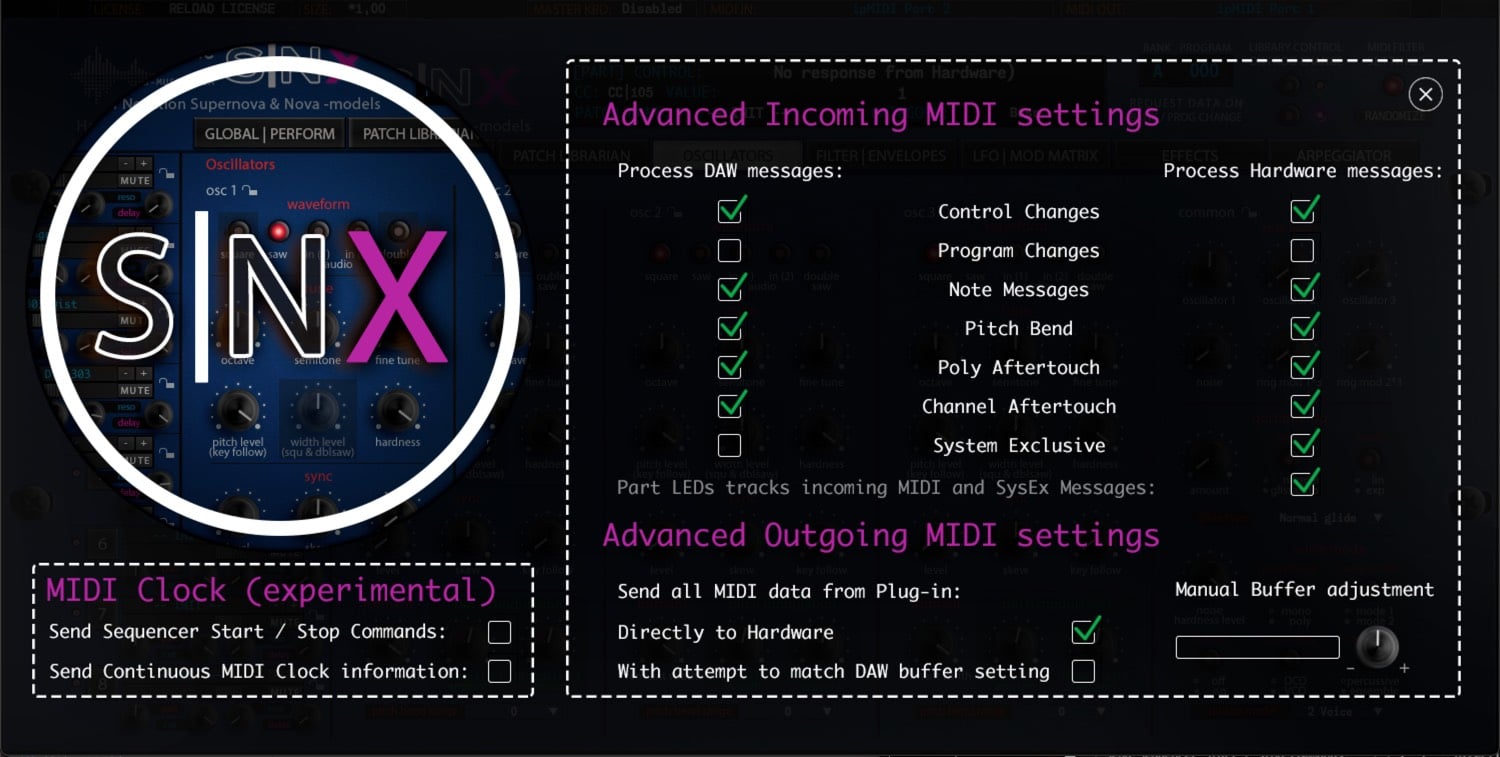
SNX User Manual – Advanced MIDI Settings view
Advanced Incoming MIDI settings
Allow certain MIDI messages to pass into plug-in processor within Incoming MIDI setting section. Green check mark means it will be processed and when there is no check mark, it will be bypassed. Process DAW messages [1] and Process Hardware messages [2] has their own set of data “filters” [3-9] available as follows:
- [3] Control Changes
- [4] Program Changes
- [5] Note Messages
- [6] Pitch Bend
- [7] Poly Aftertouch
- [8] Channel Aftertouch
- [9] System Exclusive
- [10] Part LEDs tracks incoming MIDI and SysEx messages
When green check mark is on, incoming data from DAW and Hardware ports is monitored and LED indicator will flash when data is coming in. When check mark is off, outgoing data is being monitored.
Check LEDs Off function to disable.
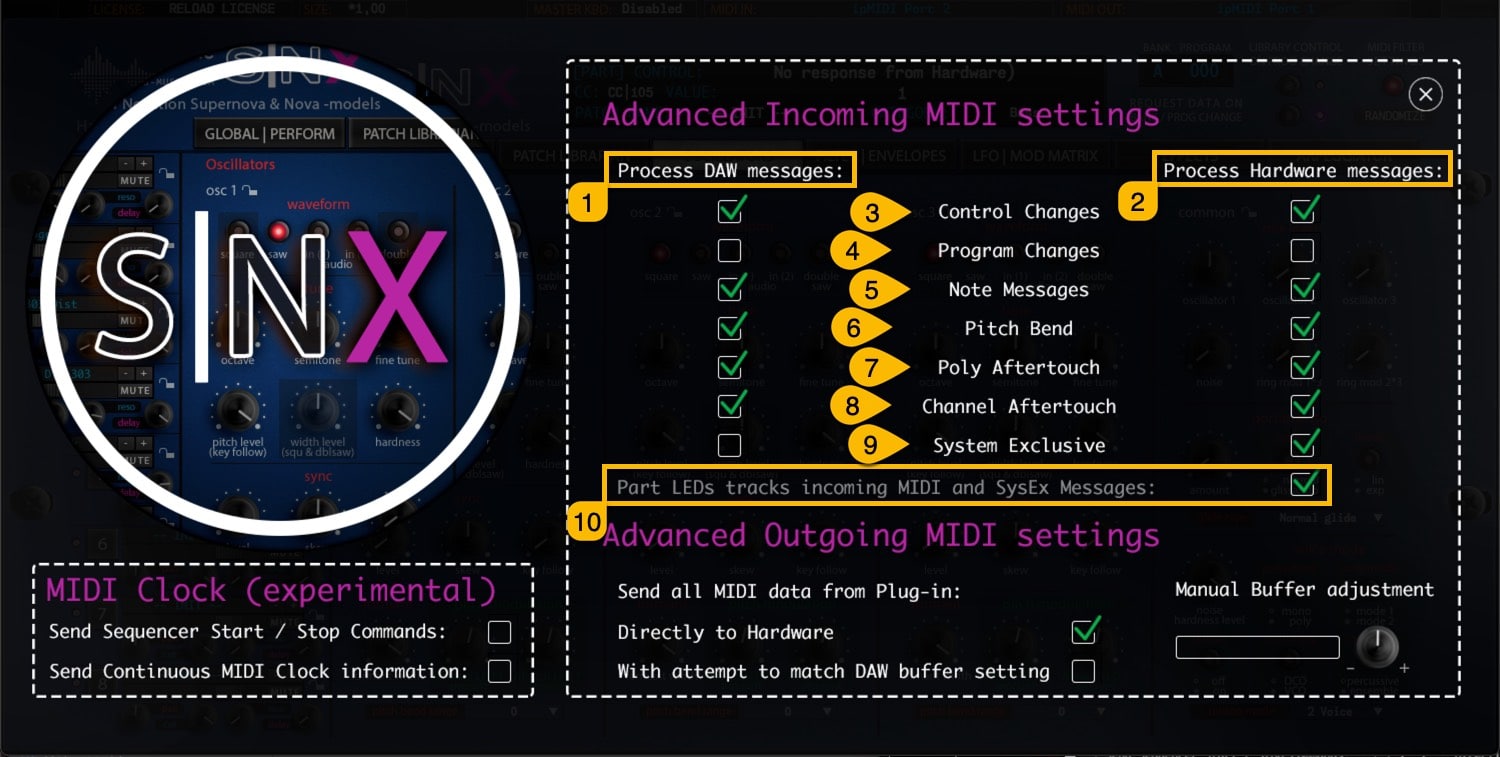
SNX User Manual – Advanced Incoming MIDI Settings
Note #1: If you disable Control Changes and System Exclusive messages from Hardware port, your plug-in might stop responding to hardware knob movements completely.
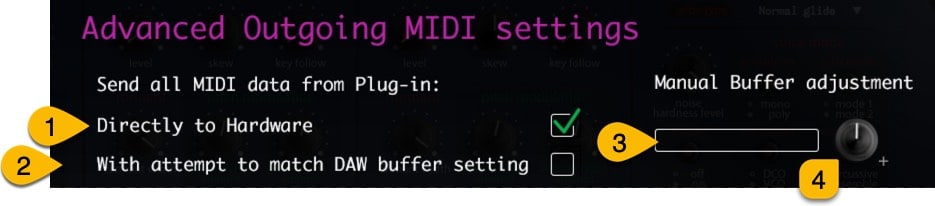
Advanced Outgoing MIDI settings
In Outgoing MIDI settings section, you can adjust few options to fine tune the plug-in behavior.
Send all MIDI data from Plug-in:
- Directly to Hardware [1] = Send all MIDI related command directly to hardware from the MIDI output port.
- With attempt to match DAW buffer setting [2] = experimental attempt to sync with DAW time.
- Manual Buffer [3] = Displays the DAW buffer size – Use the -/+ knob [4] to fine tune.
SNX User Manual – Advanced Outgoing MIDI Settings
MIDI Clock (experimental)
We are experimenting to add general MIDI clock to the plug-in by standard feature. This might crash on some systems on a specific setups, so be cautious when using it.
Check Send Sequencer Start / Stop Commands [1] if you want to send MTC start and stop commands.
Check Send Continuous MIDI Clock information [2] if you want to sync MIDI clocked Effects and Arpeggiator to plug-in tempo information.
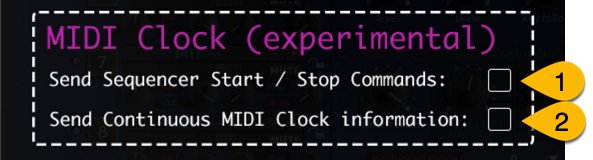
SNX User Manual – Experimental MIDI Clock
Note #1: The clock with the plug-in might be inaccurate, so if you have another solution to sync clock information from your DAW to the hardware, use that instead.