
Configuration articles and guides for software and hardware. These settings are mandatory unless otherwise stated
In a hurry? Download User Guide for Bitwig Studio to read offline
v1.0.0 – 2020-March-14
In this little Bitwig Studio User Guide you will find the instructions to get our plug-in to work with Bitwig Studio with ease. This is universal tutorial for all of our plug-in, but we are using our Roland JP-80×0 Editor in this guide.
Checkout the Editor user manual prior to this guide, so you have the knowledge to setup the Editor properly.
Also, as we are not Bitwig Studio experts, we engourage you to read the Studio manual in order to fully understand your DAW.
We hope you have taken all the necessary precautions prior to using our product, like making a full backup of your synthesizer memory.
DISCLAIMER
Our company & plug-in has nothing to do with Bitwig company, so please don’t bug them if you encounter issues with the Editor – open a support ticket in your account page in such case. You can find support details at the end of this document.
Support is free to anyone who has bought the license from our store
Bitwig Studio
Preferences
Open your DAW and enter Preferences. We will make sure that MIDI ports are disabled for those ports, where your synthesizer is connected at. This will ensure that your DAW won’t crash and we won’t be getting double data in to the DAW processing loop.
Click Bitwig logo [1] -> Settings [2] -> Controllers
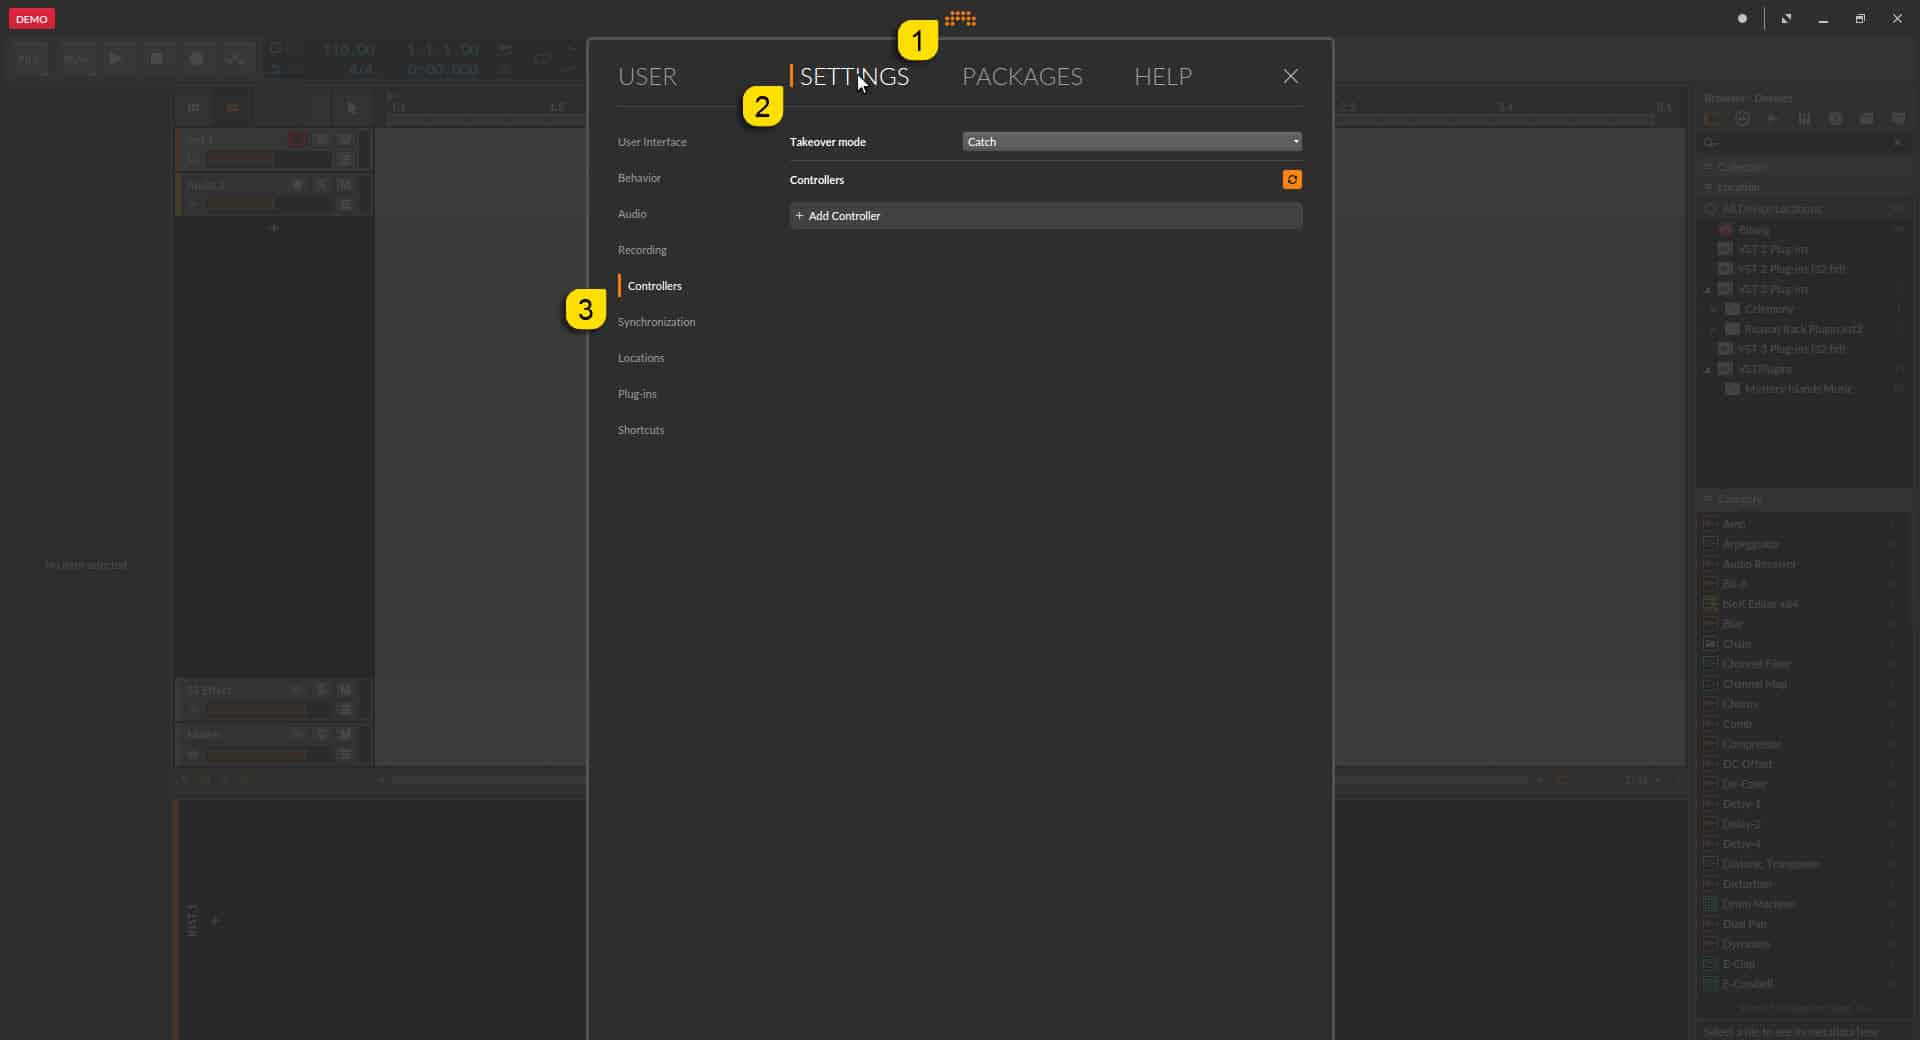
Bitwig Studio Config – Open Settings
Click to Add Controller [1], set type to MIDI Keyboard [2] and choose Add [3].

Bitwig Studio Config – Add Keyboard as a Controller
Set MIDI input port [1] to JP-8000 vMIDI In [2] which we have created in our Setting MIDI Devices guide.
macOS users can select the physical MIDI port instead.

Bitwig Studio Config – Add Virtual Port as a Controller (Windows)
Click Syncronization [1] tab and set MIDI clock to JP-8000 vMIDI Out [2] port if you wish to sync the synthesizer delay etc. to the DAW tempo clock.
macOS users can set the physical MIDI port instead.

Bitwig Studio Config – Send clock to Virtual Port on Windows
NOTE #1: Check our support site for additional guides like Setting MIDI Devices to learn how we added JP-8000 vMIDI In and JP-8000 vMIDI Out ports in the DAW.
You can adapt the settings to your Hardware!
Insert the plug-in
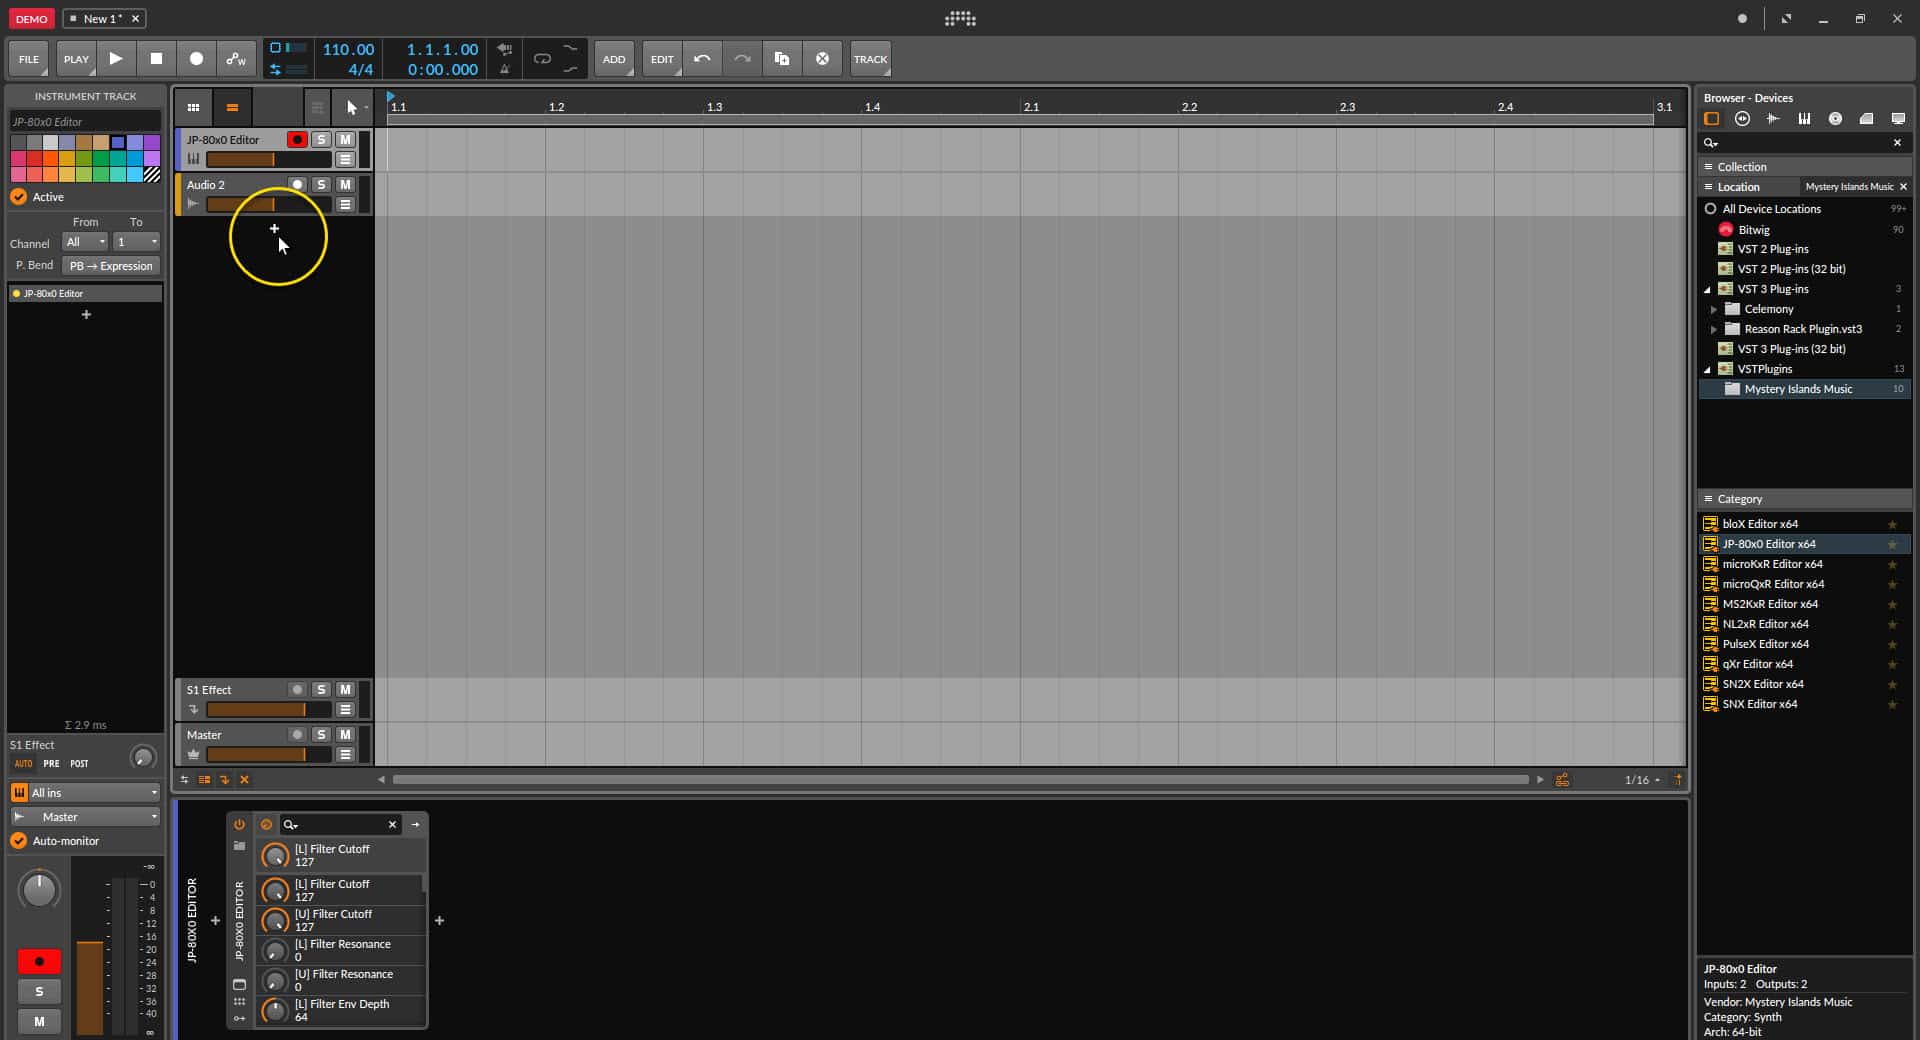
Drag’n’drop the plug-in from the Devices Browser window to a instrument track.
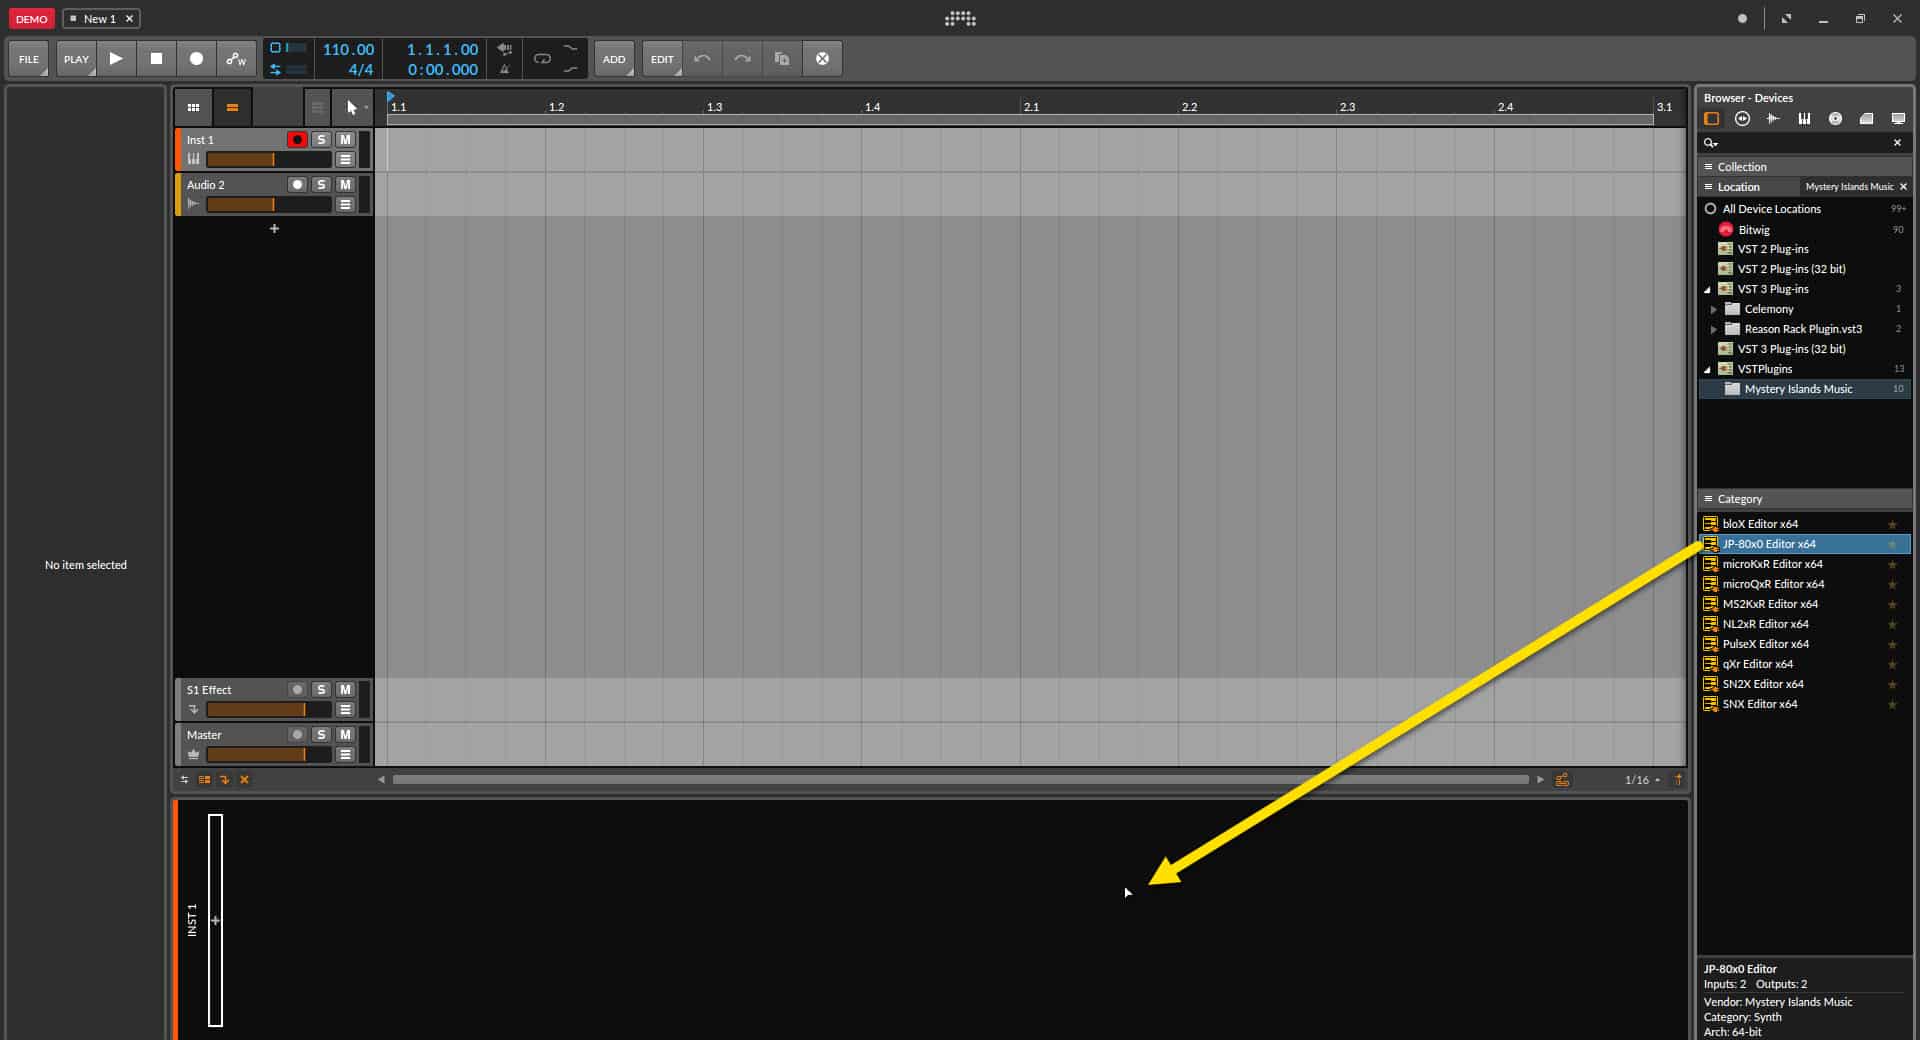
Bitwig Studio Config – Drag the plug-in to Arrangement
Plug-in window will now appear.
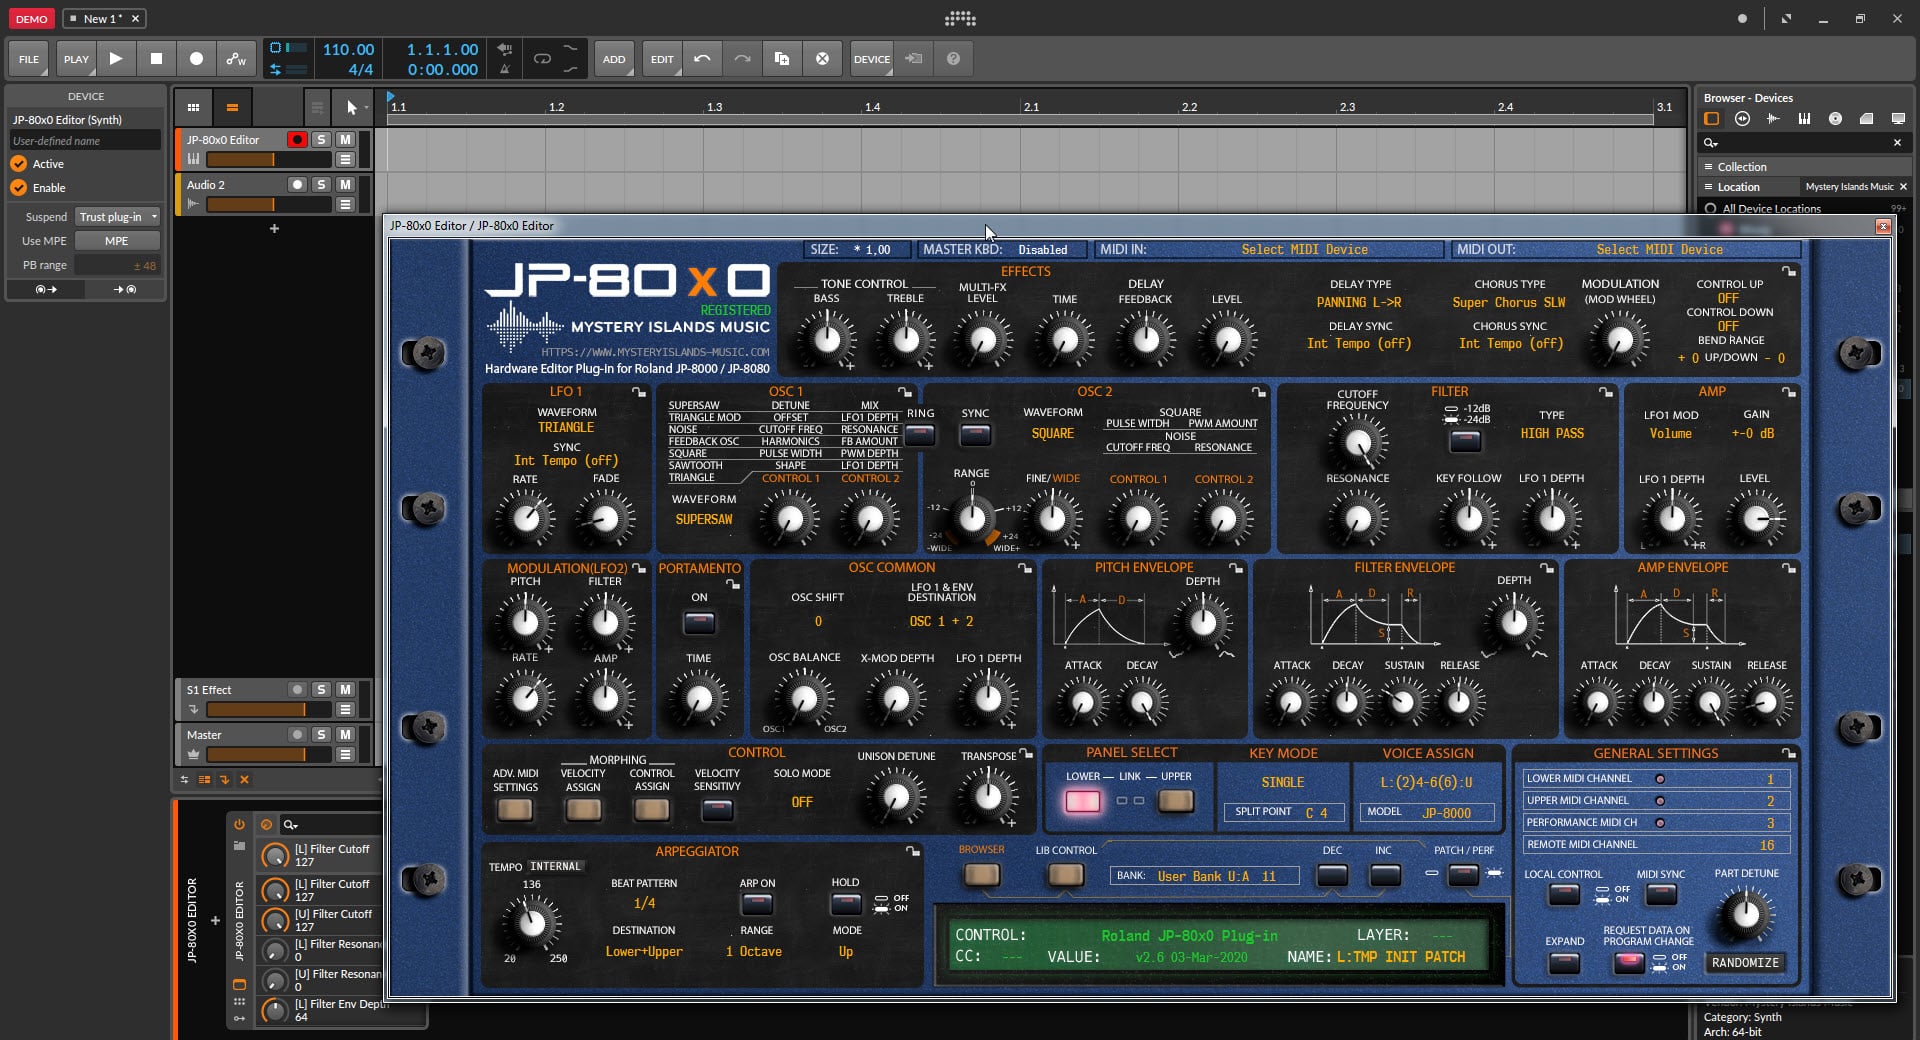
Bitwig Studio Config – Plug-in Window will Appear
MIDI IN / MIDI OUT
Now we can select the Physical MIDI input port which receives MIDI data from your synthesizer.
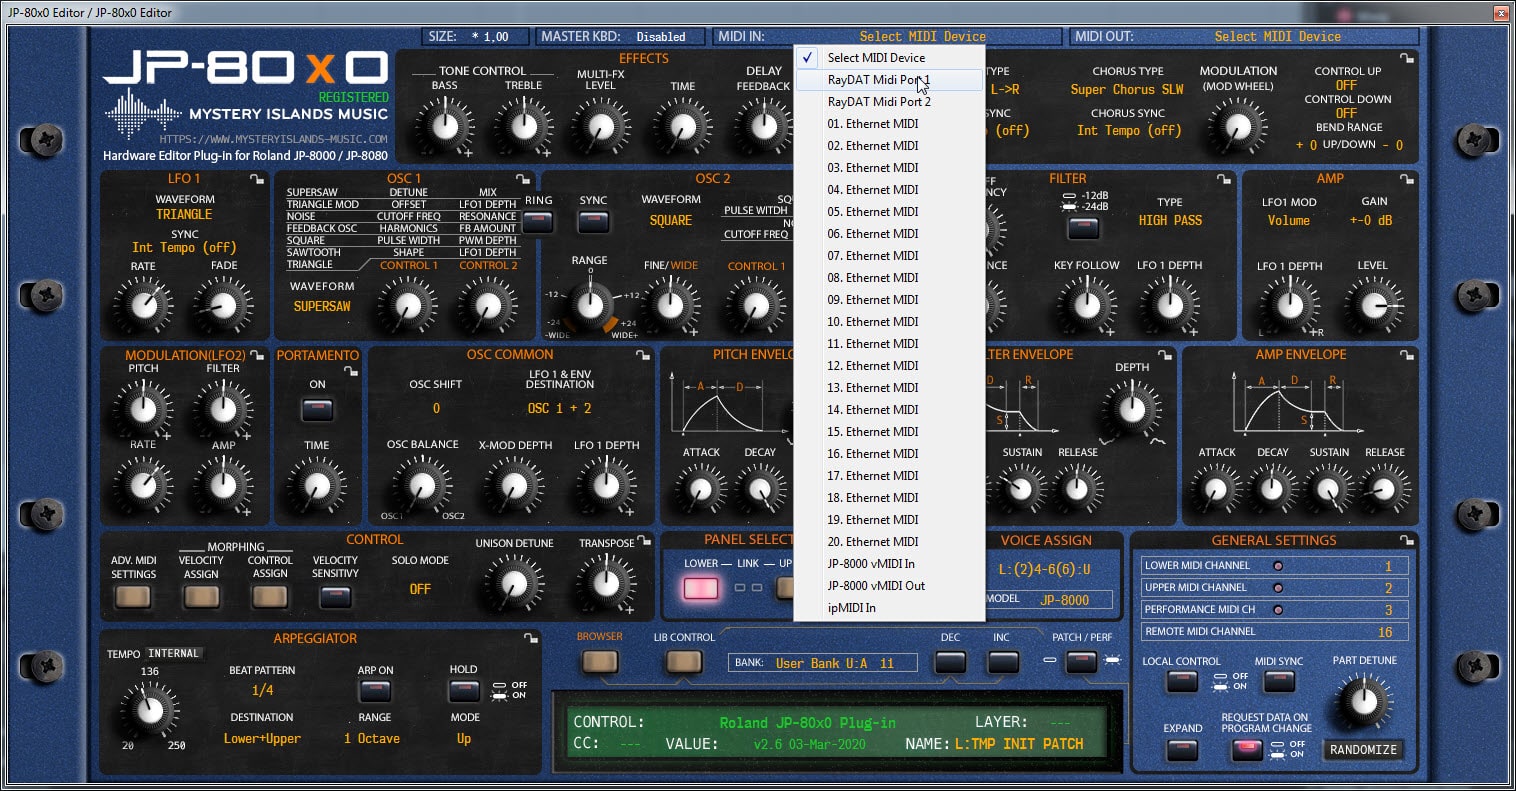
Bitwig Studio Config – Assign MIDI Input
And then we choose the Physical MIDI Out port which sends data to the synthesizer MIDI input.
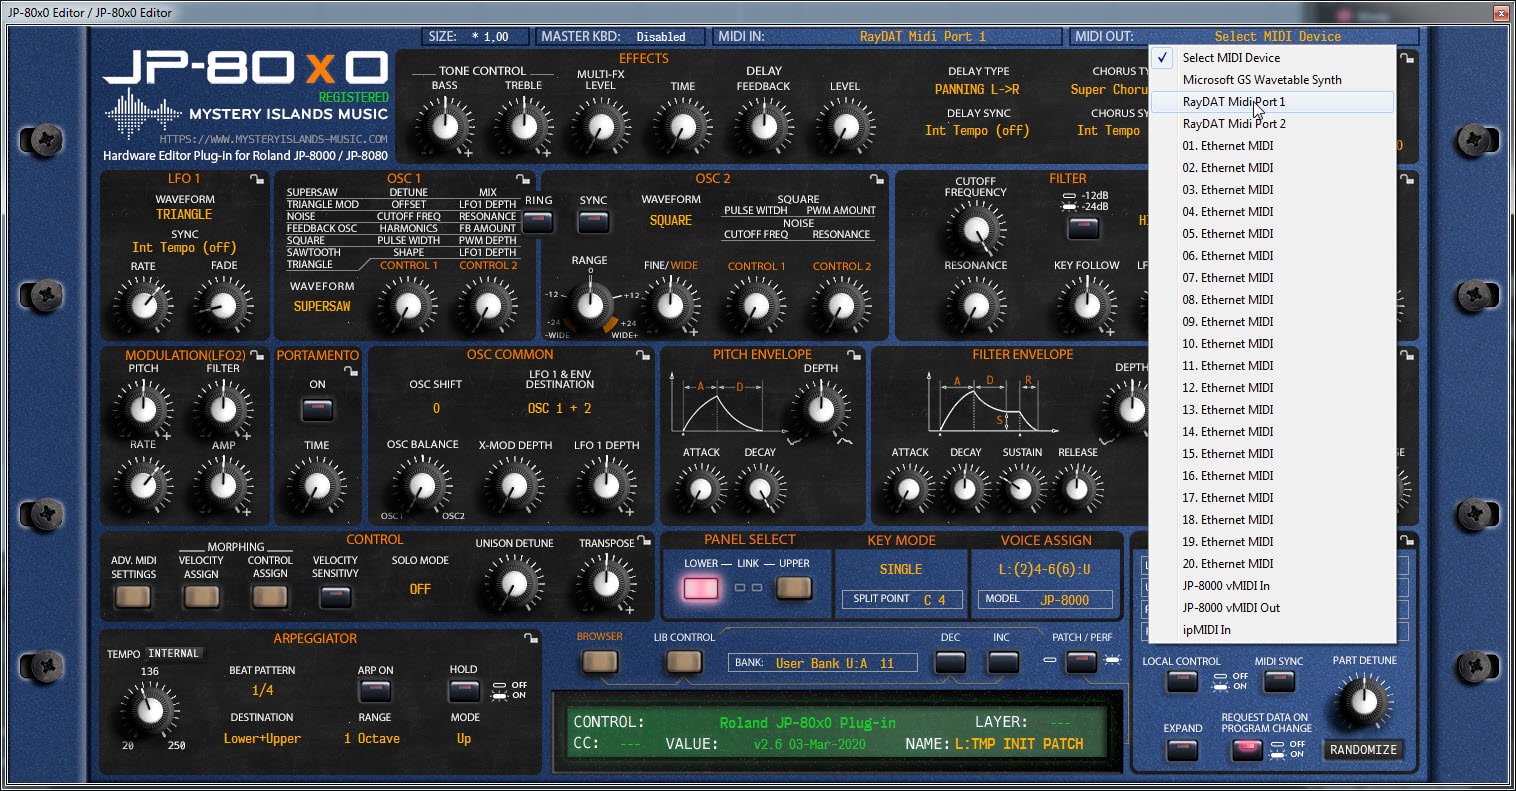
Bitwig Studio Config – Assign MIDI Output
Plug-in will now attempt to establish connection with the synthesizer, so it might take some time if your settings are not right or if you chose a wrong MIDI port by mistake. You should see plug-in saying PROCESSING… somewhere in the plug-in interface and also ABORT PROCESS button will appear.

Bitwig Studio Config – Editor Attempts to connect
If all of the settings are correct, you will see “Plug-in is ready to go!” [1] message in the plug-in display.

Bitwig Studio Config – Connection Established
If something is wrong with your settings, plug-in will say “No response from JP!” [1] and that indicates something is wrong with your synth settings, MIDI device or Studio One Preferences.

Bitwig Studio Config – Failed Connection
Once the connection is in, you should sync the data with your hardware. Usually this function can be ran from the patch librarian tab / page of the plug-in & “Sync Data From HW” button. Check the plug-in user manual to learn more.
We can now close the plug-in window and move on.
Note #1: Check troubleshooting from the Editor, DAW or synthesizer manual if you can not establish connection. You can also seek help from our support site if you can’t find out what is causing error in your setup.
Assign MIDI tracks to Bitwig Studio arrangement
Now, in order to send MIDI notes to the synthesizer, we need to have MIDI tracks in the DAW.
Click the “+” icon in the track list window to show the menu.
Bitwig Studio Config – Add New Tracks to Arrangement
Choose Bitwig [1] -> Hardware [2] -> HW Instrument [3].
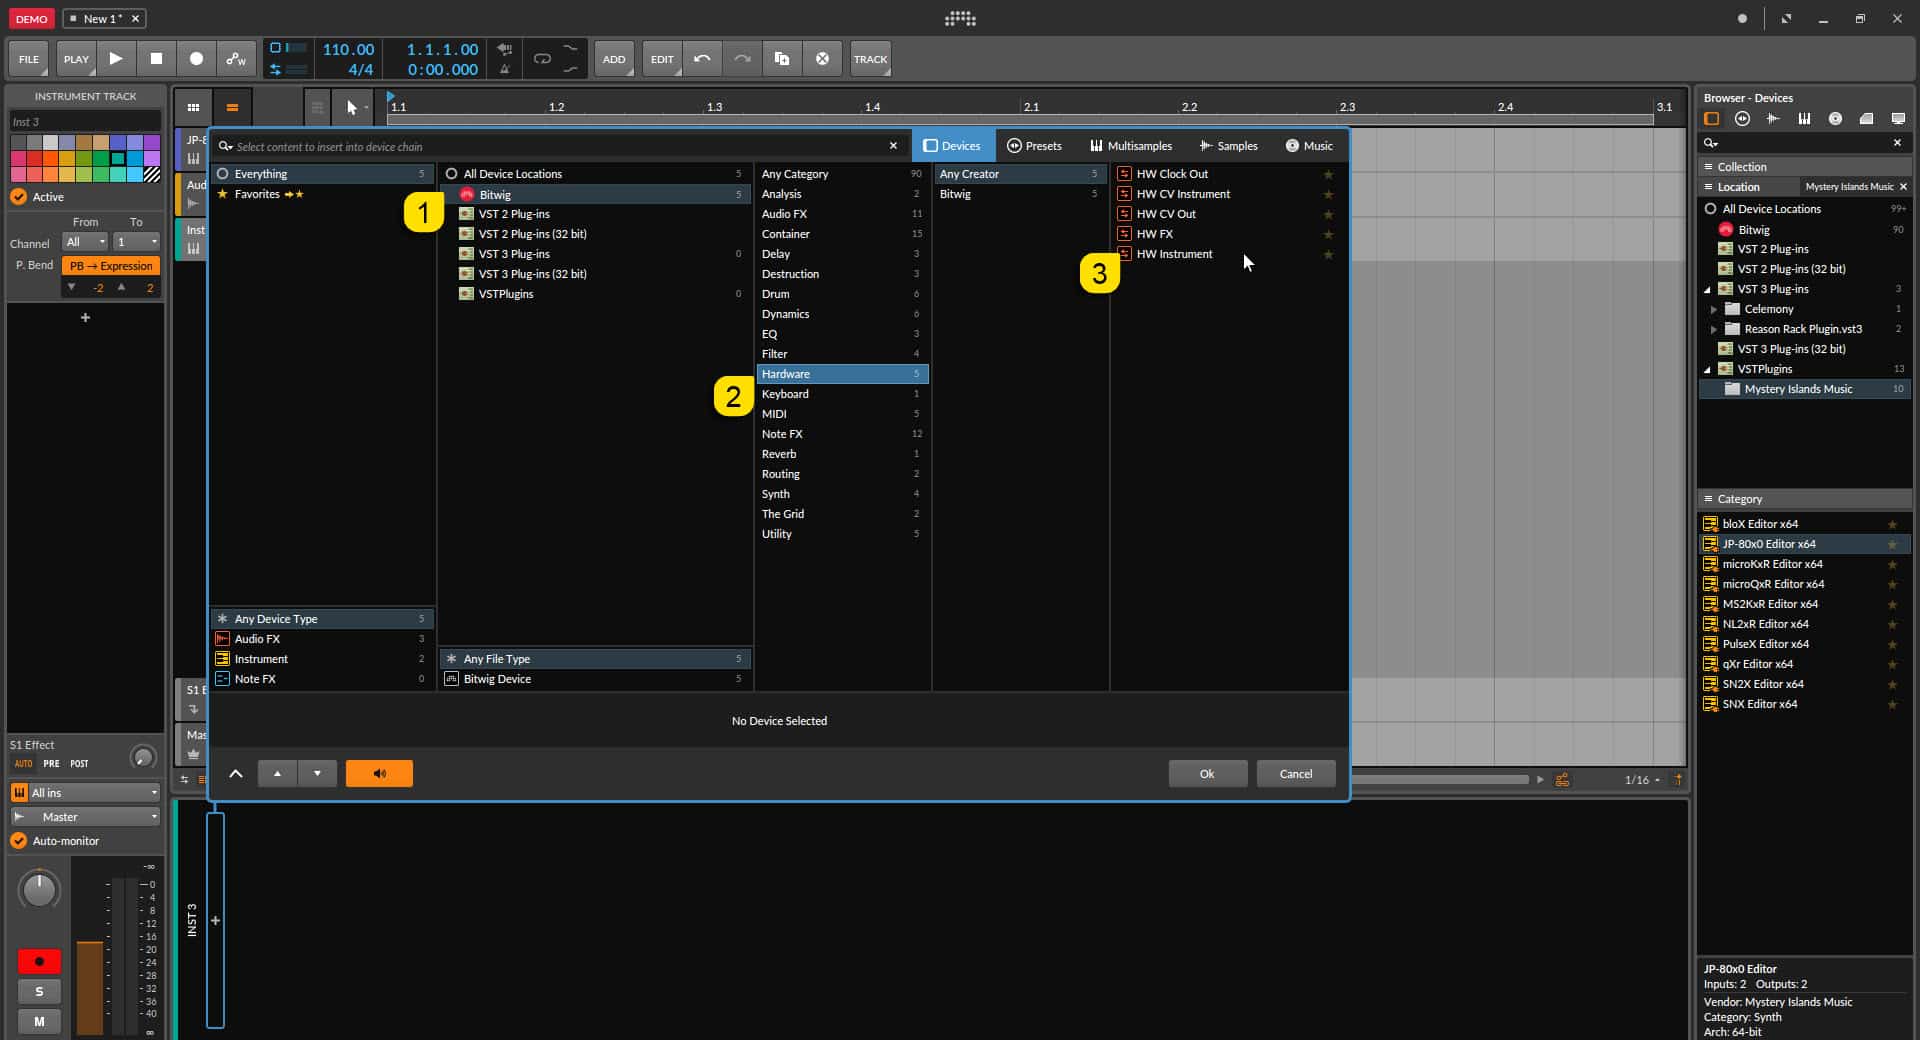
Bitwig Studio Config – Choose Track Types
Assign MIDI Out port [1] where your synthesizer is connected. If you use Windows and you’ve setup vMIDI Out port, choose that instead of physical MIDI port. See image below.
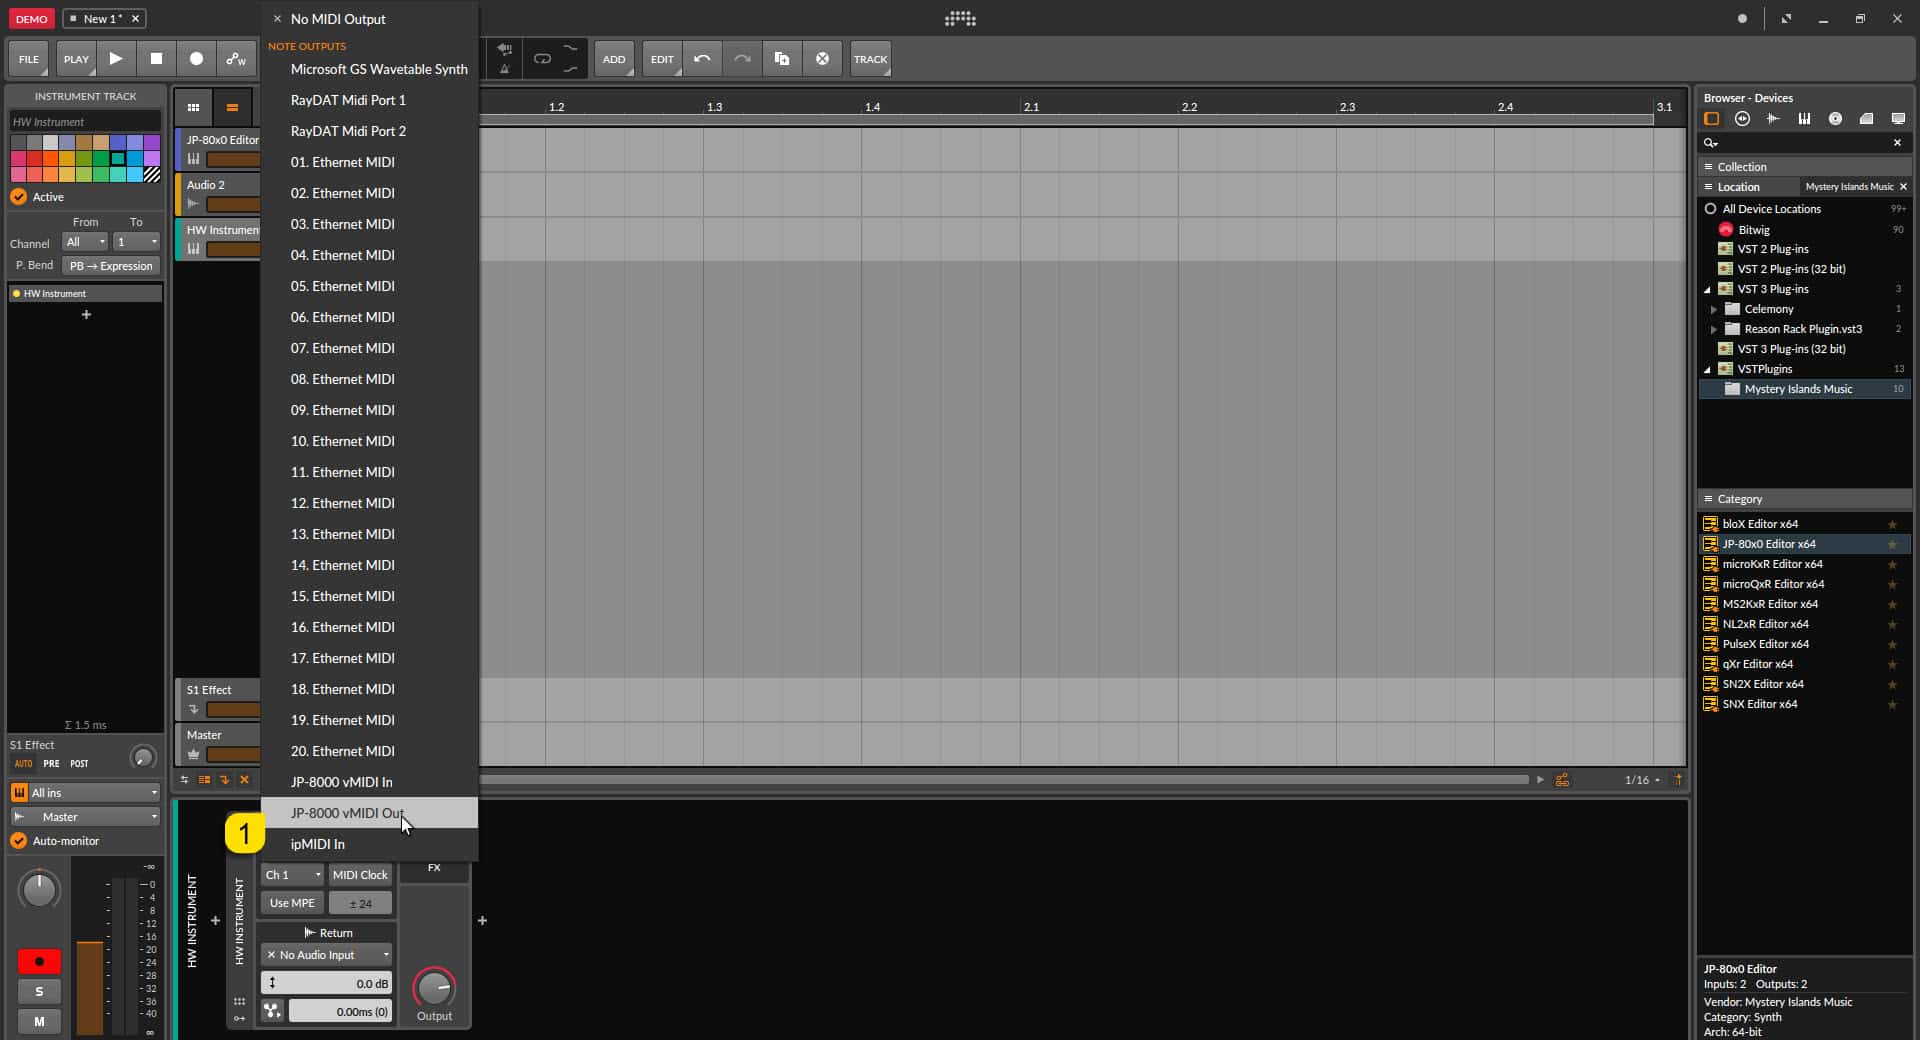
Bitwig Studio Config – Assign MIDI Ports
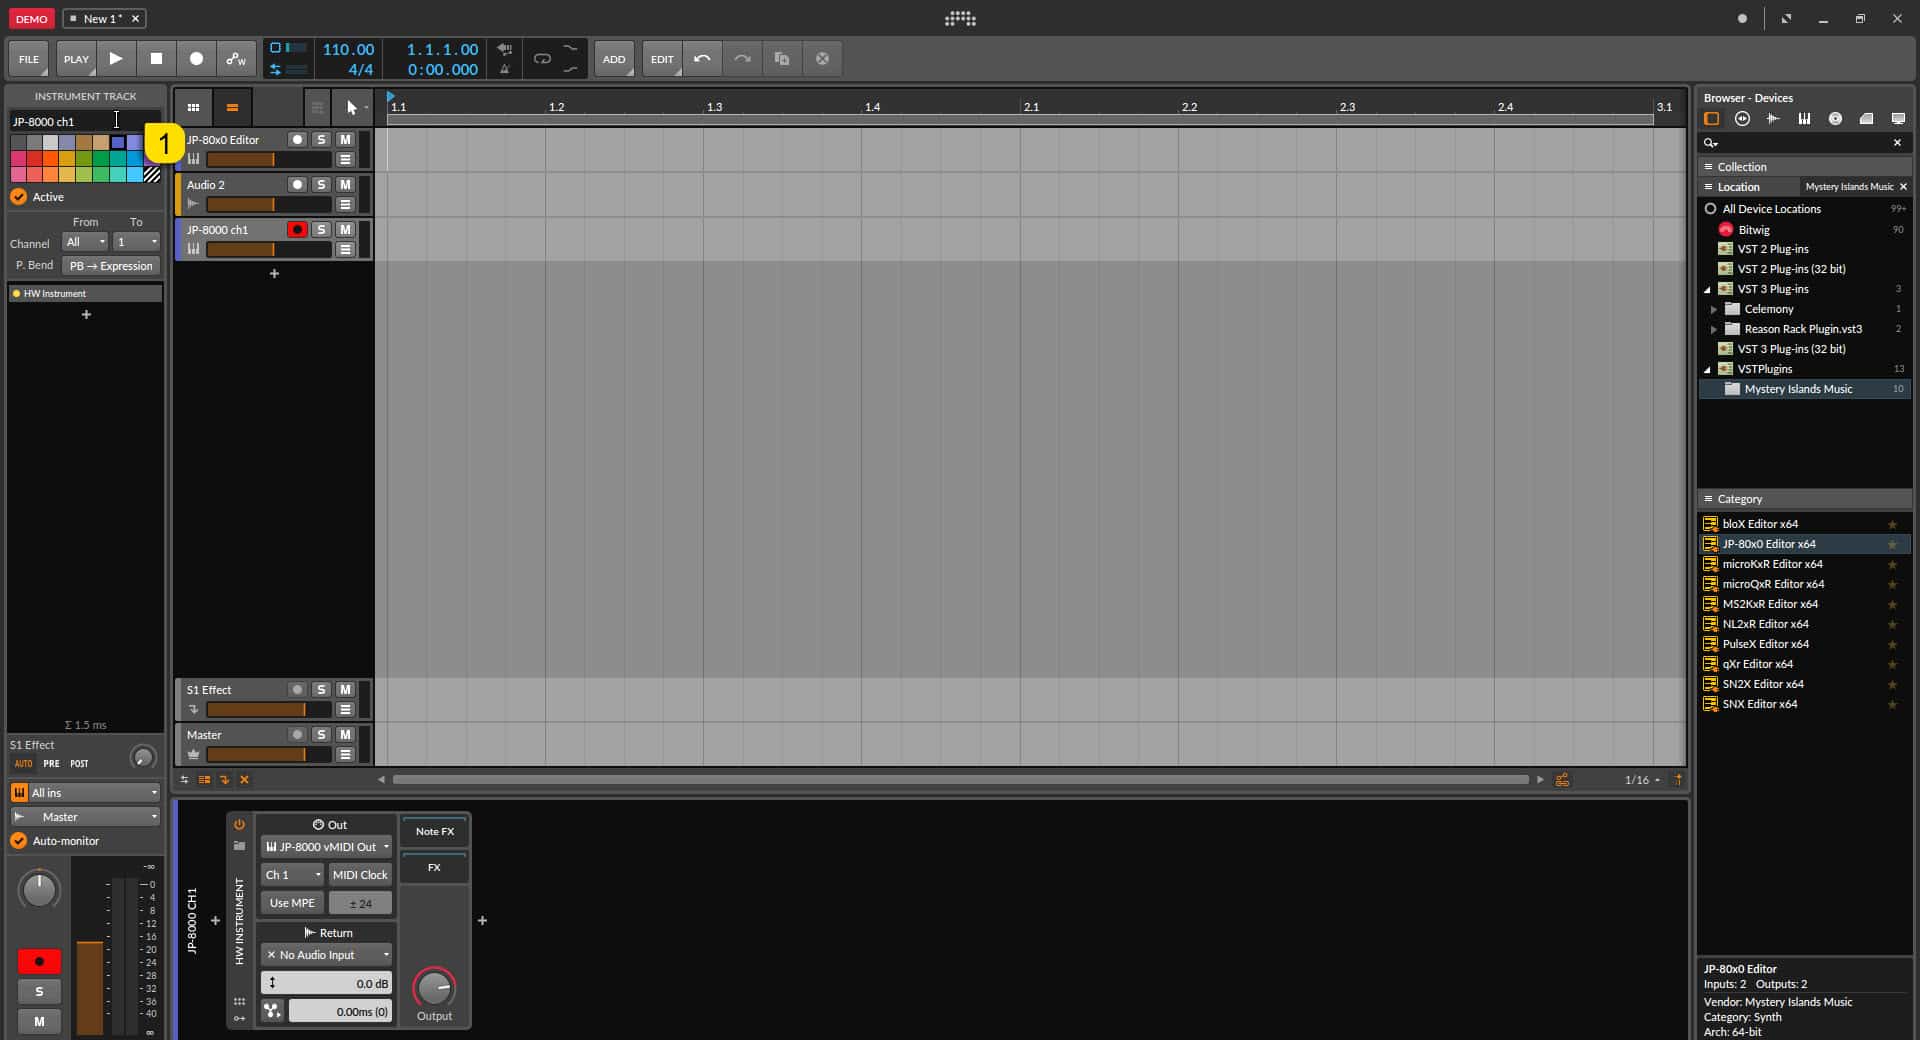
Rename the device to reflect your unit and add the channel id to it. Easier to spot it in the arrange later on. I’ve renamed my device to “JP-8000 ch1” which sends to my JP-8000 Lower layer.
Bitwig Studio Config – Rename and Add Color to your Tracks
Now I’m going to duplicate the track. Right click on the HW Instrument [1] and choose “Duplicate” [2].
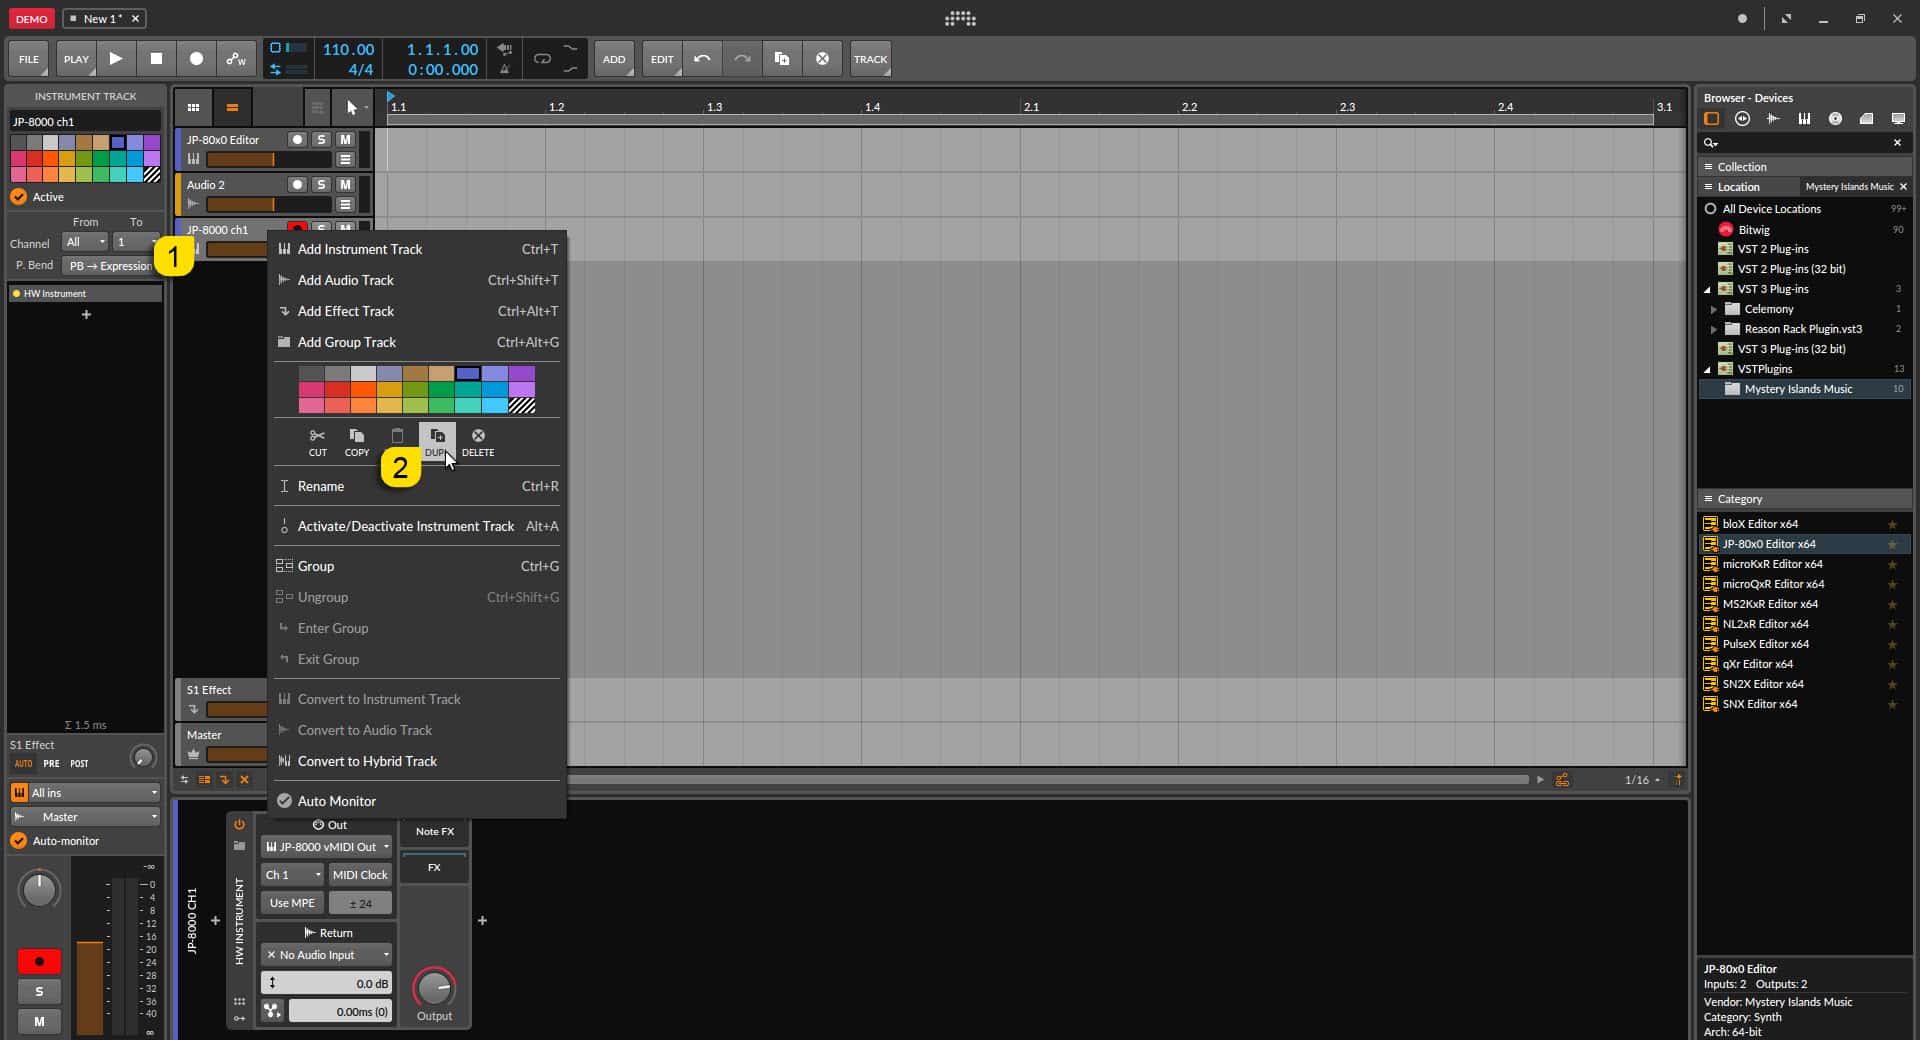
Bitwig Studio Config – Create Duplicate of the Track if Needed
Choose the MIDI out channel [1] to reflect the next part / layer in the hardware and rename [2] the devices to reflect the hardware setup. I will rename my device to “JP-8000 ch2”.
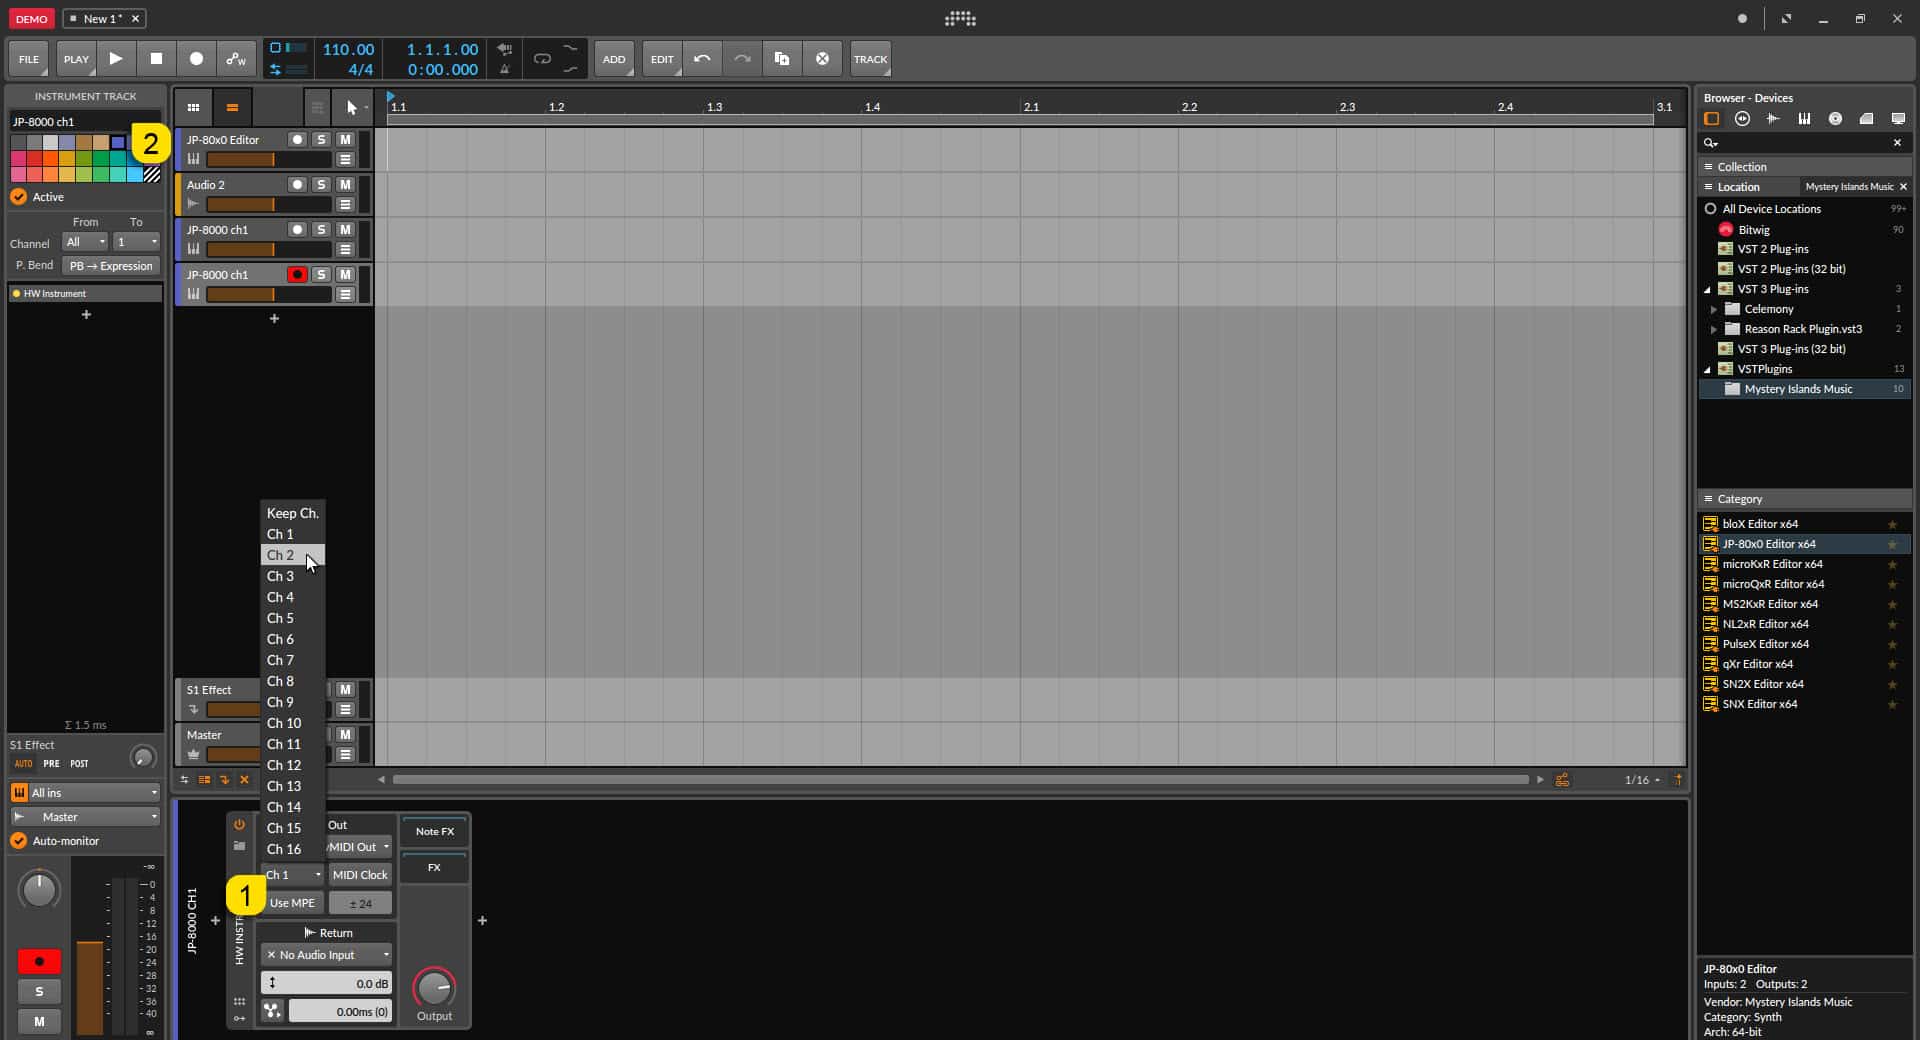
Bitwig Studio Config – Change the MIDI Channel to Reflect New Layer
Now MIDI setup is done, and we can move on!
Note #1: Assign MIDI Channels so that they match your synthesizer part / layer MIDI channels. I have set JP-8000 Lower to MIDI channel 1 and JP-8000 Upper to MIDI channel 2.
Note #2: MIDI out is pointing to JP-8000 vMIDI Out, which I’ve created in our Setting MIDI Devices guide. macOS users can point the MIDI out directly to physical MIDI port of synth.
Note #3: If you have multitimbral setup / use with your synthesizer, which most can do, then add more MIDI tracks and point them to respected MIDI channels.
Note #4: You should always put MIDI blocks in the MIDI tracks because our plug-in can not talk to DAW about delay compensation. This is because we do not generate any audio with our plug-in.
Automating Plug-in Parameters
Click the instrument channel and toggle on “Automation” [1]. See image below.
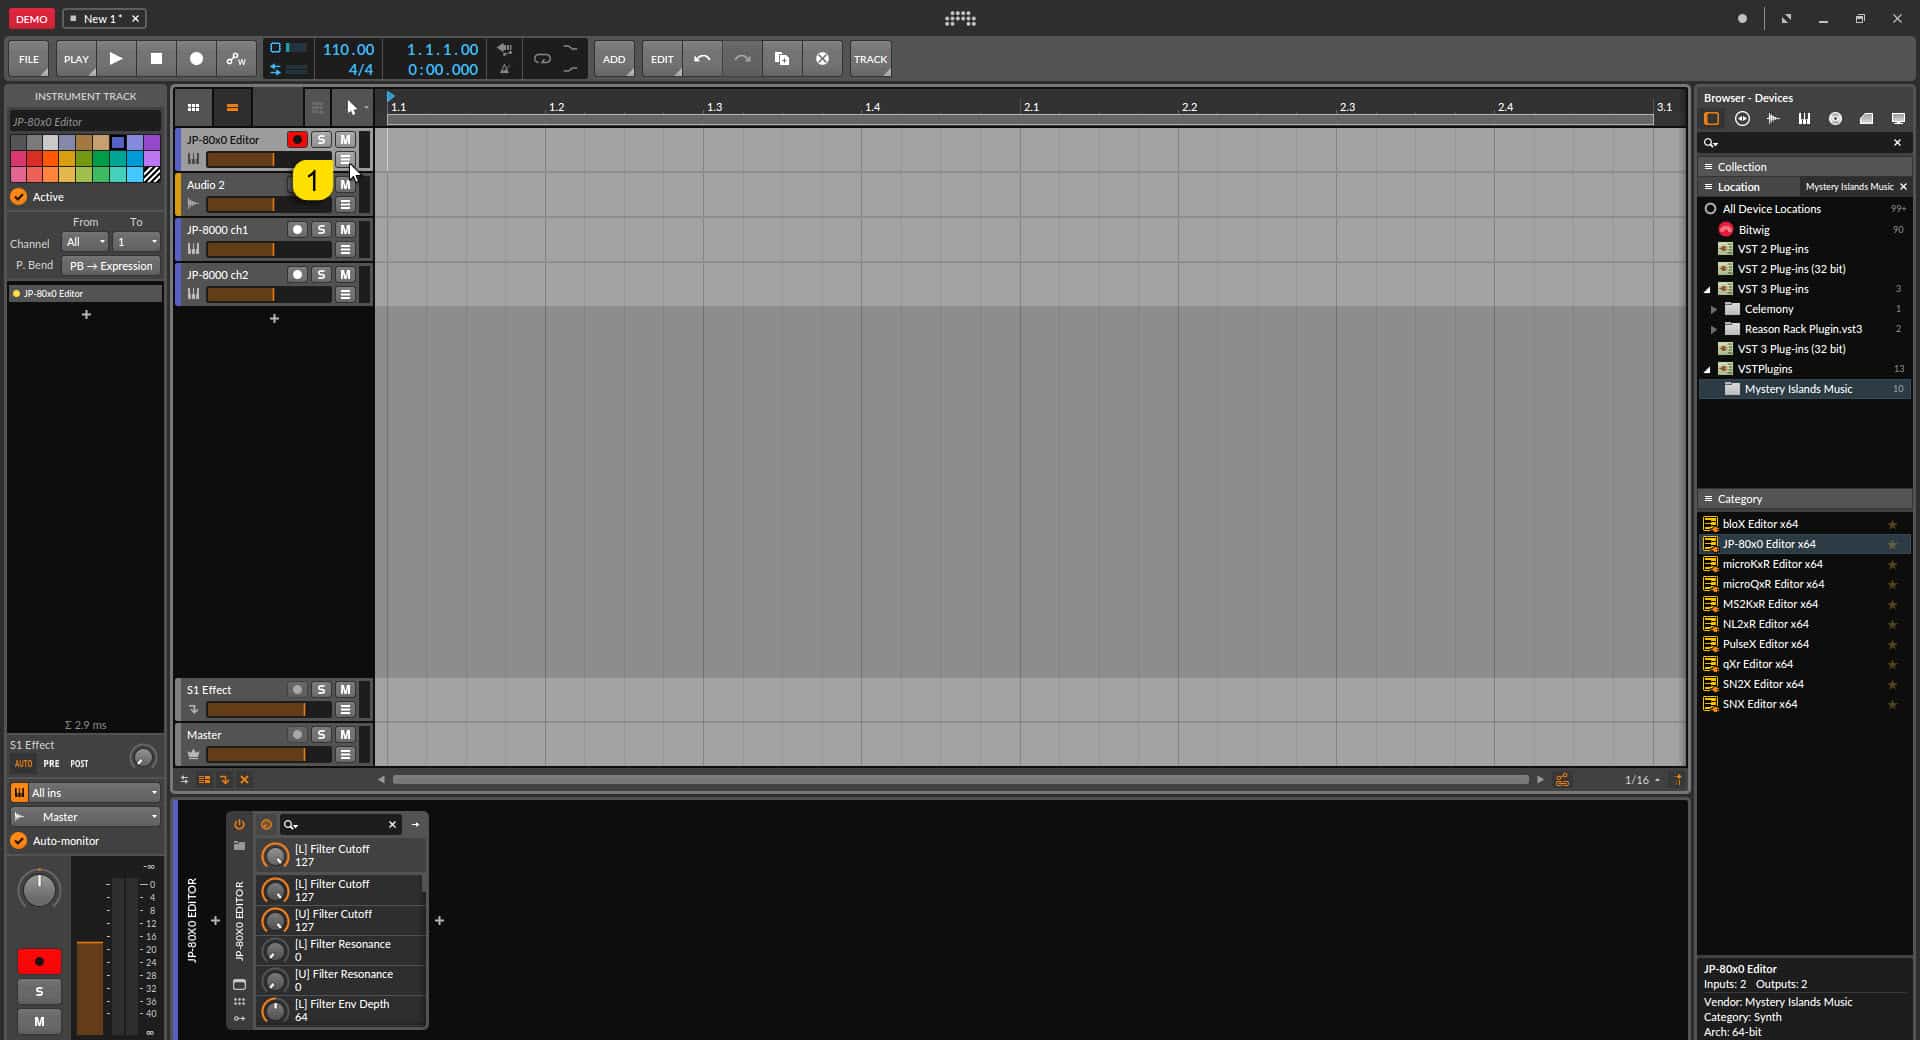
Bitwig Studio Config – Toggle On Track Automation
Now there is a new track below the instrument track indicating Filter Cutoff automation with lane on the arrangement I’ve drawn with the pencil tool.
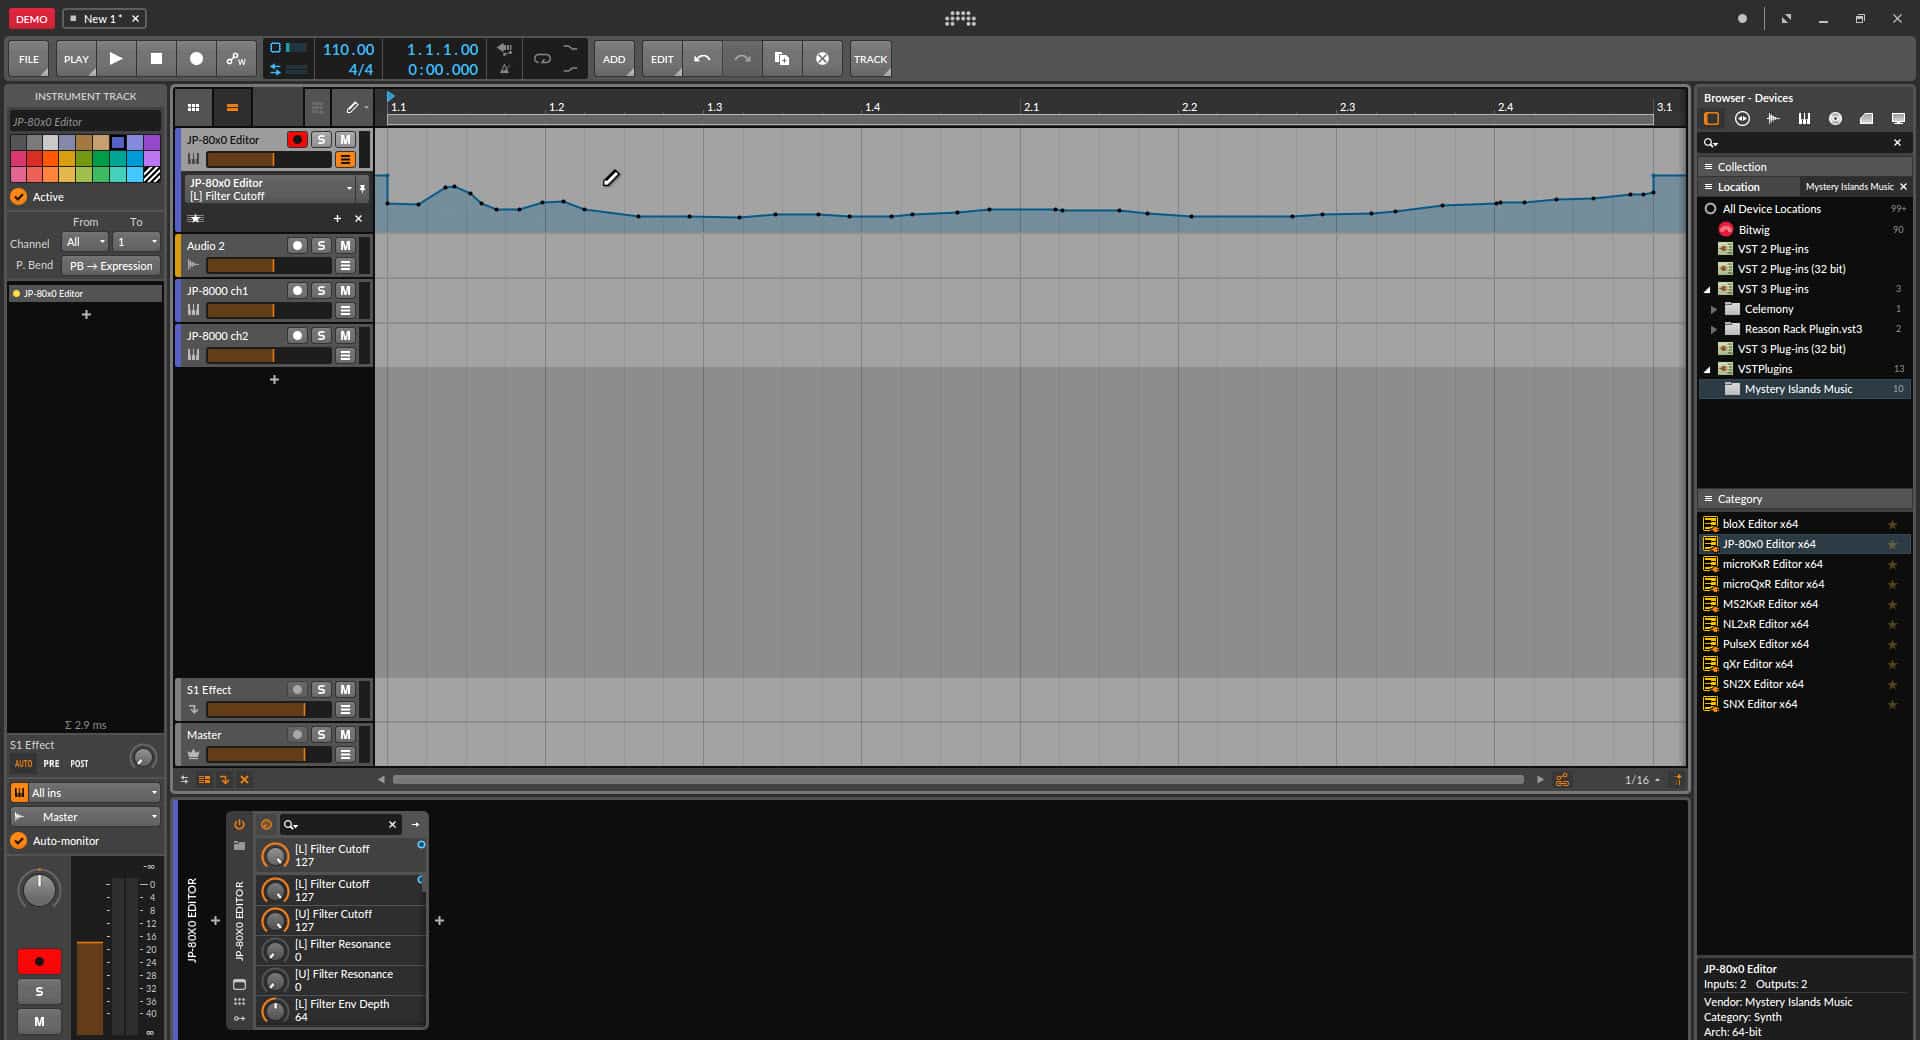
Bitwig Studio Config – Start Automating
Note #1: You can add as many parameters as you wish. System Exclusive (SysEx) parameters and system buttons can not be automated.
Note #2: With some Editors, it is not yet possible to draw automation in DAW when moving the knob from the hardware. Move knob from the Editor user interface instead.
Start drawing in OR move the knobs in the plug-in while recording to make automation! Before you start to pursue with MIDI blocks, read the next chapter!
Finishing it up!
Final step is to add Audio track, so we can hear the synthesizer in action. Click the Audio track in the arrangement window [1], rename to represent your hardware input [2].
Select appropriate Audio Inputs and turn on the track monitoring [3]. Remember to select the inputs where your synth Audio Output is connected!
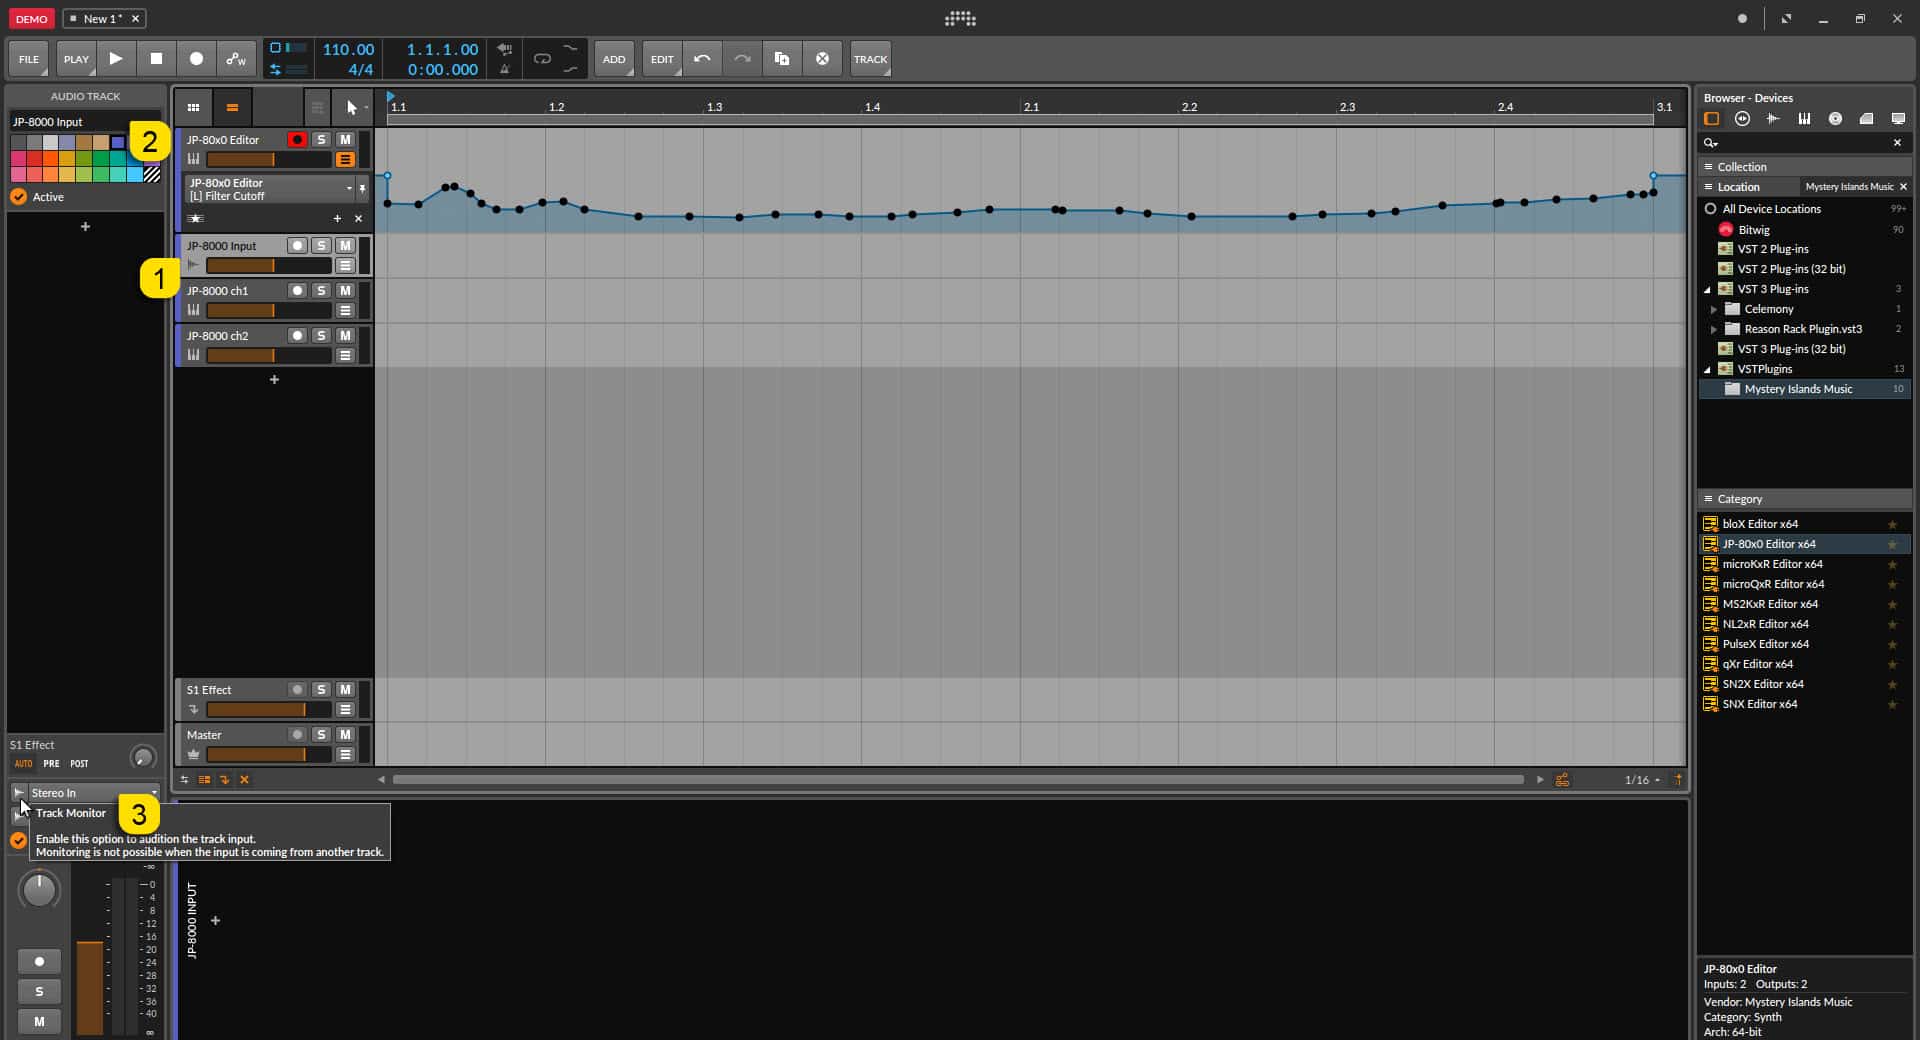
Bitwig Studio Config – Setting Up for Input Monitoring
Now you should hear the Audio from your synth while making some MIDI blocks and you have some sort of automation (if needed).
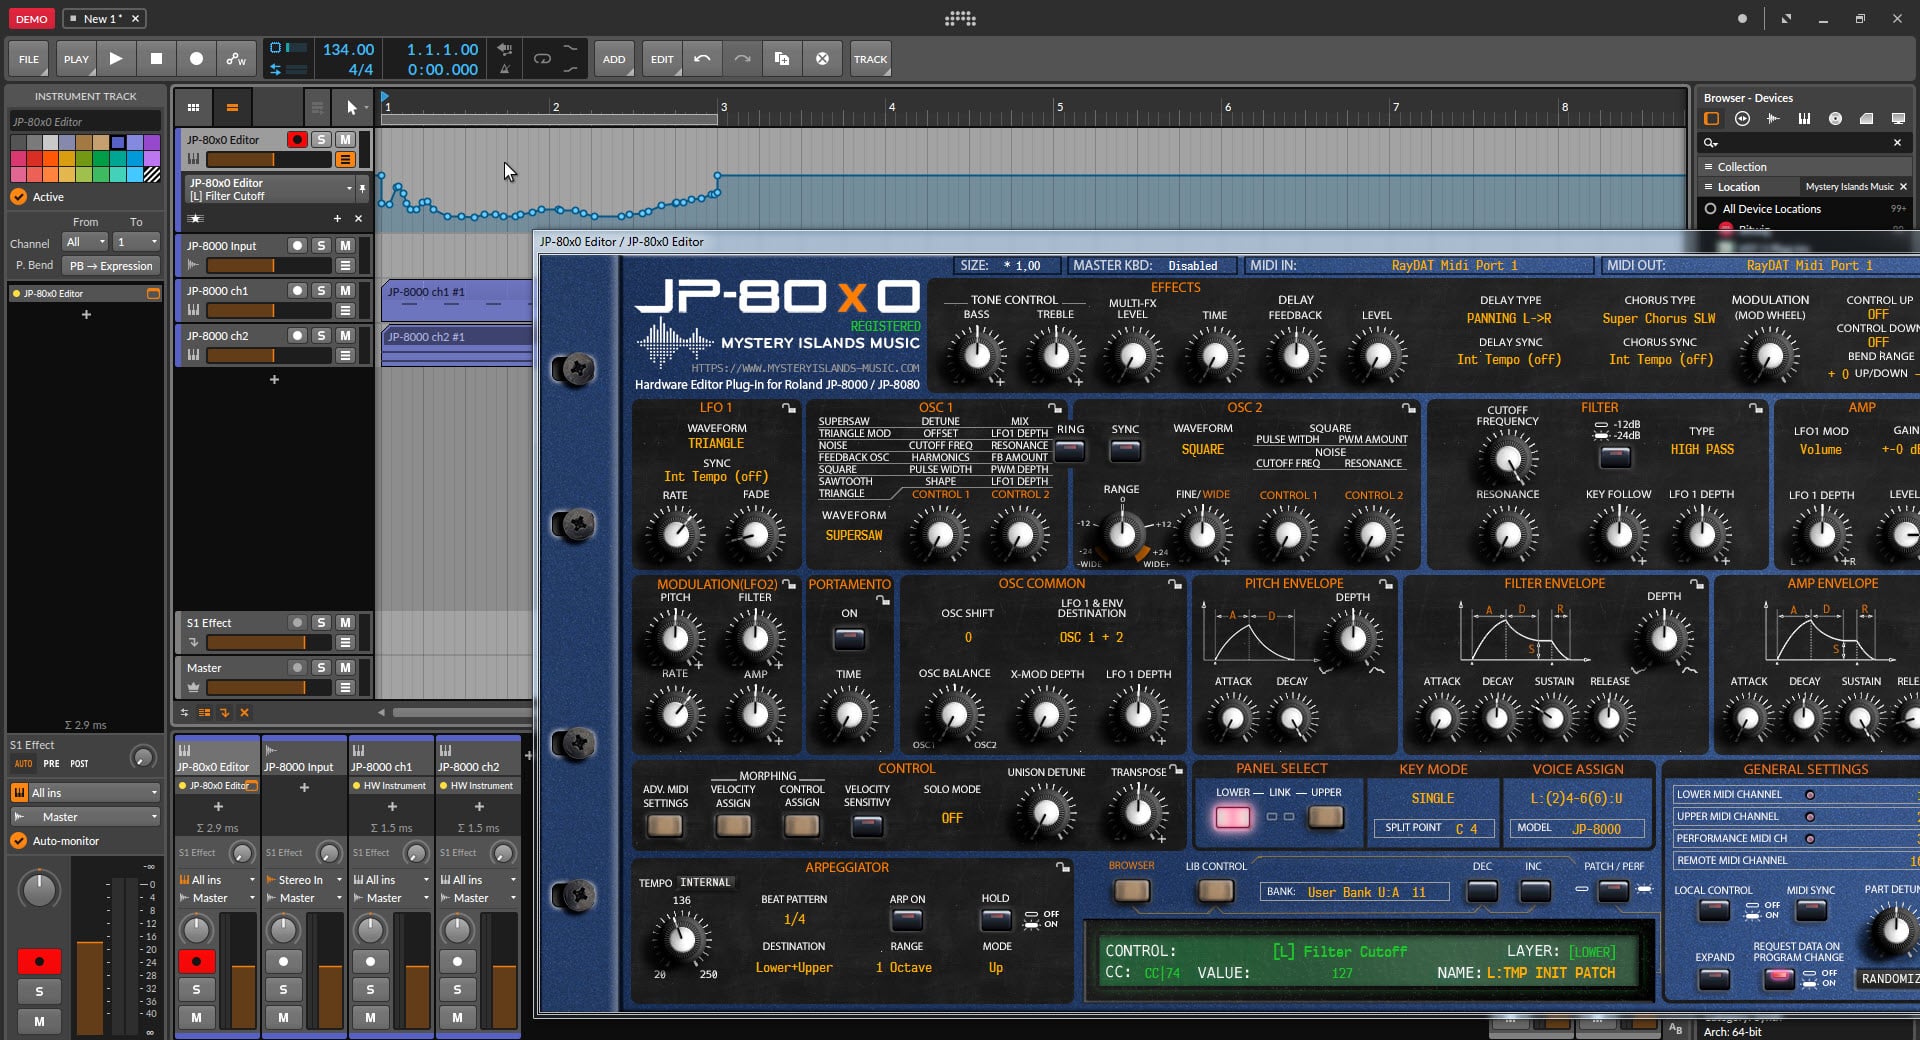
Bitwig Studio Config – Everything Runs like well Oiled Machine
Note #1: You might have routed your Audio Output from the synth itself to external mixing desk or speakers, so make sure you power those units on. Otherwise there won’t be any sound because our plug- in does not transmit any audio data to the DAW.
Thats it for the Bitwig Studio user guide. We hope you find this useful.
Troubleshooting
loopMIDI and MIDI-OX are both shipping their own user manuals, so please refer to their documentary to learn more about how they work.
Editor User Manuals: https://docs.auraplugins.com/
Editor Updates: https://auraplugins.com/downloads/
Check our Knowledge Base for documentation regarding to the Editor and Hardware configurations.
Use the website search to find answers / solutions to possible issues.
You have some suggestions? Yes please!
We are always open for new suggestions and ideas regarding to our products. Send your suggestions to us because it will make our products better.
Head down to our main site and drop your idea in, we will have a look at it and let you know if it can be done.
If you have found an error in this document, open a support ticket or join our Discord server so we can have it fixed.